How to combine and blend photos in Photoshop

How to combine and blend photos in Photoshop

Creating captivating photo composites involves seamlessly bringing different elements together. Mastering the art of combining and blending images allows you to expand your creative possibilities, whether you are crafting surreal landscapes or integrating subjects into new environments.

This guide provides a foundational understanding of how to merge multiple photos into a single canvas and then blend them naturally within Photoshop. You will explore various techniques for combining images and practical methods for achieving smooth transitions between layers.

Watch the Video

Video by photoshopCAFE. Any links or downloads mentioned by the creator are available only on YouTube

The Art and Science of Photo Compositing

The concept of photo compositing has evolved significantly since the early days of photography. Initially, combining elements from different negatives or prints was a painstaking physical process, often involving darkroom trickery and meticulous cutting. Digital tools, particularly Photoshop, revolutionized this practice, offering unprecedented control and precision for artists and photographers.

Modern compositing goes beyond mere technical assembly; it delves into storytelling and visual impact. By strategically layering and blending images, creators can:

  • Construct entirely new realities.
  • Enhance existing scenes with dramatic flair.
  • Communicate complex narratives visually.

This capability empowers photographers to transcend the limitations of a single shot, creating images that are both technically proficient and creatively compelling. The techniques for merging and blending are fundamental skills, laying the groundwork for more advanced digital art.

Practical Tips for Combining and Blending

  • Combine images into layers: Use File > Scripts > Load Files into Stack to automatically place multiple selected images onto separate layers within a new document, or manually drag images between document tabs while holding Shift to center them.
  • Arrange multiple open documents: Utilize Window > Arrange options like Four Up to display several images side-by-side, facilitating easy dragging and dropping between canvases.
  • Blend with quick selections: For subjects against a contrasting background, use the Quick Selection Tool to isolate the subject, then Alt/Option-click the layer mask icon to hide the background, followed by applying a Gaussian Blur to the background layer for depth.
  • Create soft edges with a brush: For a more organic blend, create a layer mask on the top image, then paint with a large, soft black brush to gently reveal the layer below, flipping to white to restore areas as needed.
  • Refine layer mask edges: After creating a selection-based mask, open Levels (Ctrl/Cmd+L) for the layer mask and drag the black slider to sharpen the edges, eliminating unwanted halos.

Explore more resources and deepen your understanding of combining and blending images in Photoshop.
How to combine and blend photos in Photoshop
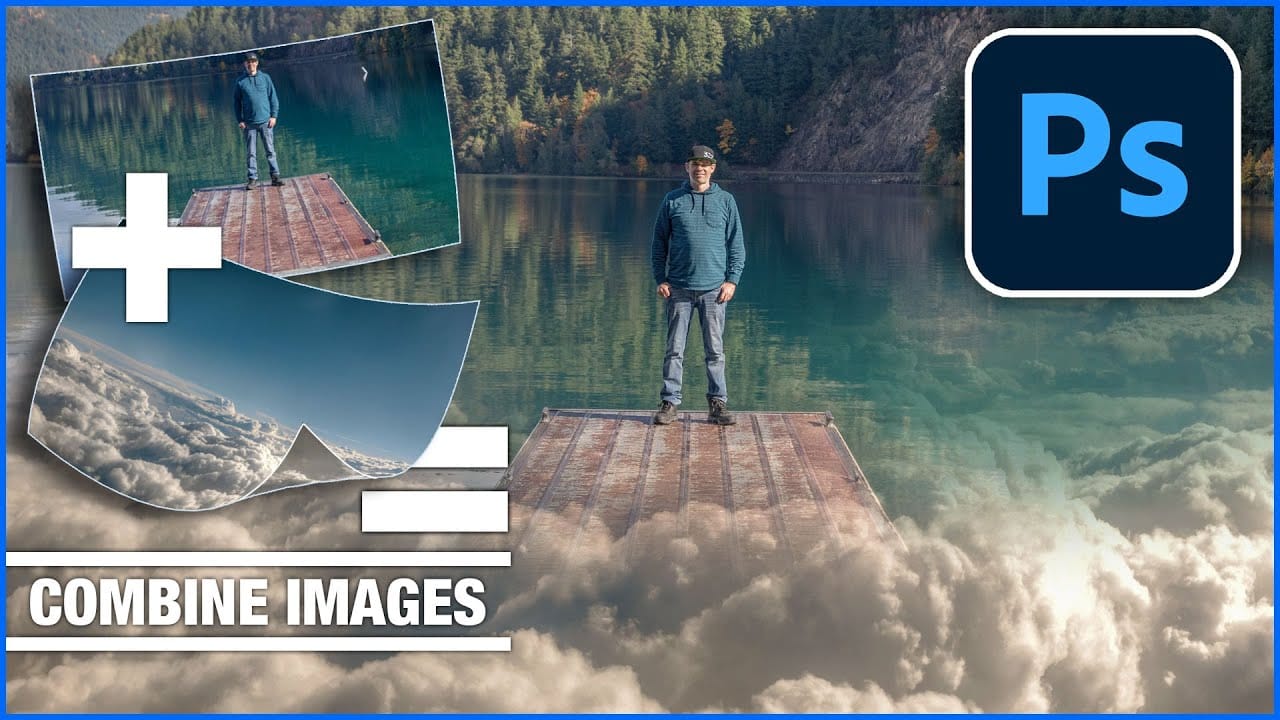
In this tutorial, Colin Smith from Photoshop Cafe demonstrates effective techniques for combining and blending multiple photos in Photoshop. You'll learn two distinct methods for merging images, allowing you to seamlessly integrate different elements into a cohesive composition. Colin also covers four advanced techniques for blending layers together, helping you achieve smooth transitions and harmonious effects. These techniques are essential for creating compelling visuals where multiple image
How to Blend Two Photos in Photoshop
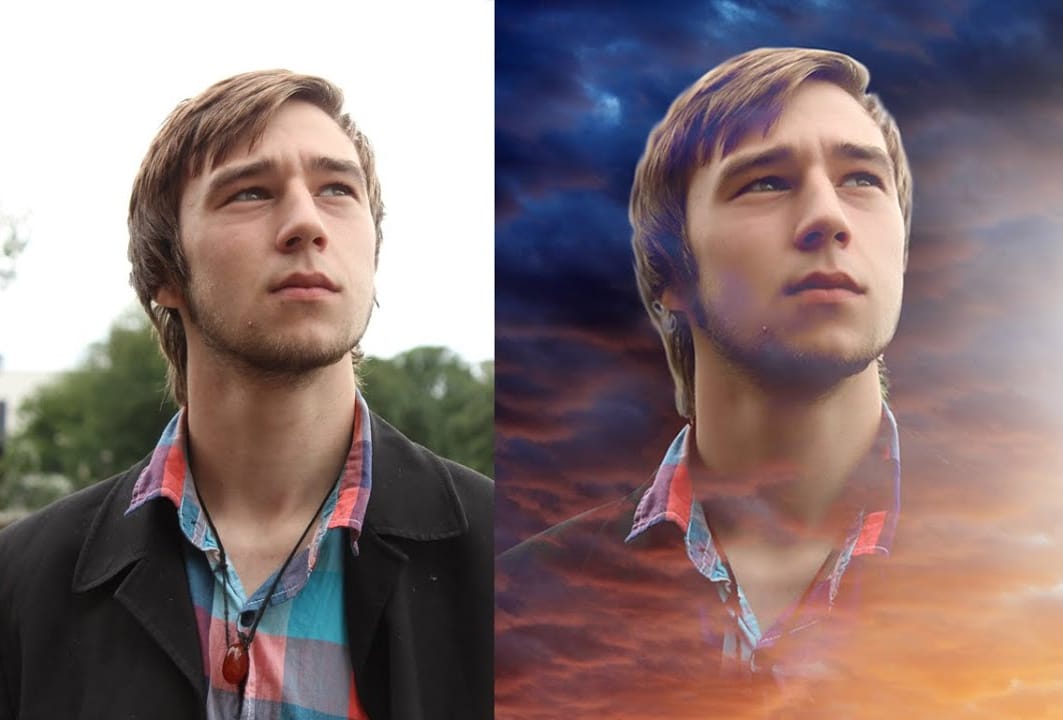
In this Photoshop tutorial, the author Arunz Creations shows how to blend two photos together. The process involves merging a photo of clouds with a portrait using blending modes. The instructions are straightforward and easy to follow. First, the user opens both photos in Photoshop. Then, they select the cloud photo and copy it to the same layer as the portrait. Next, they adjust the blending mode to achieve the desired effect, experimenting with different options until they find the perfect b
3 Creative ways to combine photos in Photoshop
In this tutorial, Colin Smith explores three innovative methods to combine photos in Photoshop. Whether you are creating composites or collages, these techniques will help you blend images together seamlessly. Colin demonstrates how to merge photos using layer masks, blending modes, and adjustment layers. These foundational skills are essential for creating striking and cohesive composites. By mastering these techniques, you can enhance your creativity and produce stunning visual effects. You'
How to combine multiple images in Photoshop instantly
In this detailed tutorial, Colin Smith reveals an efficient method for combining multiple images into a single layered document in Photoshop. This technique is designed to save time and reduce manual effort by allowing you to merge all open tabs into one cohesive file quickly. Colin explains how to leverage this powerful feature to streamline the process of creating complex composites or layered designs. Whether you're working on intricate photo edits or assembling detailed visual projects, this

Get tutorials & freebies delivered to you.

Subscribe to the Photoshop Roadmap newsletter, a weekly roundup of new tutorials, insights and quality downloads, trusted by 6500+ readers.

You might also like

How to Use the Vectorscope in Camera Raw to Correct Skin Tones

Monitors vary, room lighting shifts, and your eyes adapt — none of which makes for reliable skin tone judgments. Camera Raw's vectorscope gives you a measurement-based alternative, displaying hue and saturation data visually so you can align skin tones to a scientifically accurate target line, regardless of your...

How to Fix the Photoshop Scratch Disk Full Error

The scratch disk full error stops Photoshop mid-edit and can even prevent it from opening at all. Understanding what a scratch disk actually is — and knowing where to look — makes the difference between a quick fix and repeated frustration. Watch the Video Practical Tips These steps address the most...

Using Photoshop's Light Adjustment Layer for Non-Destructive Tonal Control

Photoshop's Light adjustment layer brings Camera Raw's core tonal controls — exposure, contrast, highlights, shadows, whites, and blacks — directly into the layers panel as a fully non-destructive, maskable layer. This makes it possible to apply precise tonal corrections to specific areas of an image without ever...

How to Turn a Photo Into a Fine Art Painting in Photoshop

A photograph carries detail that a painting would simplify, and that gap is exactly where this technique operates. By working through a structured layer-based workflow in Photoshop, you can reduce photographic sharpness, introduce painterly texture, and guide the eye the way a traditional artist would — all without picking up...

You’ve successfully subscribed to Photoshop Roadmap
Welcome back! You’ve successfully signed in.
Great! You’ve successfully signed up.
Success! Your email is updated.
Your link has expired
Success! Check your email for magic link to sign-in.