5 easy ways to clean blemishes and heal skin in Photoshop

5 easy ways to clean blemishes and heal skin in Photoshop

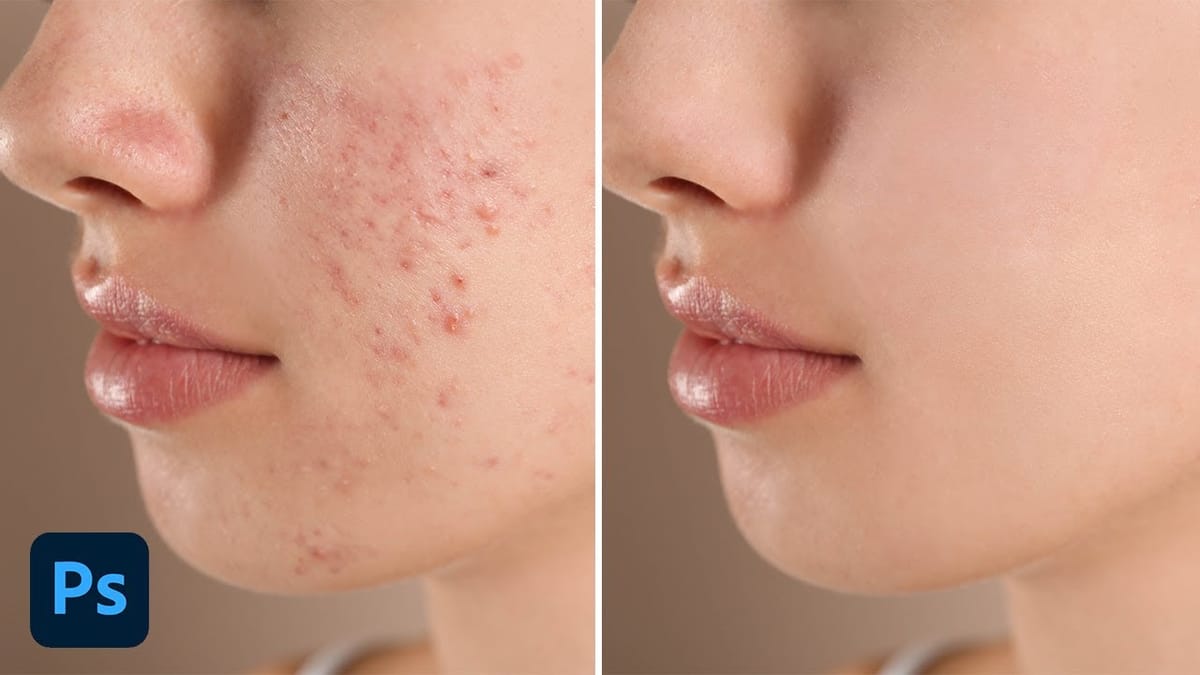
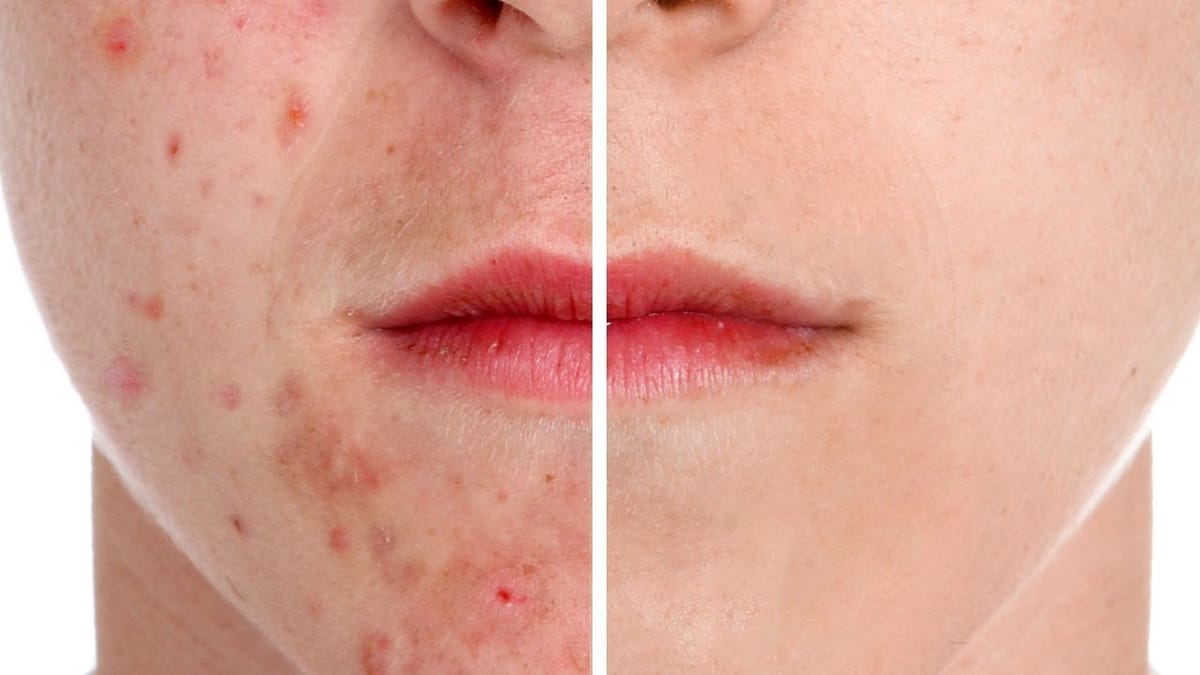
Skin imperfections such as blemishes, acne, or scars can significantly impact the visual appeal of an otherwise excellent photograph. Achieving a polished, natural finish often becomes a challenging and frustrating task, as manual removal methods can easily lead to unnatural-looking results if not executed with precision and care.

This comprehensive tutorial delves into multiple Photoshop techniques specifically designed for effectively healing and removing skin blemishes. Viewers will learn various tools and sophisticated workflows, empowering them to achieve professional, natural-looking skin retouching and significantly enhance their image editing efficiency.

Watch the Tutorial: Blemish Removal in Photoshop

Any links or downloads mentioned by the creator are available only on YouTube

Understanding Non-Destructive Skin Retouching

Effective skin retouching in Photoshop goes beyond simply removing imperfections; it emphasizes preserving the original image data through non-destructive workflows. This approach allows for greater flexibility, enabling adjustments, refinements, or even complete reversals without permanently altering the base photograph.

Techniques like working on separate layers for healing, utilizing Smart Objects, or leveraging advanced methods such as frequency separation ensure that every edit can be revisited. This is particularly vital when dealing with client feedback or when seeking to fine-tune the intensity of blemish removal, leading to more professional and adaptable results in any photography niche.

Key Strategies for Blemish Removal

  • Utilize Camera Raw's Healing Brush for initial passes, especially for straight lines by Shift-clicking between two points. Remember to keep Feathering low for seamless skin blending.
  • For most quick removals, employ the Spot Healing Brush on a new layer set to Sample All Layers and Content Aware for efficient, non-destructive blemish removal without manual sampling.
  • Gain precise control with the traditional Healing Brush by manually sampling (Alt/Option + click) and setting the layer to Current and Below. Adjust Diffusion to '1' when working near sharp edges to prevent unwanted halos.
  • For advanced, realistic retouching, employ Frequency Separation to isolate texture (High layer) and color (Low layer). This allows for independent healing of details and tones, providing unparalleled control over the final look.
  • For subtle age reduction, heal wrinkles on a separate layer using either the Healing Brush or Spot Healing Brush, then reduce the layer's Opacity to achieve a natural, less harsh blend.

Explore further resources to enhance your Photoshop skills and master advanced retouching techniques.

Smooth Skin and Remove Blemishes and Scars in Photoshop
In this Photoshop tutorial by Marty Geller from Blue Lightning TV, you’ll learn how to retouch a face to achieve beautifully smooth and flawless skin. The tutorial provides step-by-step instructions on removing blemishes, scars, acne, and wrinkles, ensuring a polished and professional finish. Perfect for photographers and retouchers aiming to
How to easily remove acne and blemishes in Photoshop
In this Photoshop tutorial, I share my easy three-step process for retouching skin and removing acne and blemishes in Photoshop with the help of the healing brush tools, a sneaky brush tool technique, and a skin-smoothing technique that retains texture. Without getting too deep in the weeds with complex methods that aren’t beginner-friendly, these techniques […] More
How to Remove Acne in Photoshop
In this tutorial by Aaron Nace from Phlearn, learn how to effectively remove acne in Photoshop. The process is divided into two steps: first, removing redness using Hue/Saturation to target specific red areas and make them look like normal skin tone. Second, removing blemishes with the Spot Healing Brush

Get tutorials & freebies delivered to you.

Subscribe to the Photoshop Roadmap newsletter, a weekly roundup of new tutorials, insights and quality downloads, trusted by 6500+ readers.

You might also like

How to Remove Glasses Reflections with Firefly Image Model 5 in Photoshop

Glasses reflections can ruin otherwise perfect portraits, obscuring your subject's eyes and creating distracting bright spots. While traditional AI models can remove these reflections, they often alter facial features and frame details in the process. Photoshop's new Firefly Image Model 5 changes this by preserving facial...

How to Create Realistic Specular Highlights Using Basic Brush Techniques

Specular highlights bring objects to life by simulating how light reflects off surfaces. These bright spots of reflected light add dimension and realism to your digital artwork, making flat surfaces appear three-dimensional and convincing. This technique uses simple brush strokes combined with strategic blending modes to create professional-looking highlights that...

How to Create a Wood Engraving Effect from Photos in Photoshop

Wood engravings capture the timeless aesthetic of traditional printmaking, transforming ordinary photographs into artwork that resembles hand-carved illustrations. This technique combines the rustic charm of wood textures with the precise detail of engraved lines, creating images that feel both historical and artistic. The process uses non-destructive editing methods and smart...

When to Skip Layer Duplication in Modern Photoshop Workflows

The old advice to always duplicate layers when editing in Photoshop stems from earlier versions that lacked today's powerful tools. Modern Photoshop workflows often make layer duplication unnecessary, especially for common tasks like object removal, sky replacement, and background changes. Understanding when to skip this step saves storage...

Why Testing Your Thumbnails Across Generations Improves Video Performance

The best thumbnail designs make sense to everyone, not just your target audience. When you create thumbnails that only speak to your specific niche or generation, you limit your video's potential reach and engagement. Testing your thumbnails with people from different age groups reveals clarity issues you might...

How to Use Photoshop 2026's New Dehaze Tool for Better Background Clarity

Hazy backgrounds can make even the most stunning landscapes look flat and lifeless. Photoshop 2026's new dehaze feature transforms these atmospheric challenges into clear, vibrant scenes with precise control. The key to getting professional results lies in making targeted selections before applying the dehaze effect. This approach ensures...

You’ve successfully subscribed to Photoshop Roadmap
Welcome back! You’ve successfully signed in.
Great! You’ve successfully signed up.
Success! Your email is updated.
Your link has expired
Success! Check your email for magic link to sign-in.