Create a 3D Pop-Out Photo Effect

Create a 3D Pop-Out Photo Effect

This tutorial explores a classic Photoshop technique that brings a dynamic, three-dimensional quality to ordinary photographs. It offers a creative approach to making images more engaging by introducing an illusion of depth.

Viewers will learn how to make any object or person appear to pop out of its background, giving images a unique visual depth and engaging appeal. The video guides you through the process, from initial image preparation and subject isolation to the final application of the pop-out effect.

Watch the Video Tutorial

Video by Blue Lightning. Any links or downloads mentioned by the creator are available only on YouTube

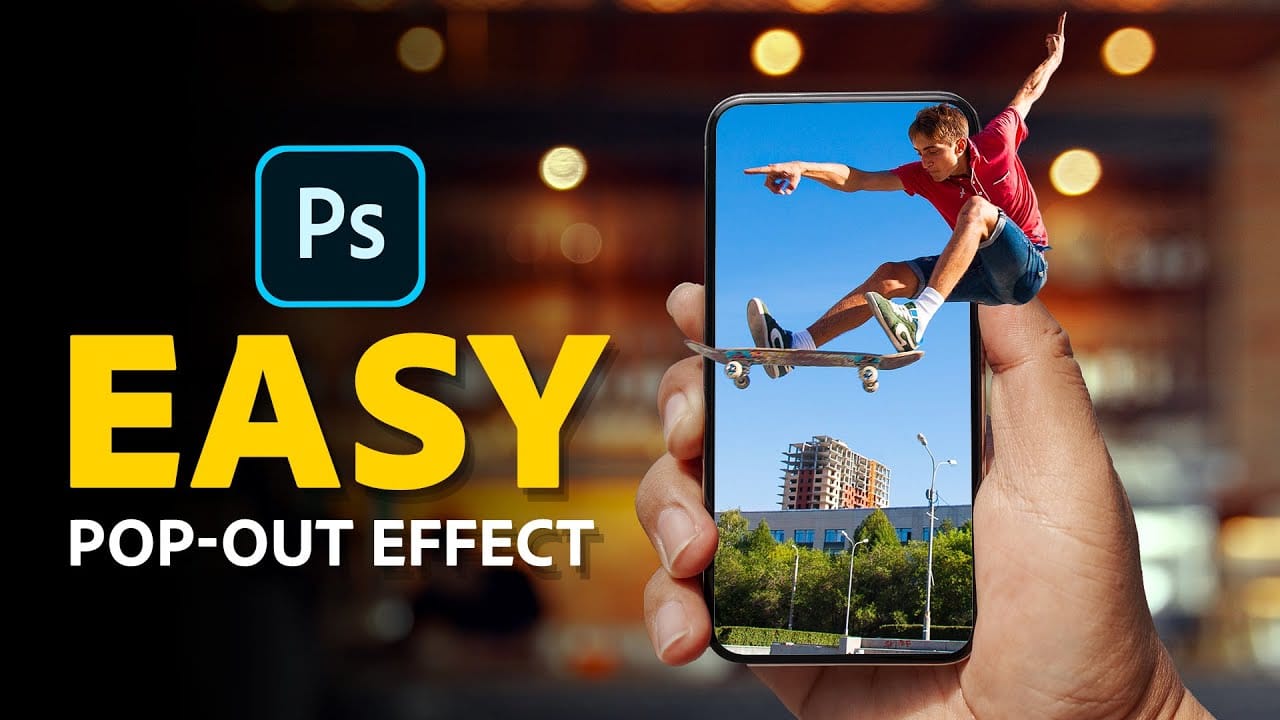
Crafting Visual Depth: The Pop-Out Effect

The pop-out effect in digital imaging manipulates visual perception to create an illusion of depth and dimension from a flat, two-dimensional image. It relies on the brain's interpretation of foreground and background elements, making a subject appear to break free from its frame. This technique is particularly effective because it introduces an unexpected element of reality into a static photograph, drawing the viewer's eye.

Achieving this involves careful separation of the main subject from its environment, followed by strategic layering and perspective adjustments. By making certain parts of the subject extend beyond a defined boundary, such as a photo frame, the mind perceives these elements as closer to the viewer, thus creating the "pop-out" sensation. It's a clever trick of visual hierarchy and spatial arrangement.

Practical Tips for the Pop-Out Effect

  • Convert your image to a Smart Object early to enable non-destructive modifications throughout the process.
  • Ensure adequate space below your subject when cropping, as this area will be used for the pop-out frame.
  • Use the Refine Edge tool to precisely select your subject, especially the top third that will pop out, ensuring clean edges.
  • When transforming the frame, use Ctrl/Cmd + Alt/Option + Shift to maintain perspective while adjusting corners.
  • Apply a subtle Drop Shadow to the "popped-out" subject to enhance the illusion of depth and separation from the background.

More Tutorials about 3D Photo Effects

Explore additional resources to deepen your understanding of creating dynamic visual effects in Photoshop.

How to Create a 3D Pop-Out Effect in Photoshop
In this tutorial by Jesus Ramirez from PTC Photoshop Training Channel, you'll learn to create an eye-catching 3D pop-out effect using just two simple Layer Masks. Ideal for Photoshop 2021 (22.5) and newer, this guide walks you through combining Layers and Layer Masks to give the illusion that an element, such as a skateboarder, is jumping out of a phone screen. The tutorial provides clear instructions on how to apply this technique to make your images stand out with a dynamic, three-dimensional
Create a fun pop out frame effect in Photoshop
This tutorial by Click3D explores the creative process of making a whimsical 3D pop-out photo effect in Photoshop. This effect brings images to life and introduces a surreal quality that transforms the viewing experience. Imagine a scene where a subject appears to leap out of a polaroid frame, adding an element of fun and surprise. The author takes the reader through the steps to create this delightful and impactful visual effect. By using simple techniques, the tutorial demonstrates how to ach
Create a pop-up illustration in Photoshop
In the world of visual communication, pop-up illustrations have long been a domain reserved for children's books. However, this tactile and physical approach to design has now found a place across the creative industry. Illustrators and designers alike are embracing pop-up and 3D techniques to add a touch of flair and excitement to their visual concepts. Pop-ups can infuse your work with a sense of playfulness, offering an element of surprise and interaction. Imagine the delight of opening a sp
Add a third dimension to your photos: 3D Plugins for Photoshop
Rumor has it that Photoshop CS3 will offer some 3D capabilities. There is no official list of features, but it seems that you will be able to open most popular 3D objects formats (objects, not scenes though…) and presumably, have access to thier color and texture properties. But as of this writing the only official word is that these 3D capabilities are not active in Photoshop CS3 beta preview. So, until Photoshop CS3 is released, you will have to use the available plugins to create 3D images i

Get tutorials & freebies delivered to you.

Subscribe to the Photoshop Roadmap newsletter, a weekly roundup of new tutorials, insights and quality downloads, trusted by 6500+ readers.

You might also like

Complete Photoshop Editing Workflow: 5 Steps from Raw to Polished

Photoshop offers endless possibilities for photo enhancement, but many photographers never move beyond basic adjustments because the software feels overwhelming. This comprehensive workflow breaks down photo editing into five manageable stages that work consistently across different photography styles. The systematic approach covers everything from initial raw processing to advanced lighting...

Photoshop Workspace Basics: Navigation, Zooming, and Essential Interface Elements

Photoshop's interface can feel overwhelming when you first open the program. Dozens of panels, tools, and menus compete for attention, making simple tasks feel complicated. This tutorial breaks down the essential workspace elements and teaches fundamental navigation skills that form the foundation of efficient Photoshop work. Watch the...

How to Restore Old Damaged Photos Using Nano Banana in Photoshop

Old family photos with scratches, tears, and missing sections can seem beyond repair. Google's Nano Banana AI model, now integrated into Photoshop, makes full restoration possible in minutes rather than hours. This powerful tool excels at maintaining facial characteristics while automatically filling in damaged areas and adding realistic...

How to Get Higher Quality Results from Photoshop's Generative Fill Tool

Photoshop's Generative Fill creates impressive AI extensions, but the results often look blurry and pixelated when viewed at full size. This quality limitation makes many AI-generated areas unusable for printing or large displays. This technique shows how to work around the 1024x1024 pixel quality limit to create much...

How to Use Photoshop's Liquify Tool for Non-Destructive Portrait Retouching

Clothing wrinkles, hair that lacks volume, and awkward fabric bunching can distract from an otherwise great portrait. Photoshop's Liquify tool offers a powerful solution for smoothing out these issues while preserving the natural look of your subject. This tutorial demonstrates how to use the Liquify tool non-destructively with...

You’ve successfully subscribed to Photoshop Roadmap
Welcome back! You’ve successfully signed in.
Great! You’ve successfully signed up.
Success! Your email is updated.
Your link has expired
Success! Check your email for magic link to sign-in.