Old family photographs often suffer from tears, scratches, discoloration, and missing pieces over time. These precious memories can seem beyond repair, but with the right approach, even severely damaged photos can be restored to their former glory.
This comprehensive restoration workflow covers everything from reassembling torn pieces to removing blemishes and correcting color casts that develop in aging photographs.
Watch the Video
Practical Tips
These essential techniques will help you tackle even the most challenging photo restoration projects effectively.
- Use the Magic Wand tool to select white backgrounds, then separate torn pieces onto individual layers for easier repositioning
- Enable "Show Overlay" in the Clone Source panel to preview exactly what you're painting before applying the clone stamp
- Start with the Spot Healing Brush for simple blemishes, move to Clone Stamp for detailed work, and use the regular brush tool only as a last resort
- Apply Selective Color adjustments to remove yellow and magenta color casts common in aged photographs
- Add subtle noise texture over painted areas to match the original photo's grain and maintain authenticity
Related Articles and Tutorials
Explore more techniques for photo restoration, vintage effects, and creative torn paper manipulations.
Create an Old Photo Effect in Photoshop
The author, Photoshop Pro Help, provides a tutorial on how to create an old photo effect in Photoshop. They explain that if you have ever admired the style of vintage photos and wanted to give your modern photos a similar look, this tutorial will show you how to apply an old photo style with a torn and damaged brown vintage effect. This can transform your photos to look as if they were taken straight from a history book.
The tutorial guides the user through the process of achieving this retro a
Create an impressive torn paper effect in Photoshop
In this photoshop photo effect tutorial from Tutorials Junction you will learn how to create this somewhat popular torn paper effect. The effect is actually very simple to create, compared to how good it looks. All you have to do is apply some layers masks and use good quality torn paper brushes.
You will need two portrait photos with slightly different poses to get the best effect. The author uses one black and white photo and another one in color to give more impact to the final image.
Watch
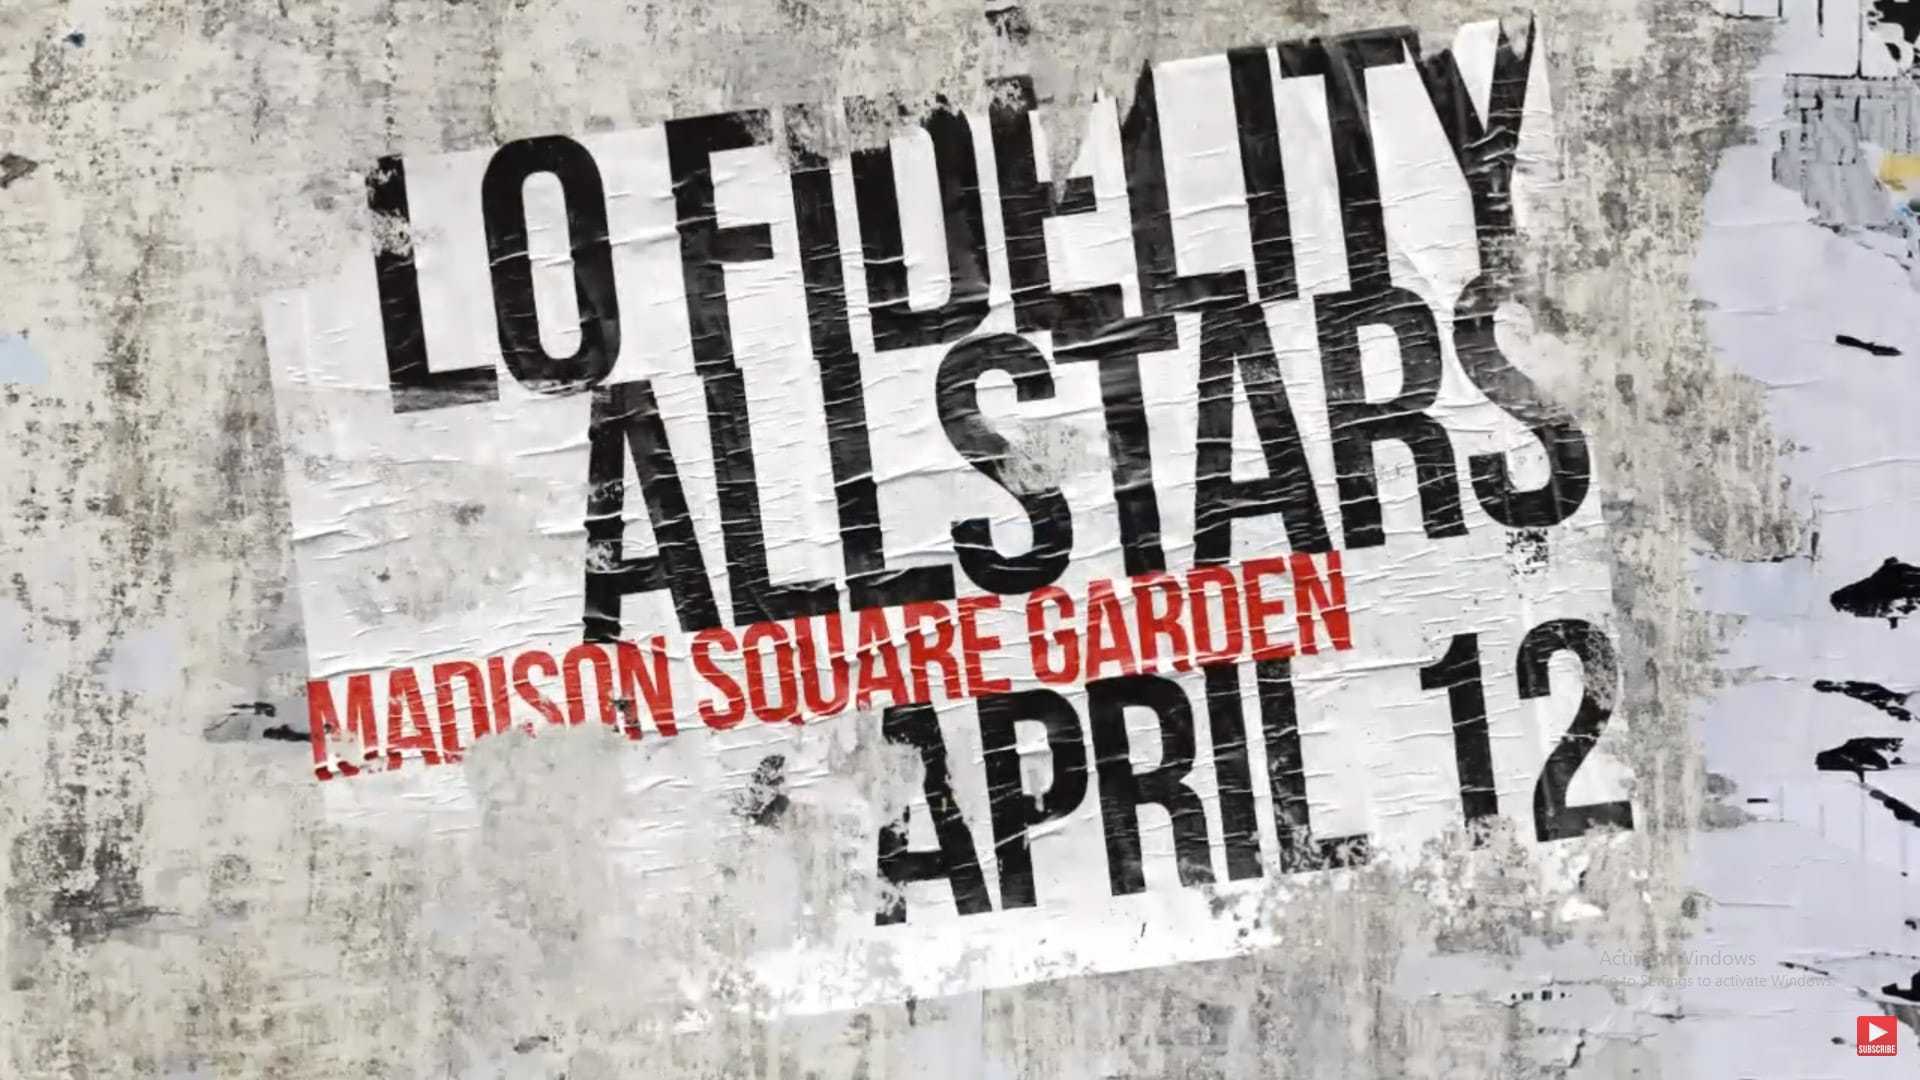
Create a Ripped and Worn Out Poster on a Wall in Photoshop
Vintage posters tell a story through their faded colors and torn edges. This weathered aesthetic adds a layer of history and authenticity to any design, transforming a clean graphic into something with tangible grit and character. Achieving this look digitally requires more than just adding a texture; it involves mimicking how paper and ink break down over time. This tutorial guides you through the essential Photoshop techniques, from creating realistic distortions to using grunge brushes, to cr
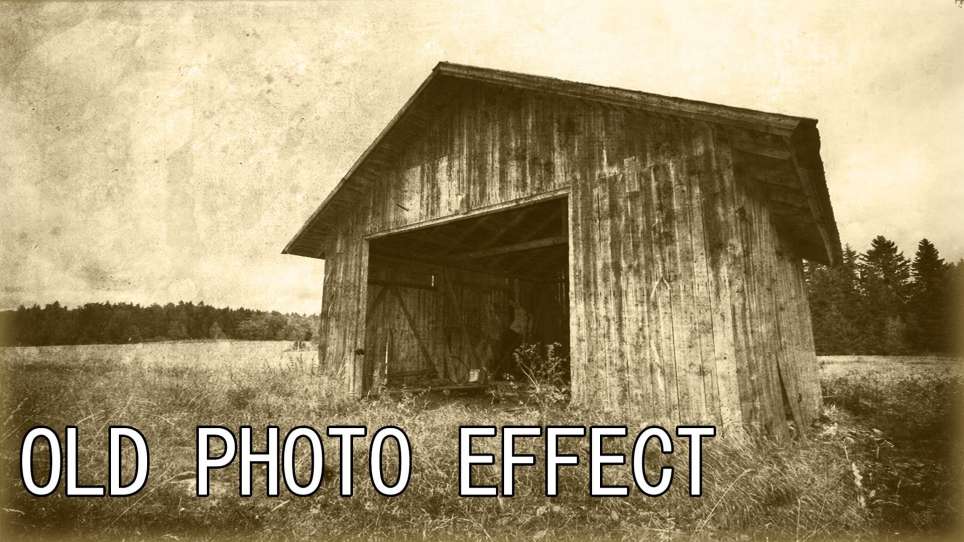
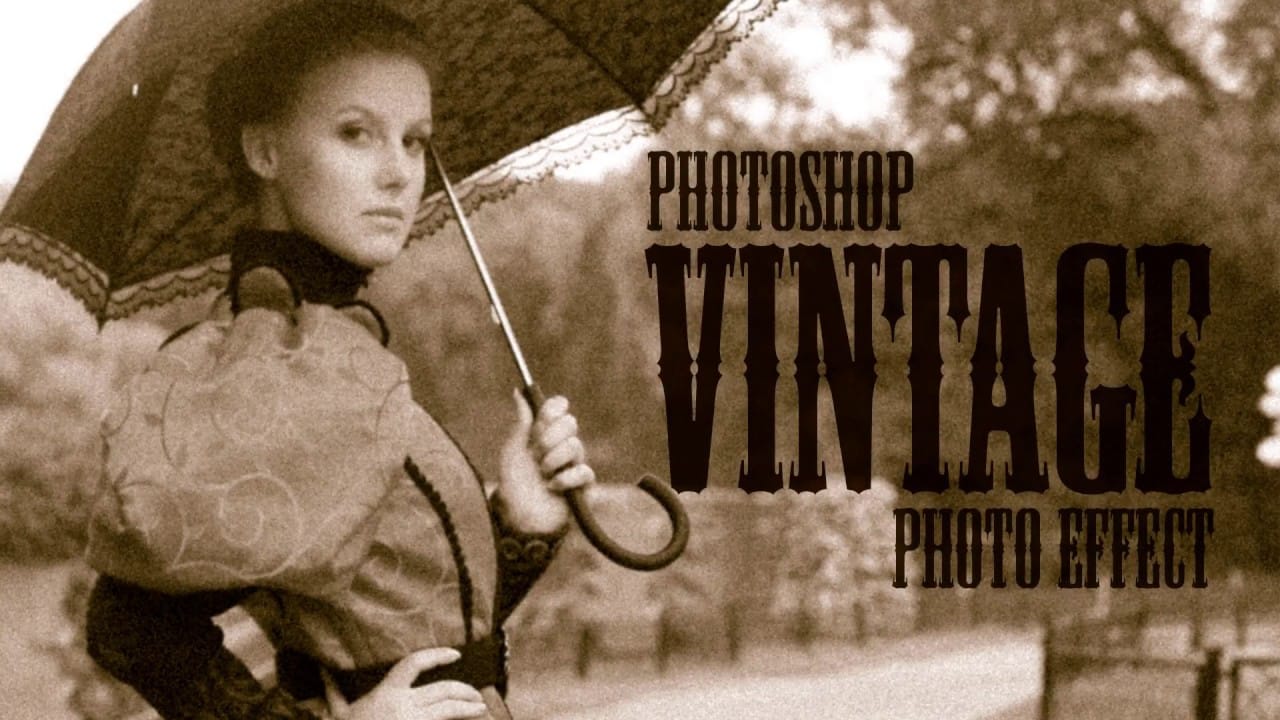
Create a realistic old vintage photo effect in Photoshop
Photographs are timeless. In fact, it's often our old, weathered and faded photographs that we treasure the most. Snapshots from a bygone era fill our hearts with nostalgia and romantic notions of how much simpler life must have been.
While today's digital cameras continue to amaze us with their technology, there's still something magical and irreplaceable about old, vintage photographs. And not only do we love to look at them, but we also love to recreate the look of them in programs like Phot
How Photoshop Photo Restoration Got Better Than Ever
This tutorial by Matt Kloskowski on Photoshop photo restoration reveals an impressive evolution in photo editing technology over the past few years. Many tasks that once required extensive time and complex processes can now be completed in just minutes. This is especially relevant after recent storms, which emphasized the need for restoring valuable family memories.
Photoshop's new tools and techniques make it easier than ever to tackle damaged images. Kloskowski emphasizes that achieving perfe

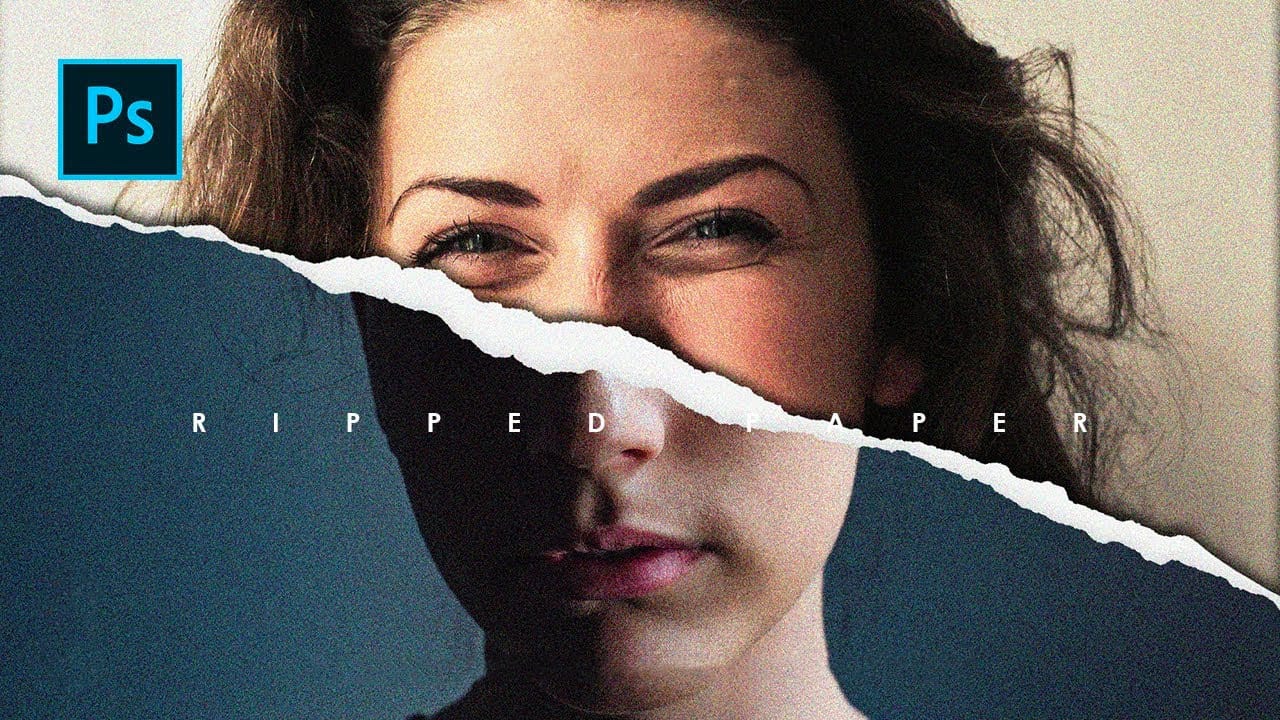
How to Create a Torn Paper Portrait Effect in Photoshop
Torn paper portraits create dramatic visual storytelling by revealing layers of meaning beneath the surface. This artistic technique transforms ordinary portraits into compelling compositions that suggest hidden depths, contrasts, or dual perspectives.
The effect works particularly well when combining different treatments of the same subject—such as color and black-and-white versions—or when creating symbolic narratives about identity, memory, or transformation.
Watch the Video
Understandin

Photo Restoration: Combining AI with Photoshop for Optimal Results
Restoring old, damaged photographs can be a challenging endeavor. While many AI-powered tools promise to breathe new life into vintage images, they often fall short, either over-sharpening details, neglecting certain areas, or, most critically, altering the original likeness of individuals. This often leads to frustrating and uncanny results that strip the photos of their authentic charm.
This tutorial unveils a comprehensive workflow that marries the efficiency of AI-driven enhancement with th

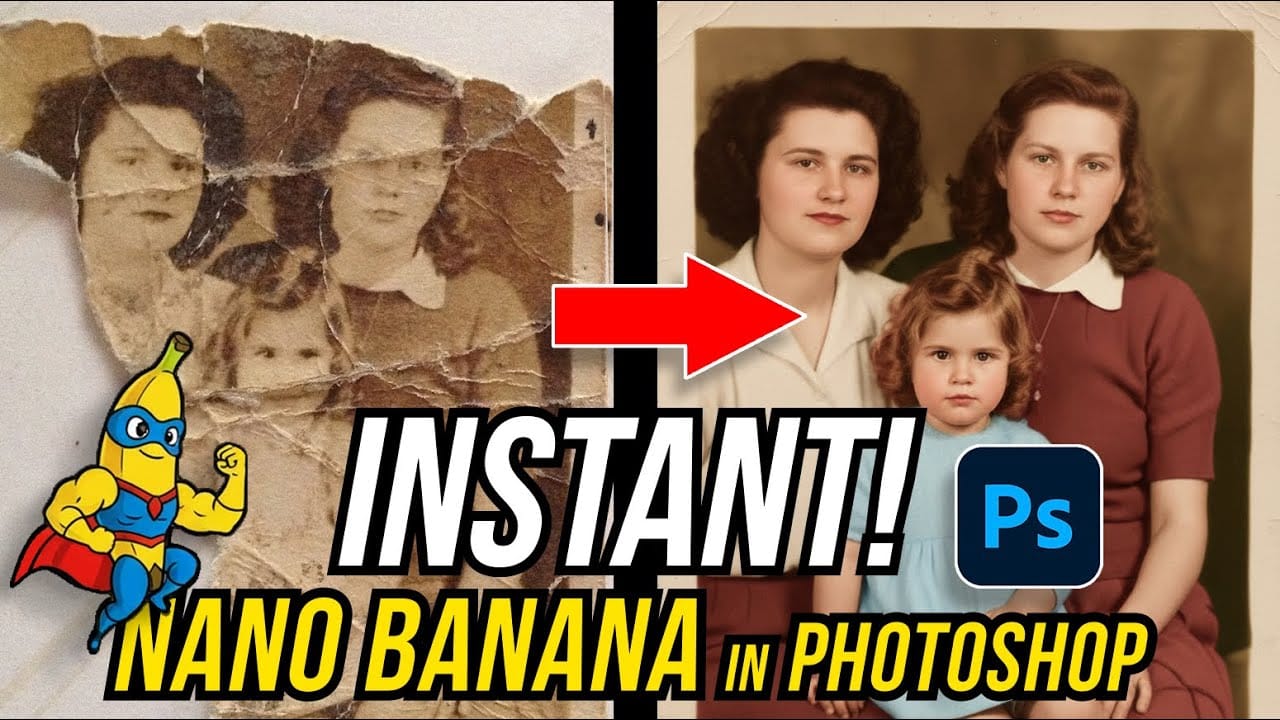
How to Restore Old Damaged Photos Using Nano Banana in Photoshop
Old family photos with scratches, tears, and missing sections can seem beyond repair. Google's Nano Banana AI model, now integrated into Photoshop, makes full restoration possible in minutes rather than hours.
This powerful tool excels at maintaining facial characteristics while automatically filling in damaged areas and adding realistic color to black and white images.
Watch the Tutorial
Essential Tips for Photo Restoration with Nano Banana
* Access the Contextual Taskbar — If you don't
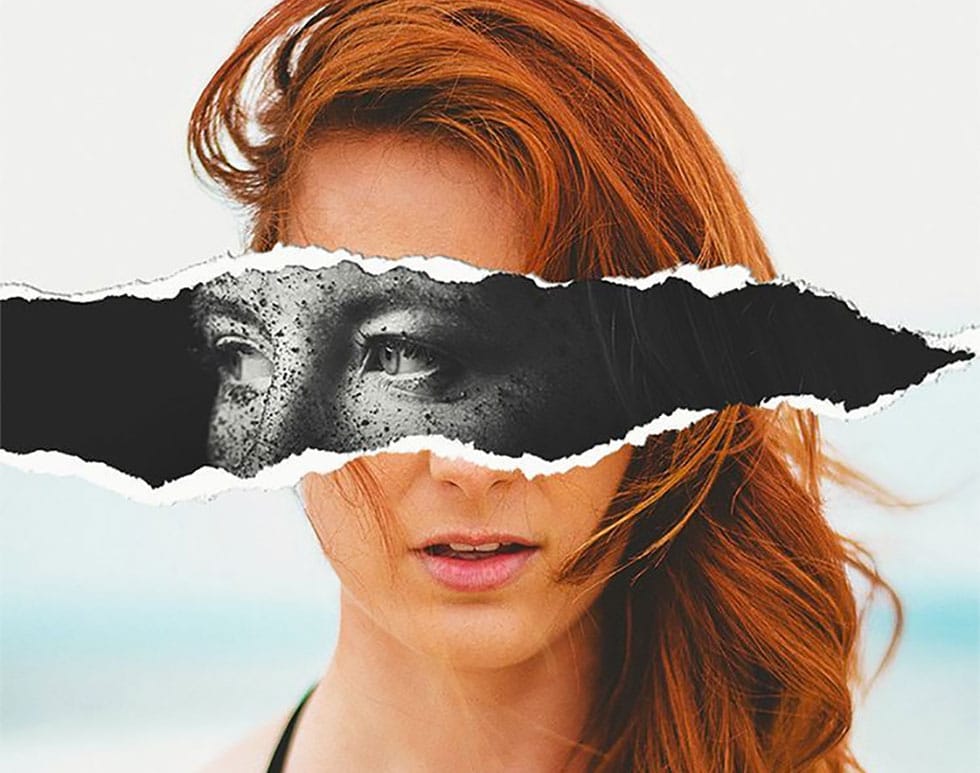
Create ripped paper portrait effect in Photoshop
This video will show you how to create a captivating ripped paper photo manipulation effect. Learn how to create a realistic tear that reveals a hidden image beneath, effectively layering two portraits into one unique composition.
The video will guide you through using layer masks and selection tools to achieve a seamless tear effect, while also exploring techniques for adding texture and depth to the "paper" for a believable final outcome.
Watch tutorial