The dispersion effect creates the illusion of a subject dissolving into particles or smoke, producing a dramatic visual that suggests movement and transformation. This technique combines the Liquify filter with custom brushes and layer masking to achieve a realistic scattering effect.
By duplicating your subject, distorting one layer, and selectively revealing portions through carefully applied masks, you can control exactly where and how the dispersion occurs while maintaining the integrity of the original image.
Watch the Video
Practical Tips
Master the dispersion effect with these essential techniques for realistic results.
- Use a large brush in the Liquify filter to stretch your subject in the direction you want the dispersion to flow
- Create a black mask by holding Alt and clicking the layer mask icon to completely hide the liquified layer initially
- Vary your smoke brush sizes and rotate them frequently to avoid creating recognizable patterns
- Paint with white on the black mask to reveal the stretched areas, and black on the white mask to hide the original
- Work with 100% opacity when applying brush strokes to maintain clean, defined edges in your dispersion
Related Articles and Tutorials
Explore more creative effects and design resources to enhance your visual projects.
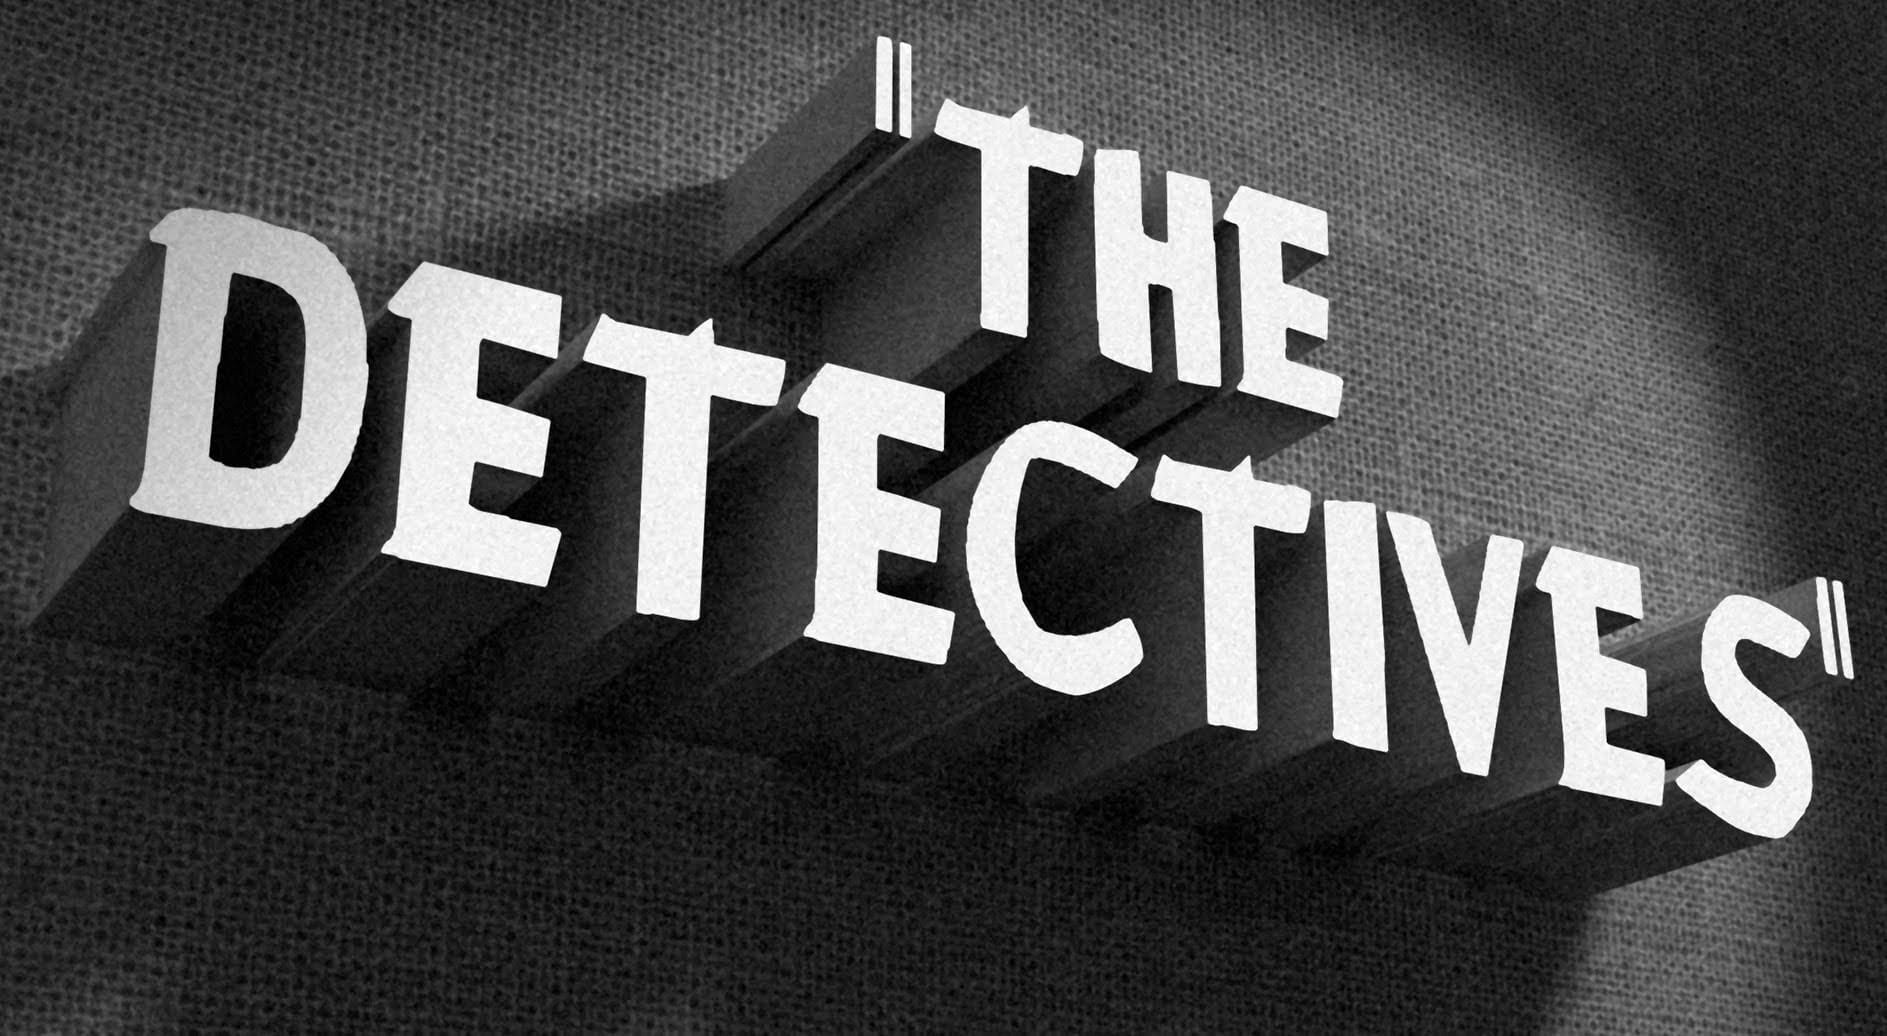
How to Create a Vintage, Film Noir Movie Title in Photoshop
This tutorial teaches you how to create vintage film noir movie titles in Adobe Photoshop. You'll use Photoshop's 3D features to extrude text, apply textures, and set up lighting, replicating the stark, dramatic aesthetic of 1940s-1950s crime dramas to craft distinctive custom opening titles.
Watch the Tutorial
Practical Tips for Vintage Title Design
* Choose a classic typeface like Montgomery for an authentic vintage feel and ensure correct installation for best results.
* Desaturate bac
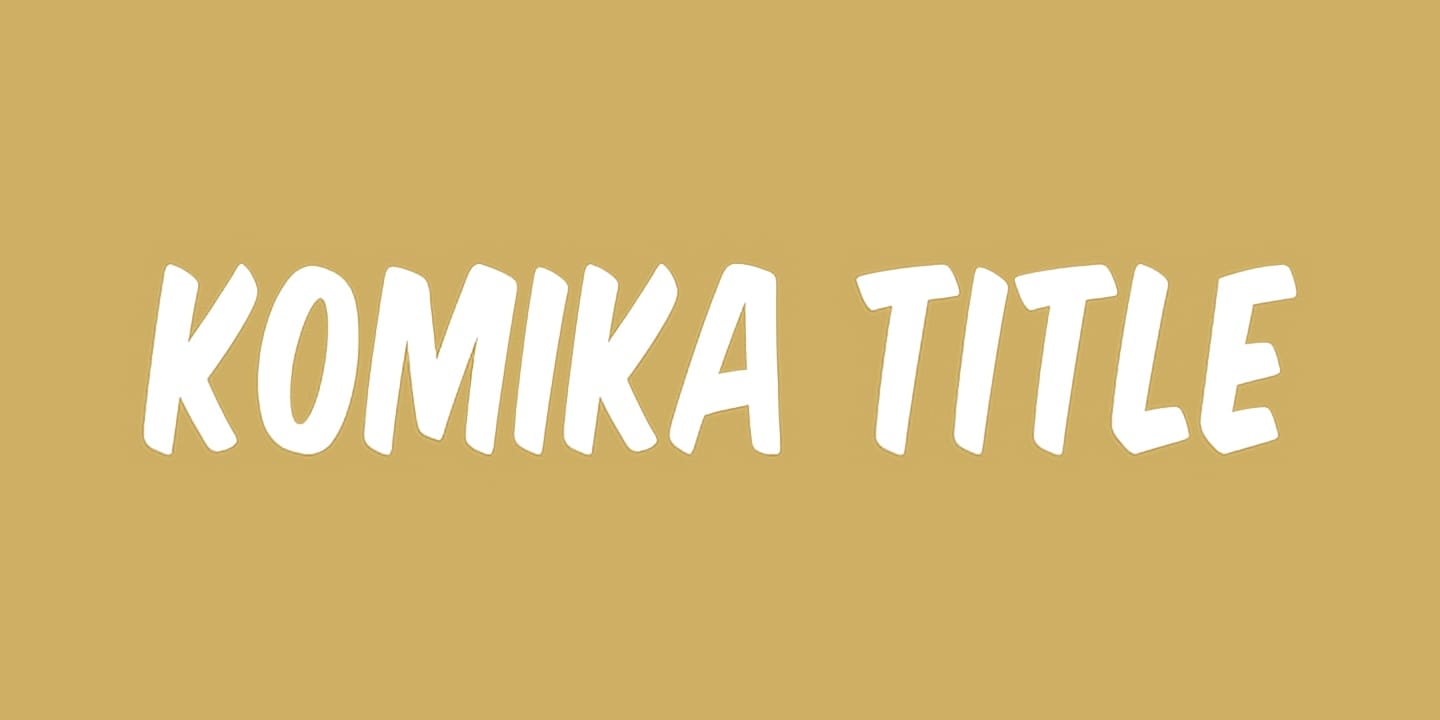
Komika Title font family
Download Komika Title font family. @Font-Face kit for web usage and OTF Open Type Font are available for download. @Font-Face kit includes TrueType Fonts, EOT fonts, WOFF fonts, SVG fonts and Cufón fonts, plus css and html files. These fonts are free for commercial use, but read carefully the font license before using them in commercial projects. Read this font License
Download here
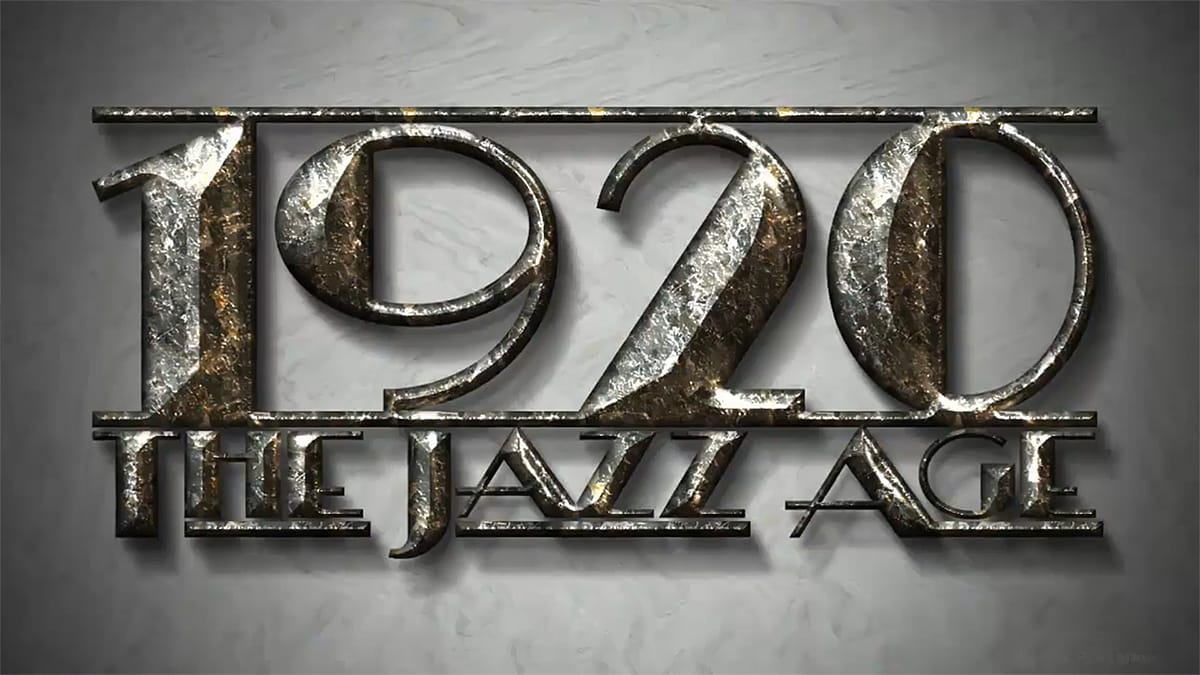
How to Make a 1920s, Jazz Age, Title Design from Scratch
A powerful Photoshop technique for creating intricate text effects involves setting a layer's fill to zero, which hides the content while preserving all layer styles. This method enables complex, multi-layered designs by stacking multiple text copies with different bevels, shadows, and patterns to build dimensional effects.
As demonstrated in tutorials like creating 1920s Jazz Age titles, this approach produces realistic depth while maintaining full editability and seamless visual integration.
Ubuntu font family
If you are on the lookout for a clean and modern typeface, the Ubuntu Title font family is worth considering. This font offers a unique blend of simplicity and sophistication, making it suitable for a variety of design projects, from digital platforms to printed materials.
Its geometric shapes and balanced proportions create a visually appealing aesthetic that maintains readability across different sizes. Whether you're designing a logo, creating an engaging website, or putting together marketi