Some time ago, I came up with this very easy effect while playing with a picture posted at Digital Photo School Blog.
After opening that picture at Photoshop, I started playing with filters and Smart Blur caught my attention. It gave some kind of vectorized or plastic look to the picture ending up with an interesting result.
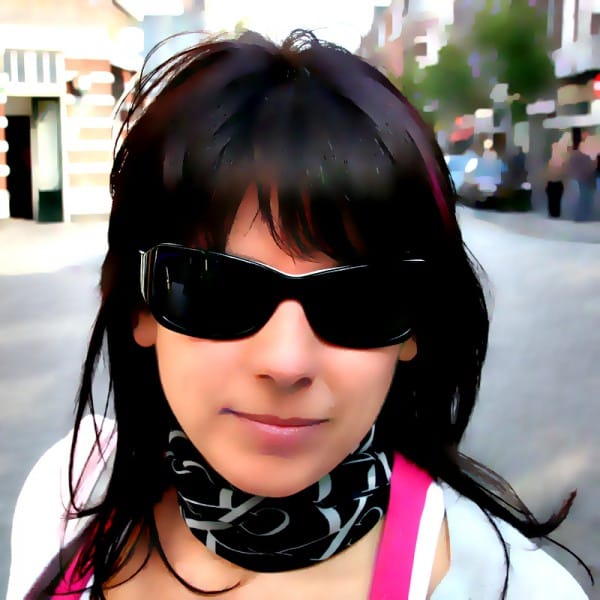
This effect is amazingly simple. It is based on using only Smart Blur and Unsharp Mask filters. And that's all. In fact, it is so simple that I had to add another special effect, a paper folding effect, to the image to make this tutorial a bit more enticing.
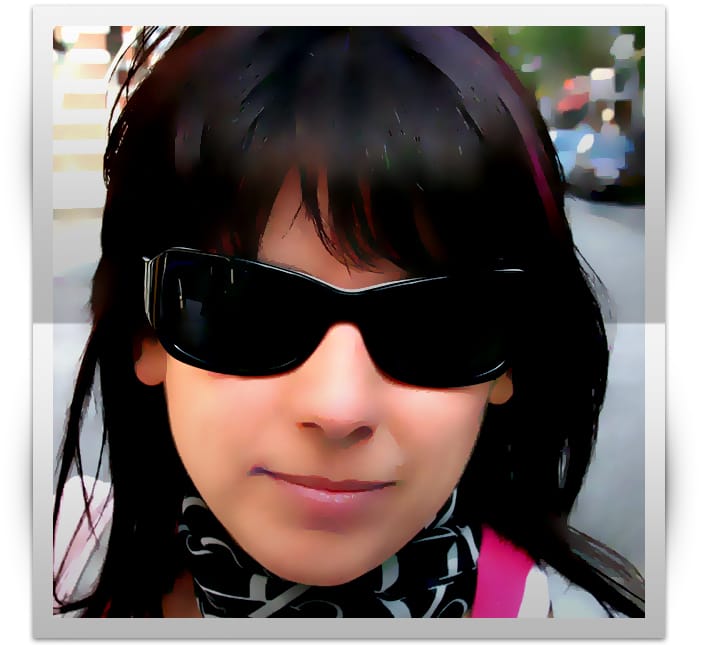
Illustration Effect on a Photo
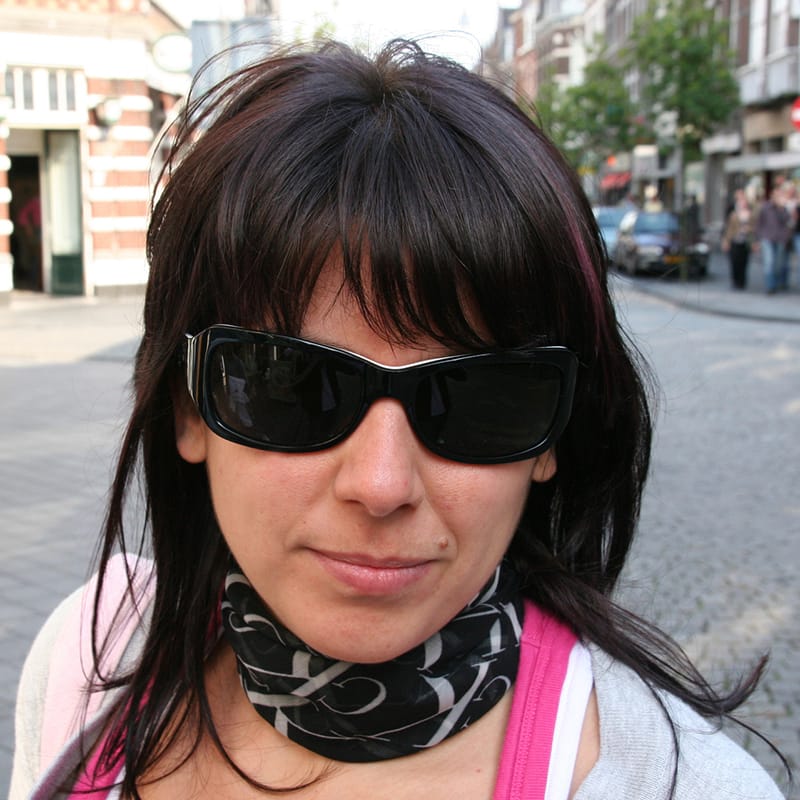
Original image by José Bernalte
Download and open a cropped version of the of the original image: here...
>> Go to FILTERS >> BLUR >> Smart Blur and set Radius: 100, Threshold: 100, Quality: High, Mode Normal. You will get a smooth, illustration like image.
>> Now go to FILTERS >> SHARPEN >> Unsharp Mask and set Amount: 60, Radius: 80, Threshold: 0.
That's it. No extra steps. This effect is based on the Smart Blur filter which, when applied with the highest settings values, it gives an illustrated look to the image. The Unsharp Mask filter is applied to give more contrast and saturation to the image in one single step.
Depending on the size or quality of the image, these settings should be changed. As with any other photo effect, play with the settings to find the ones that best fit the image you are using. You should always try to start with a well balanced image. If necessary, increase the contrast or sharpen the image before applying the filters.
Adding a frame and some folds to the image
In this next step we are going to add a new layer and draw a large white square over the woman's face.
This square will act as a photo frame, so be sure to choose a cropping that looks good.
After that, add a Drop Shadow and Stroke Layer Styles to the square. Although the frame of the photo should be white, in this case we are using a very light gray because a white frame would blend with the white color of the page in the final result. Copy the settings shown in the image below:
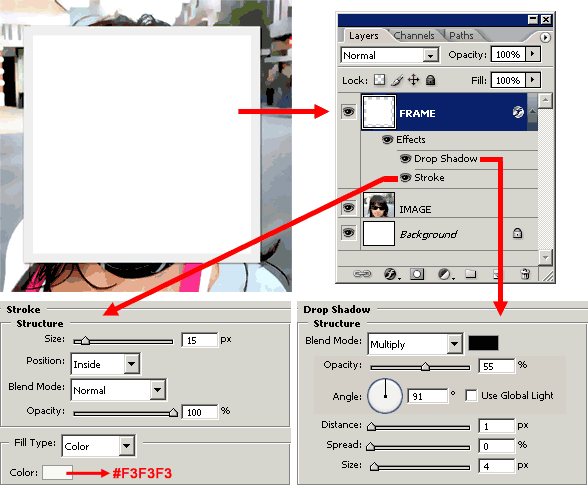
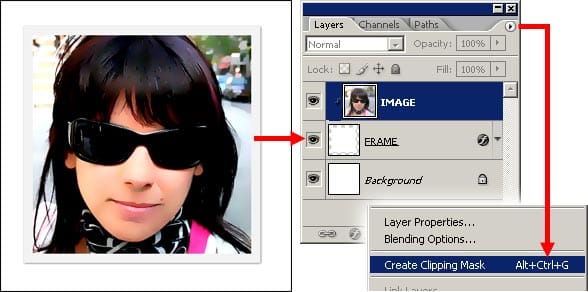
Now move the FRAME layer below the IMAGE layer. Go to the Layers Palette popup menu and select Create clipping mask. The white rectangle will now be masking the woman's face keeping the gray border and drop shadows intact.
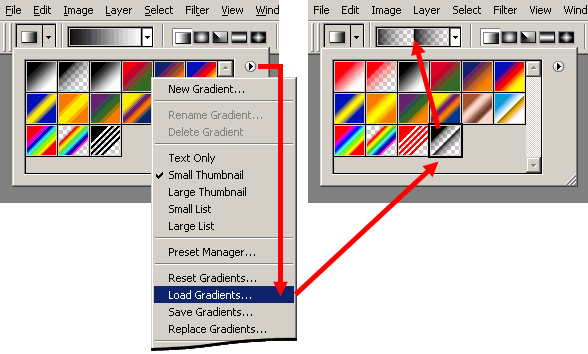
Download this gradient, then select the Gradient tool and load the gradient you've just downloaded.
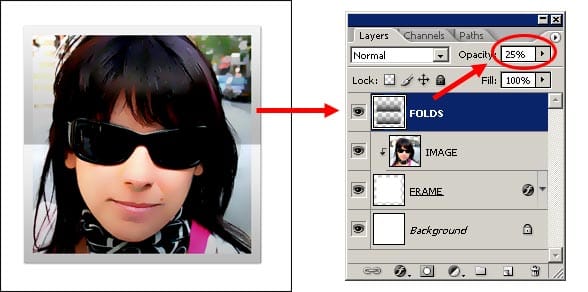
Create a new layer above the IMAGE layer and name it FOLDS. Now, while pressing the Control Key (Command key on Macs) click on the FRAME layer thumbnail to load the white rectangle selection.
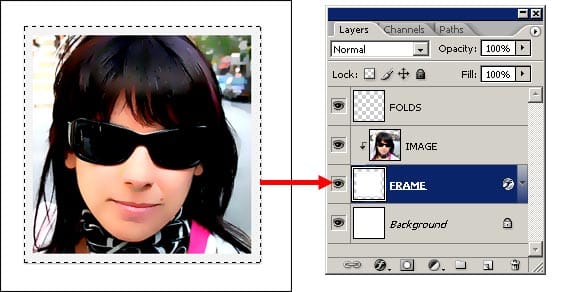
Click on the FOLDS layer to select it. Next, apply the gradient inside the rectangle selection in the FOLDS layer. Your image sholuld look similar as the one below:
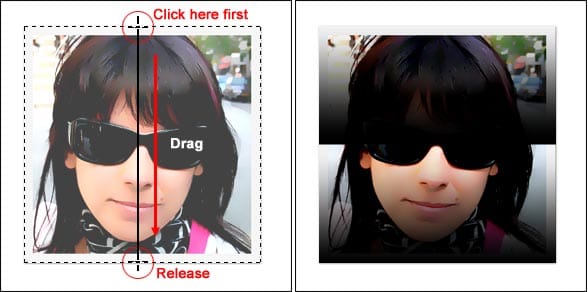
Set the FOLDS layer OPACITY to something like 25%. The folding effect is now very noticeable and realistic.
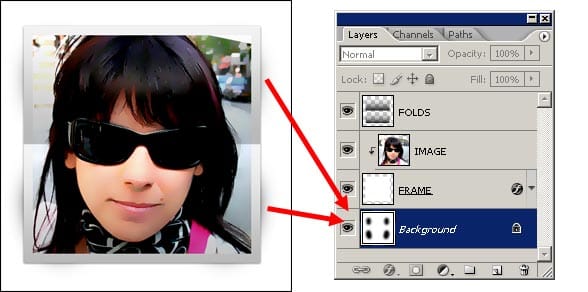
If you already read my last tutorial Watercolor text painted over a wet paper, this step will be easy for you. We are going to add some subtle shadows at both the left and right sides of the picture, using a large and soft brush.
Select the Paint brush tool and choose a 100px soft brush tip. Set the Foreground color to black.
Click on the Background layer to select it. Make a single click with the brush tool on the image, near the the edge of the paper. Try different positions of the brush tip to create deeper or lighter shadows.
It is mandatory that you leave all the layers visible while painting the shadows on the background layer so you will be able to see exactly how the shadows will look like.
And we are done!