How to Apply an Impressionist Oil Painting Effect to a Photo

How to Apply an Impressionist Oil Painting Effect to a Photo

Imagine turning an ordinary photo into a vibrant, swirling masterpiece reminiscent of Van Gogh’s "Starry Night." This effect captures the essence of impressionism, adding depth and emotion to your images. The beauty of this technique lies in its ability to transform reality into a dreamlike vision, inviting viewers to see the world through a painterly lens.

With the help of Photoshop and a few creative steps, you can achieve this stunning transformation. This video tutorial guides you through the process, using filters and brushes to create a unique, artistic effect that brings your photos to life with texture and color.

Watch the Video

Video by Blue Lightning. Any links or downloads mentioned by the creator are available only on YouTube

Exploring the Impressionistic Style in Digital Art

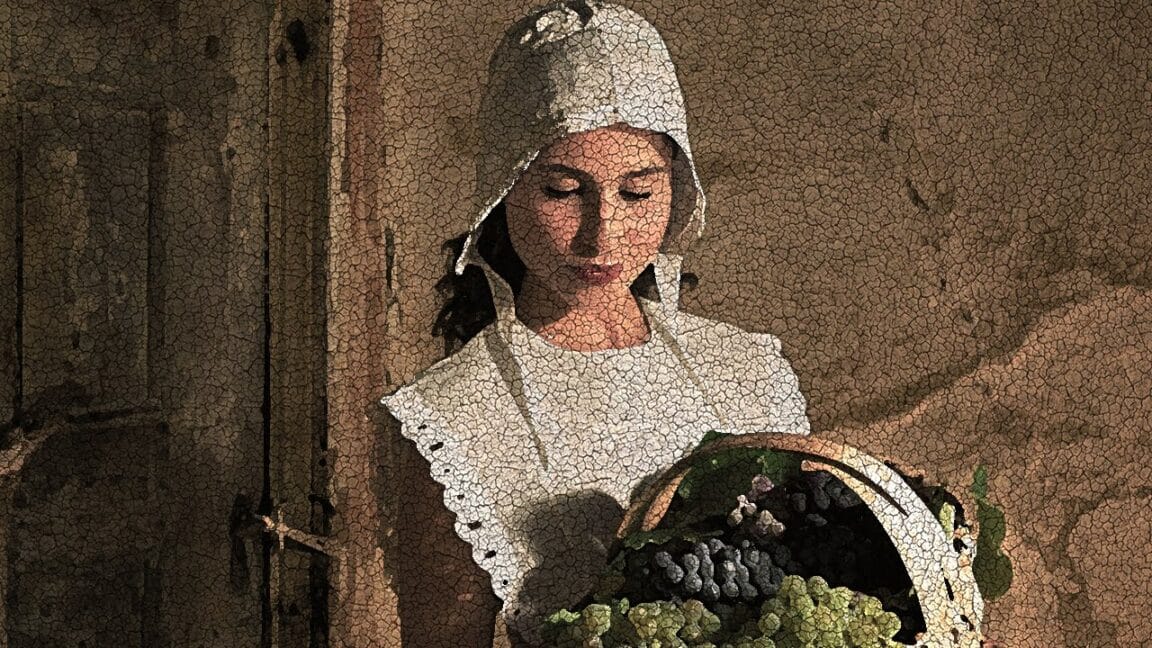
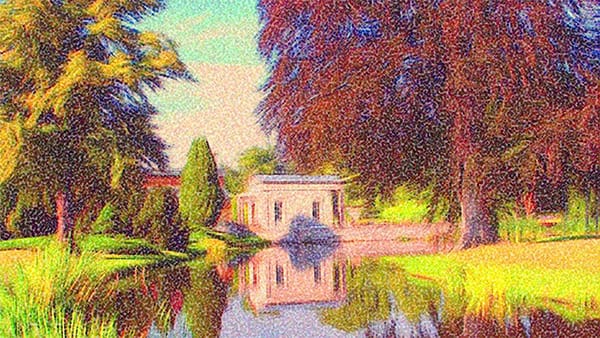
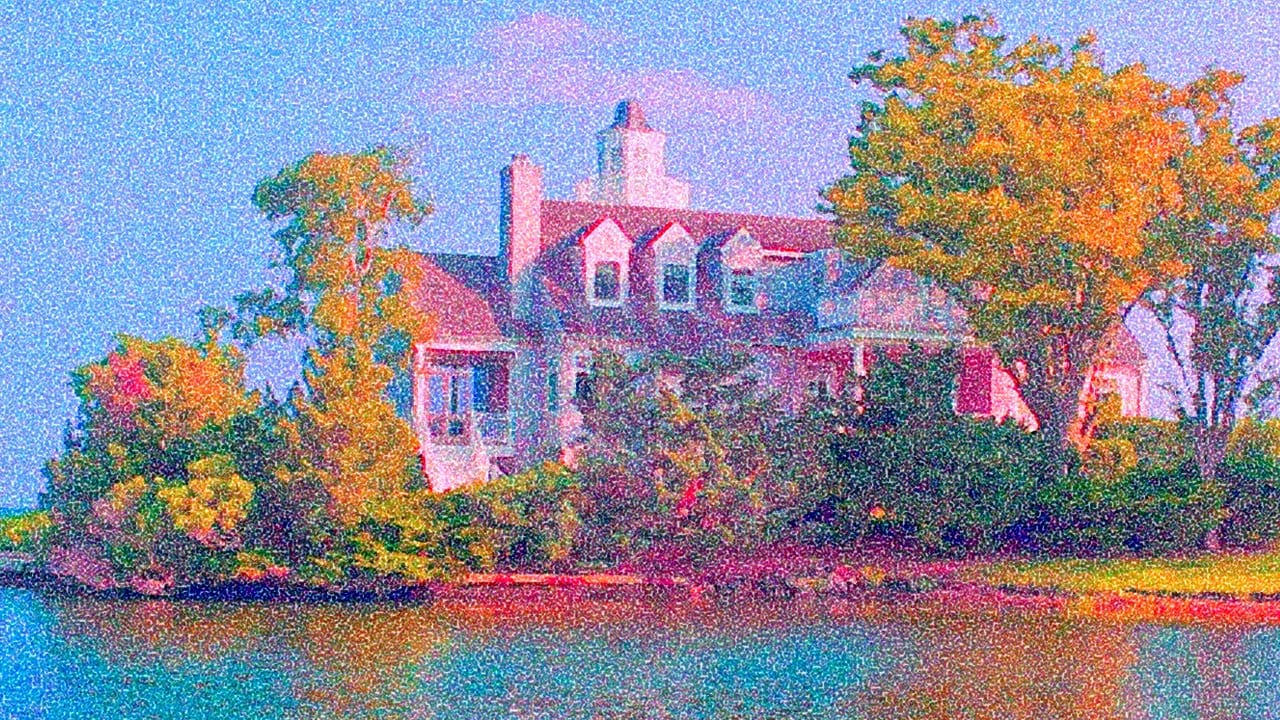
The impressionistic style seeks to capture the subjective impression of a scene, rather than a precise representation. This artistic movement, characterized by visible brush strokes, vibrant colors, and an emphasis on light, lends itself surprisingly well to digital manipulation. By mimicking these elements in Photoshop, digital artists can evoke the same sense of movement and emotion found in classic paintings.

Key components in achieving this effect involve using filters to create texture and applying brush strokes to simulate the look of paint. Colors often blend and contrast sharply, mimicking the way light interacts with surfaces. Digital tools offer a unique advantage by allowing for experimentation with effects that might be challenging or time-consuming with traditional media. One can easily adjust the intensity of filters, brush sizes, and color palettes to achieve the desired level of artistic abstraction.

To replicate the *Starry Night* aesthetic, focus on:

  • Swirling brush strokes
  • A vivid, contrasting color palette
  • A dreamlike and textured surface

Practical Tips for Creating an Oil Paint Effect

  • Liquify the image to create swirling patterns, mimicking the flow of paint.
  • Use thick, heavy brushes to add texture and simulate the look of brush strokes.
  • Experiment with the Glass filter to add distortion and depth to the image.
  • Apply the Oil Paint filter, adjusting stylization and bristle detail to refine the painted effect.
  • Incorporate a canvas texture to enhance the realism of the final painting.

Dive deeper into the world of digital art with these related tutorials, which offer different approaches to transforming photos into stunning painterly artworks.

How to Transform a Photo into an Antique, Oil Painting Photoshop
In this Blue Lightning TV tutorial by Marty Geller, you'll learn how to transform a modern photo into an antique-style oil painting with a cracked, aged effect. The tutorial guides you through applying a craquelure texture to give the image an authentic, vintage look. This technique adds depth and character to your photos, making them appear as if they were painted and aged over decades. The final result is a beautifully textured, timeless piece of art. Watch tutorial
Apply a beautiful impressionist paint effect to your photos in Photoshop
This tutorial by BlueLightningTV will show you how to transform your outdoor photos into the look of beautiful, impressionist paintings. You can also apply these techniques to your other photos, as well. Source Files: Monet painting. If working with Photoshop CS5 or earlier: Pixel Bender Windows, Pixel Bender Mac. Final Image Video Tutorial
Create an Action to Transform your Photos into Impressionist Paintings
Marty Geller from Blue Lightning TV shares a Photoshop tutorial that teaches you how to create an action to transform your photos into impressionist paintings. This action allows you to instantly apply the look of beautiful, impressionist paintings to your images. The tutorial guides you through the step-by-step process of creating the action. You'll learn how to use various Photoshop tools and techniques to achieve the desired impressionist effect. The author provides detailed instructions and
Abstract Portrait Manipulation in Photoshop CS 6
This tutorial from Abduzeedo provides a straightforward approach to replicating the stunning effects created by Italian digital artist Alberto Seveso for the Adobe CS6 promotional campaign. Seveso is known for his innovative use of Photoshop, pushing creative boundaries in the digital art world. You will discover a simple yet effective technique that relies on masks and layer effects, combined with stock images. This method allows you to produce impressive visuals with ease, even if you're not

Get tutorials & freebies delivered to you.

Subscribe to the Photoshop Roadmap newsletter, a weekly roundup of new tutorials, insights and quality downloads, trusted by 6500+ readers.

You might also like

How to Change Object Colors in Photoshop Using Hue/Saturation

Changing the color of specific objects in your photos requires precision and the right technique. The key is creating an accurate selection and using a targeted adjustment layer that affects only your chosen subject while preserving the rest of the image. This method combines the Object Selection tool with Hue/...

Create a Distorted Wave Glitch Effect in Photoshop

Digital distortion effects transform ordinary portraits into striking visual art by warping reality through deliberate technical manipulation. This technique uses multiple wave filters layered together to create increasingly complex distortions, while selective masking preserves important facial features from becoming completely unrecognizable. Watch the Video Practical Tips Master the wave distortion...

How to Create Glow Motion Effects with Gradient Maps in Photoshop

Motion blur combined with colorful gradients creates striking visual effects that transform ordinary photos into dynamic, cinematic images. This technique uses gradient maps to automatically color light and dark values, producing flowing color transitions that follow the movement of your subject. The process involves subject isolation, strategic gradient placement, path...

How to Use Reference Images with Generative Fill in Photoshop

Reference images revolutionize how Generative Fill works, letting you guide AI with actual photos instead of text prompts. This feature enables precise clothing swaps, object replacements, and realistic additions by showing the AI exactly what you want rather than describing it. The technique works with everything from custom t-shirts and...

How to Remove Eye Bags Using Dodge and Burn in Photoshop

Eye bags can dramatically age a portrait, making subjects appear tired or unhealthy. Traditional removal methods often destroy skin texture or create unnatural results that look obviously retouched. This professional dodge and burn technique removes even severe eye bags while preserving every detail of natural skin texture. The method uses...

You’ve successfully subscribed to Photoshop Roadmap
Welcome back! You’ve successfully signed in.
Great! You’ve successfully signed up.
Success! Your email is updated.
Your link has expired
Success! Check your email for magic link to sign-in.