HDR (High Dinamic Range) images are created using multiple photographs, each captured at a different exposure. It may happen you didn’t have the chance of shooting more than one image.. don’t worry, even if you haven’t got what’s needed to create a real HDR image, you can fake it.
In this tutorial I’ll show you how to enhance your images faking an HDR effect using the new HDR Toning command in Photoshop CS5. We’ll apply this effect to different images so you can see how this would work with different type of landscape shots.

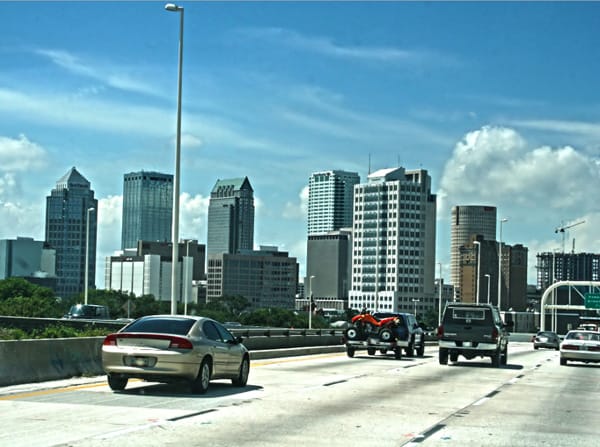
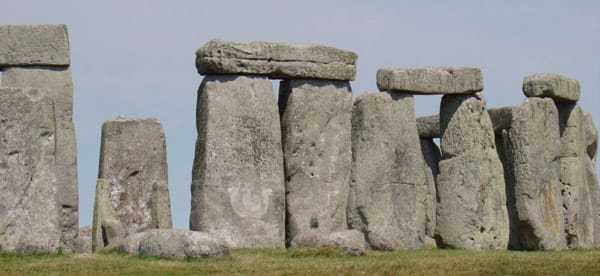
Download and open the first image from Stock.xchng (requires free subscription to download). The image is quite big, you may leave it that way or simply reduce the size to something more easy to handle.
Go to Image > Adjustments > HDR Toning.
Start with a Default Preset and make sure Method is set to Local Adaptation.
On the HDR Toning window enter the following values:
Edge Glow: set Radius to 12 px and Strength to 1.40
Tone and Detail: set Gamma to 1.10 and Detail to +97%
Color: set Vibrance to +30% and Saturation to +20%
Click OK and that’s it. An extremely fast and easy way to enhance your images with a subtle HDR look.
Click on the image below to view it at full size.
Two More Examples
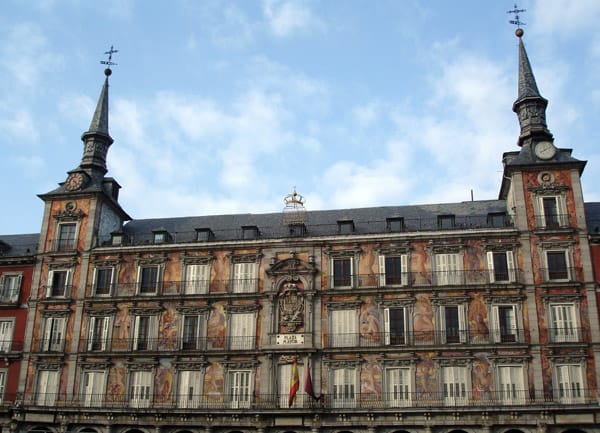
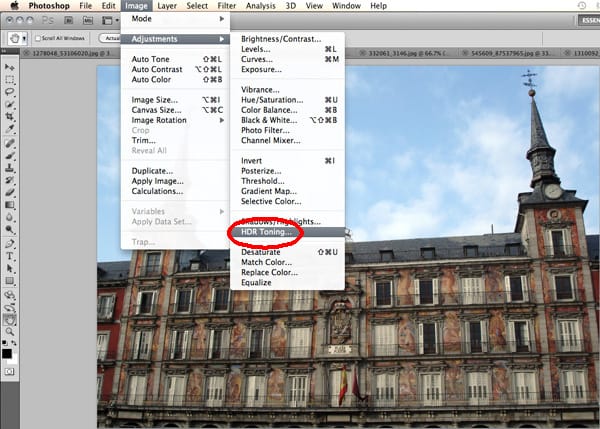
Open the second image and go to Image > Adjustments > HDR Toning
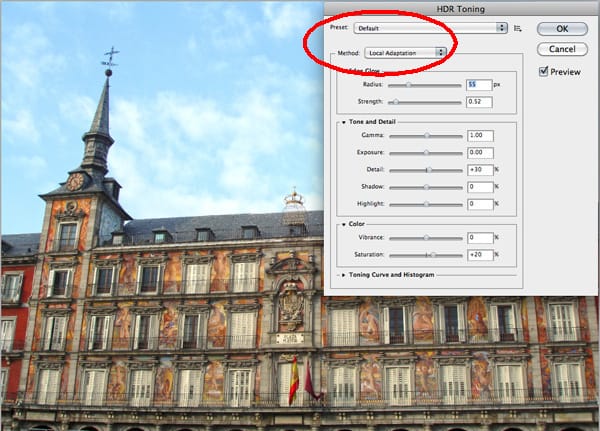
Start with a Default Preset and make sure Method is set to Local Adaptation.
On the HDR Toning window enter the following values:
Edge Glow: set Radius to 17 px and Strenghth to 0.51
Tone and Detail: set Gamma to 1.60, Exposure to -1.00, Detail to +175%, Shadow to +27% and Highlights to +23%
Color: set Vibrance to +70% and Saturation to +20%
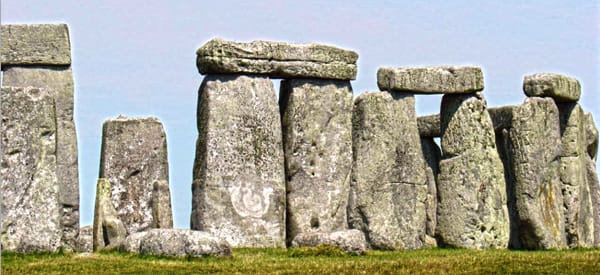
Click OK. Your image should look like the one below.
Click on the image below to view it at full size.
Open the third image and go to Image > Adjustments > HDR Toning
Start with a Default Preset and make sure Method is set to Local Adaptation.
On the HDR Toning window enter the following values:
Edge Glow: set Radius to 40 px and Strength to 1.00
Tone and Detail: set Gamma to 1.10, Detail to +175%, Shadow to +30% and Highlights to -5%
Color: set Vibrance to +50% and Saturation to +20%
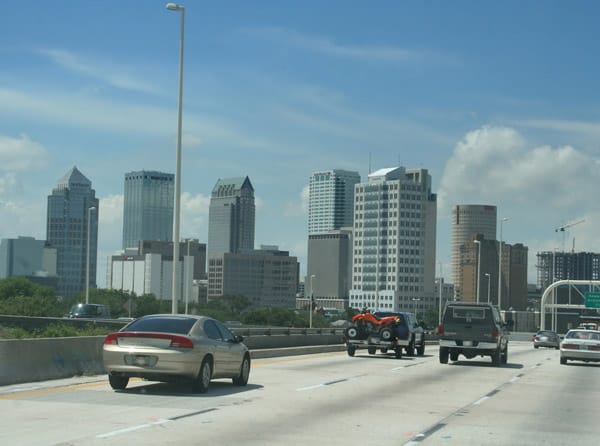
Click OK. Your image should look like this:
Click on the image below to view it at full size.