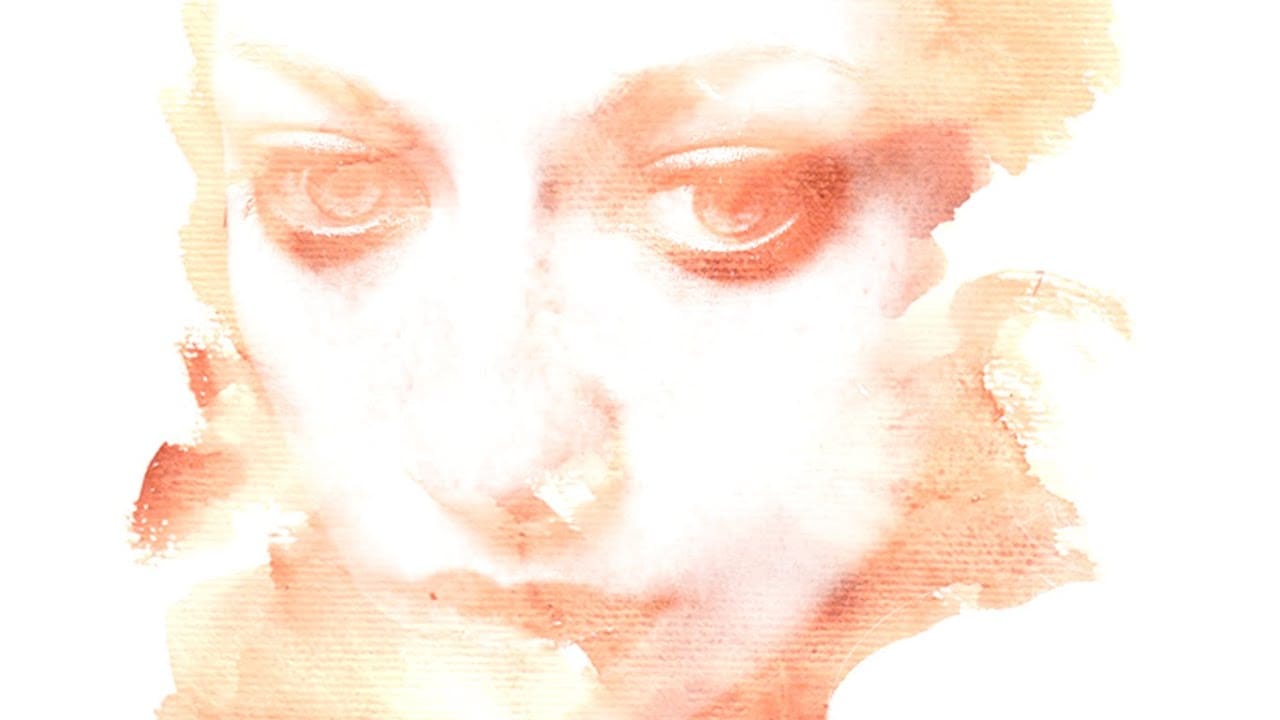
Achieve a beautiful, artistic watercolor look for your text in Photoshop. This tutorial guides you through applying a unique effect that transforms ordinary text into vibrant, hand-painted artwork, perfect for creative projects.
Watch the Video
Video by Spoon Graphics. Any links or downloads mentioned by the creator are available only on YouTube
Practical Tips for Watercolor Text Effects
Replicating the delicate nuances of watercolor requires careful use of Photoshop's features. Here are key techniques from the tutorial to master this unique effect:
- Convert your text layer to a Smart Object early to enable non-destructive editing, allowing you to easily update the wording or font later.
- Add an Inner Glow effect (Normal, 100% opacity, white, ~20px size) within the Smart Object to create a masked edge, essential for the watercolor fade.
- Use the Blend If slider with the Alt key to split its handle, smoothly fading out the highlights and establishing the text's watercolor base.
- Layer multiple Filter Gallery effects (Sponge, Cutout, Watercolor, Grain, Stamp) to build the complex watercolor texture, adjusting blending modes and opacities for each.
- Fine-tune the opacity of the second Filter Gallery effect to 20% and the Stamp effect to 15%, then add Noise (5% Gaussian, Monochromatic) and Ripple (20% Large) for added texture and organic flow.
Related Articles and Tutorials about Watercolor Effects
Explore more creative possibilities for watercolor effects in Photoshop with these additional resources.
Learn How to Create a Watercolor Photo Effect in Photoshop
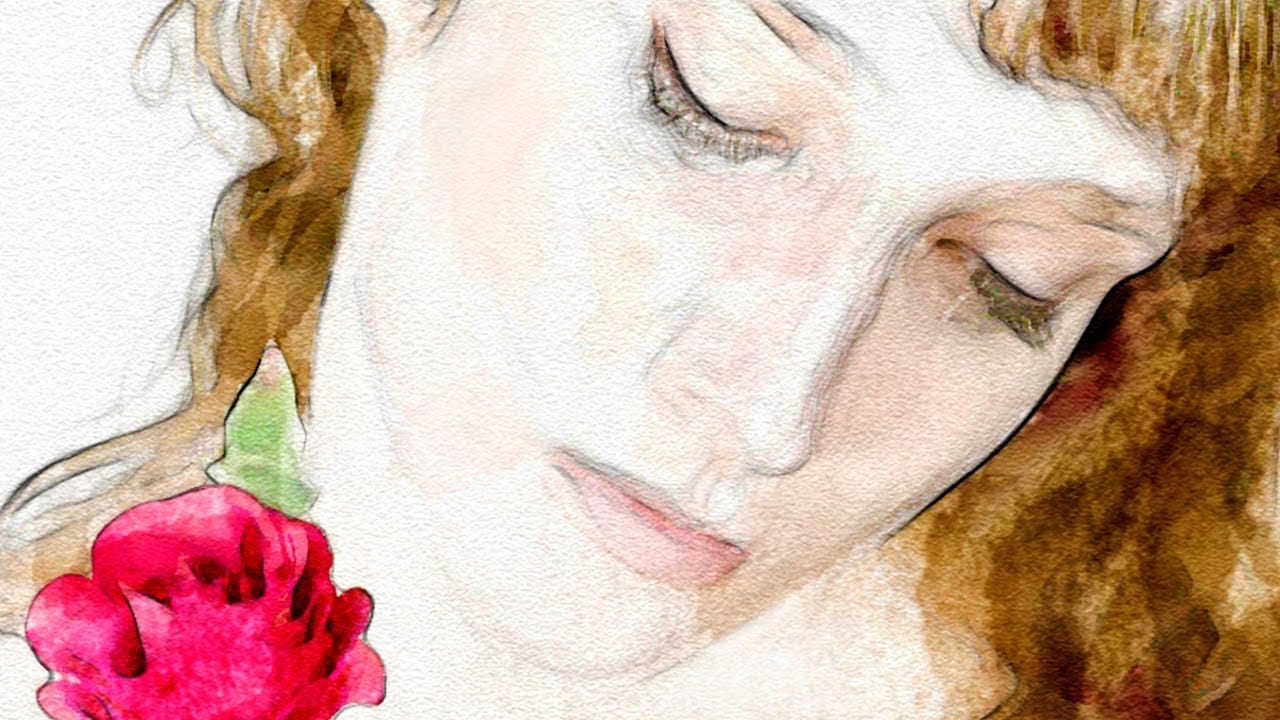
Transforming a photograph into a convincing watercolor painting opens up a world of creative possibilities. This artistic effect adds depth and emotion, turning ordinary images into unique pieces of art. The result captures the delicate washes and textures of traditional watercolor, bringing a hand-painted feel to your digital art.
This tutorial guides you through creating a hand-painted effect in Photoshop, going beyond basic filters. By using a combination of smart blurs, glowing edges, and c
How To Make a Watercolor Photo Manipulation In Photoshop
This tutorial by Maarten Rietdijk provides a step-by-step guide on how to combine watercolor brushstrokes and photos in Photoshop. The author explains the process in a clear and concise manner, making it accessible to both beginners and experienced Photoshop users.
The tutorial begins by teaching the reader how to create a set of custom watercolor brushes. These brushes are then used to add a unique, artistic touch to the photograph. The author emphasizes the importance of experimenting with di

Photoshop Watercolor Photo Effect Tutorial
In this comprehensive tutorial by Arunz Creations, you'll discover how to transform a portrait into a beautiful watercolor painting using Photoshop.
The process begins by organizing your layers into a group and temporarily hiding it. Next, you'll select specific colors from the portrait using the Color Range tool to create a precise selection. After applying the selection as a mask on the group and inverting it, you'll create a new empty layer beneath the group and fill it with white to serve a
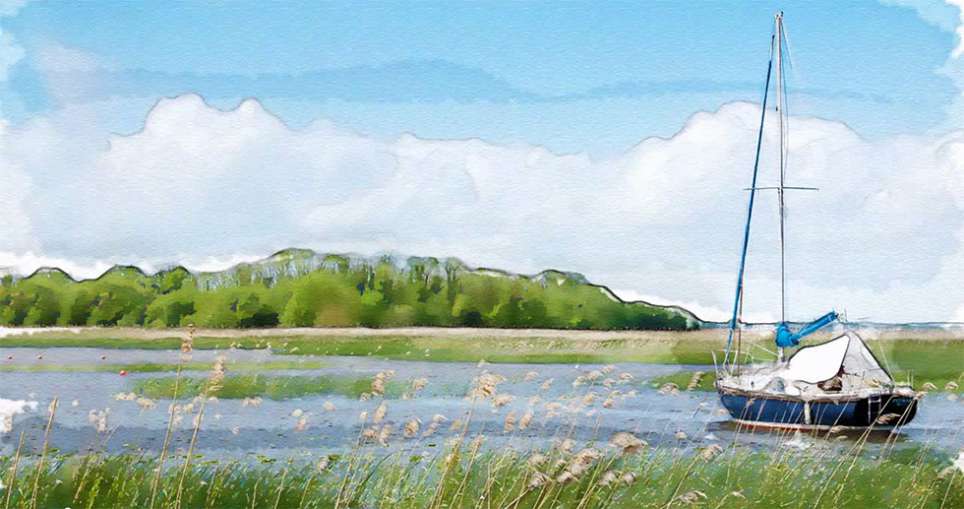
Add a beautiful watercolor effect to your photos in Photoshop
Digital art offers versatile ways to reinterpret photography. One popular technique involves transforming ordinary photographs into painterly artworks, such as watercolor portraits.
This tutorial demonstrates a method for achieving a beautiful watercolor effect in Photoshop, emphasizing the use of custom brush strokes to introduce unique artistic nuances. Viewers will learn how to prepare images, apply specific filters, and utilize various brushes to mimic the fluidity and texture of traditiona