Article republished with permission of PSD STACK. PSD Stack is a blog dedicated to Photoshop that provides high-quality tutorials, presets and actions to all level of Photoshop users
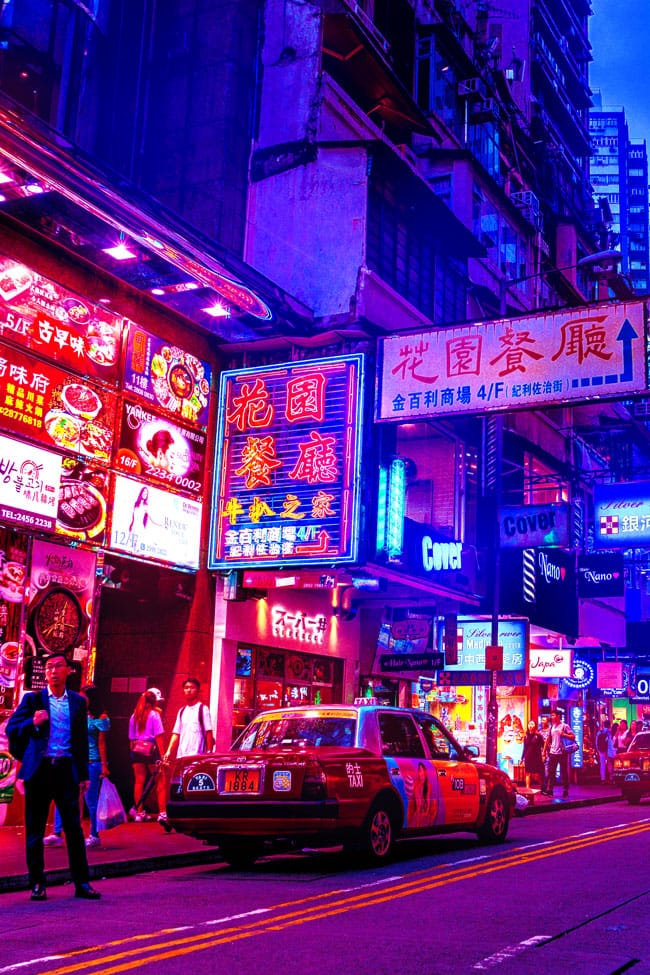
Learn how to create a trendy cyberpunk effect in Photoshop. You’ll learn how to add neon color vibes to your images by adding hot pink and bright blue tones, which are key factors to this style. The coloring for this look can be inspired by any sci-fi movie and you can add the combination of colors that you prefer most.
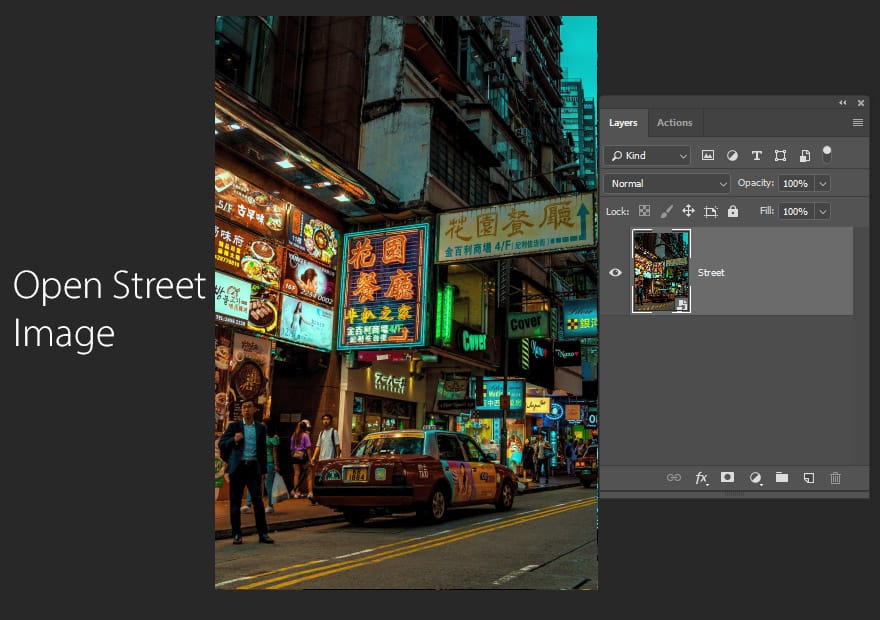
Step 1 – Choosing Images
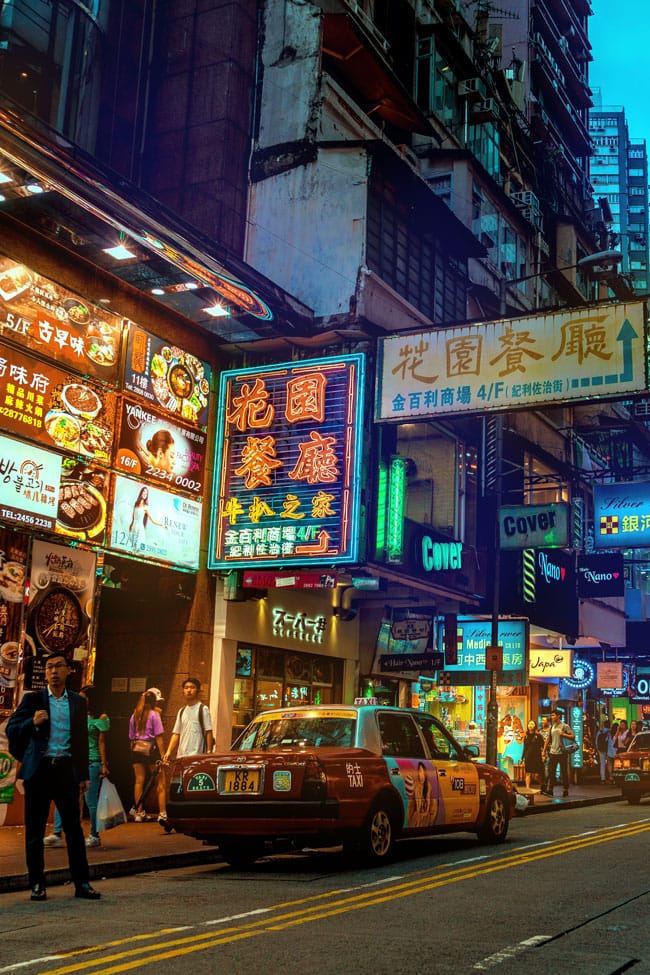
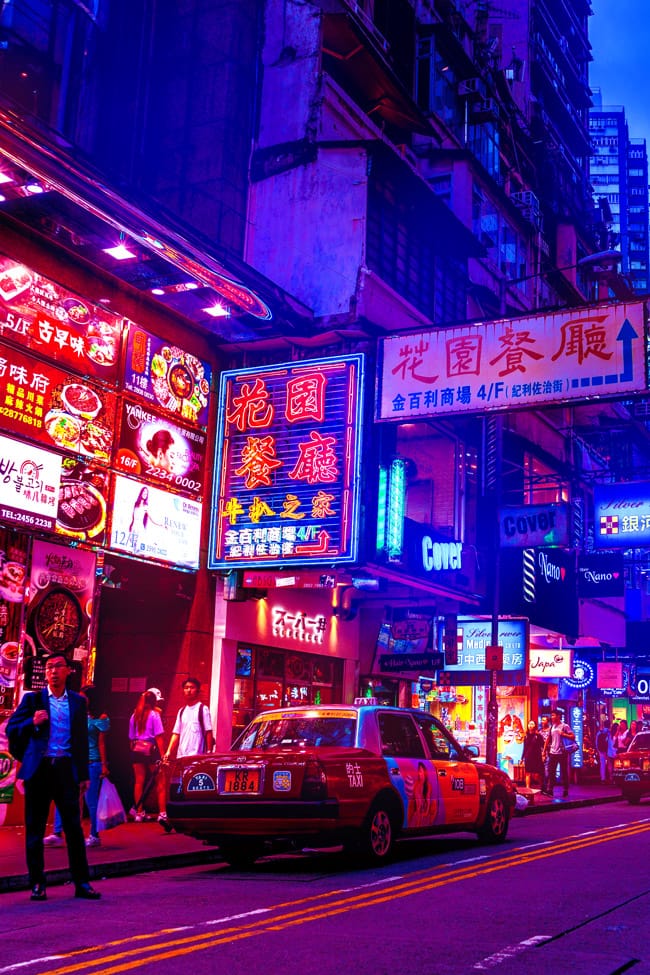
For this style I’d recommend going for street images which already have some sort of coloring to begin with. Most likely use the street images of Hong Kong, Seoul, Tokyo, or maybe Manhattan’s streets. I am using an image from Unsplash which you can download here if you want to follow along.
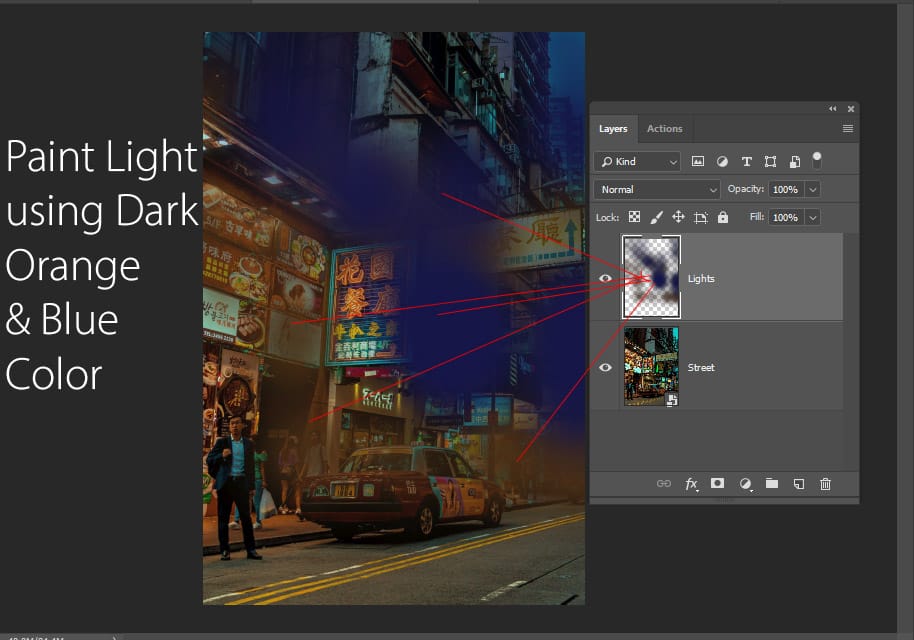
Step 2 – Add Lighting
First, we’ll work on lighting and we are gonna light up the light of the street by painting them. To do this, create a new layer by pressing CTRL + SHIFT + N and name it “Lights”.
Use a soft round brush with dark orange & blue color to paint light as shown below. Remember to paint light where you see glowing light but make sure to choose the color according to the light source. For example if the light color is orange, paint it over with orange color, and if the light color is not yellow paint it over with blue color.
Change the blending mode to the lights layer to Linear Dodge.
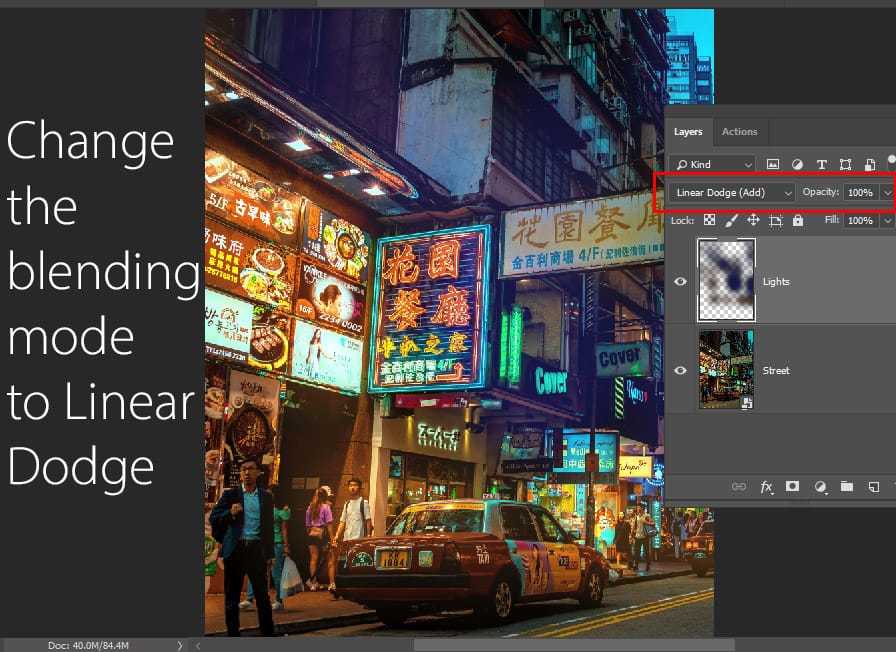
You can see below we have lightened up the lights and we can do a lot to improve it further.
Step 3 – Improve Lighting with Black Layer
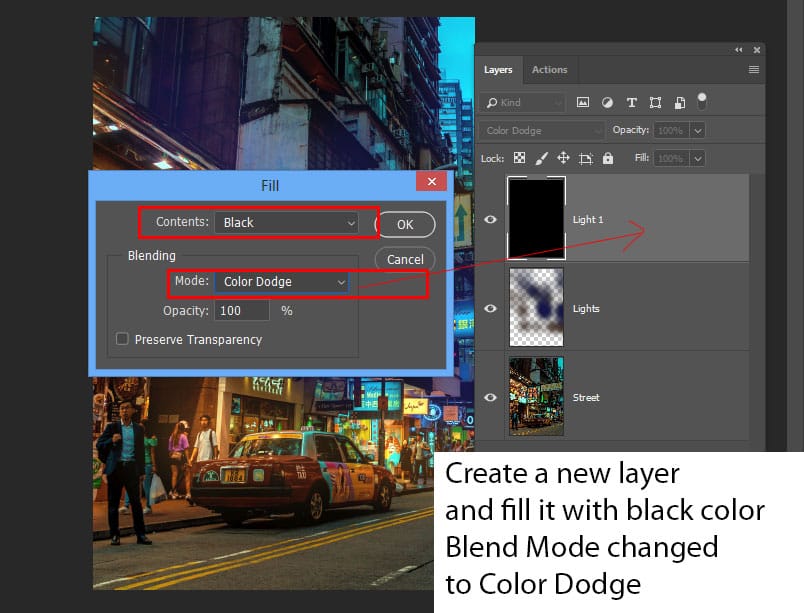
Now we can improve lighting further using my lighting technique. This is my lighting technique that involves filling up a layer with black color and changing the blending mode to Color Dodge.
Create a new layer and fill this layer with black color by going to Edit > Fill choose black in the Contents. Also, make sure to change the blending mode to Color Dodge.
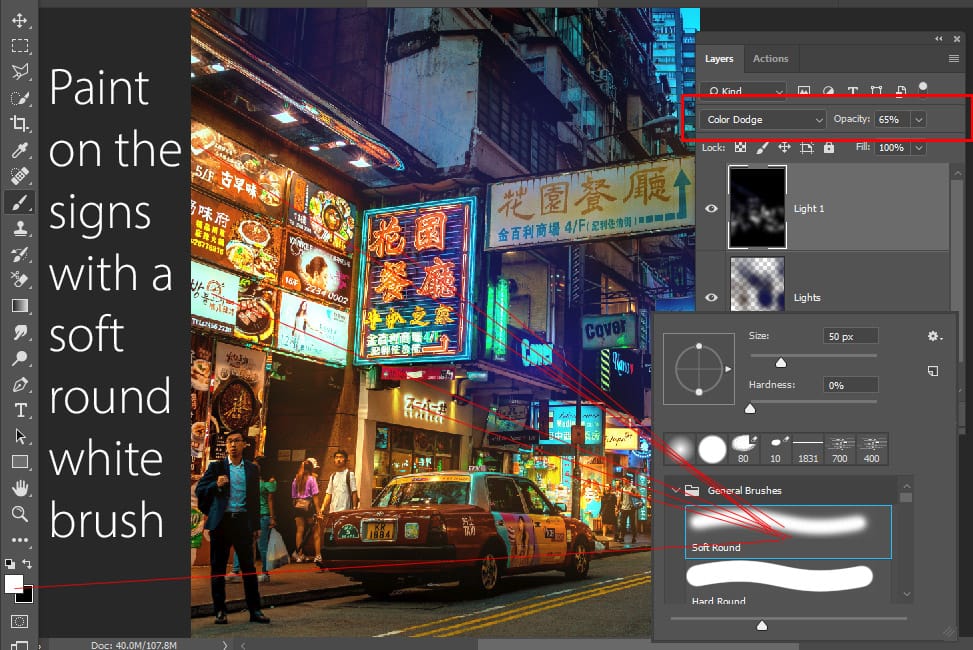
You have to be super subtle while using this lighting technique. With that in mind, use a soft round brush and change the foreground color to white, using a very low opacity & flow settings around 30% or less paint on the signs to lighten them up. You can also paint light wherever you think it needs to brighten up.
Really cool technique and will surely bump up the light in the image as you can see:
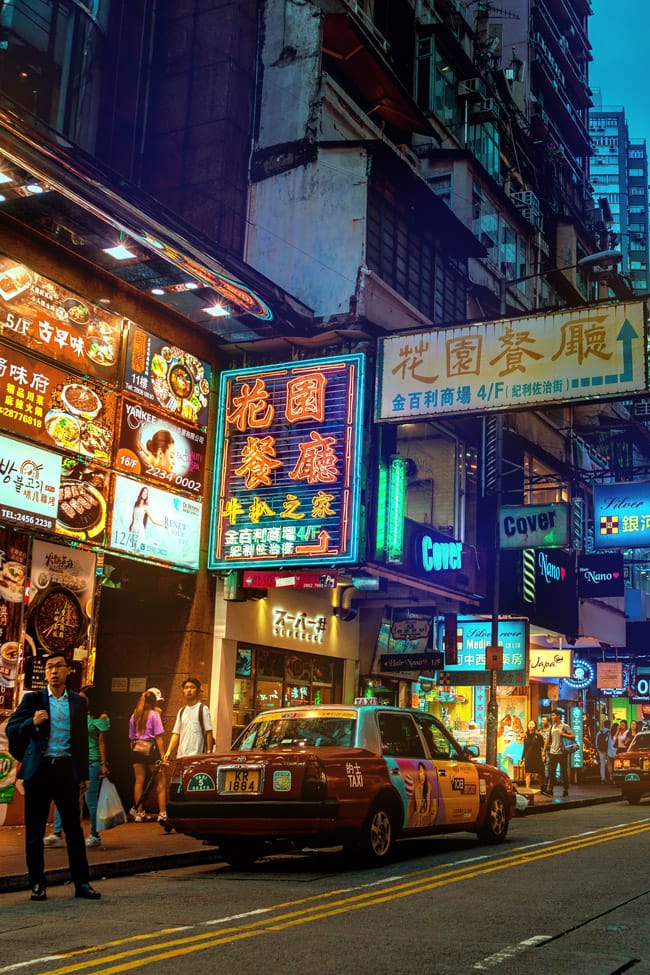
Notice the results below in the full image:
Step 4 – Begin Coloring
Now we can begin coloring using adjustment layers and as I said it always depends on what sort of coloring you want here or what works best for your images. My aim is to add pinks and blues to the images and I’ll go for that using a Color Balance adjustment layer.
Go to Layer > New Adjustment Layer > Color Balance:
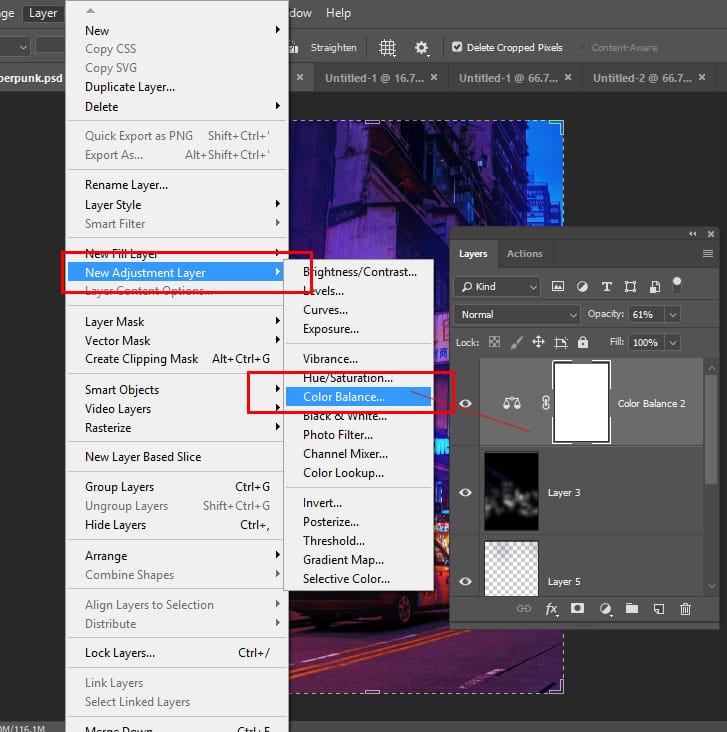
You can see the settings below and I targeted every single tone such as Shadows, Midtones, and Highlights but you can only target a specific one if you want to.
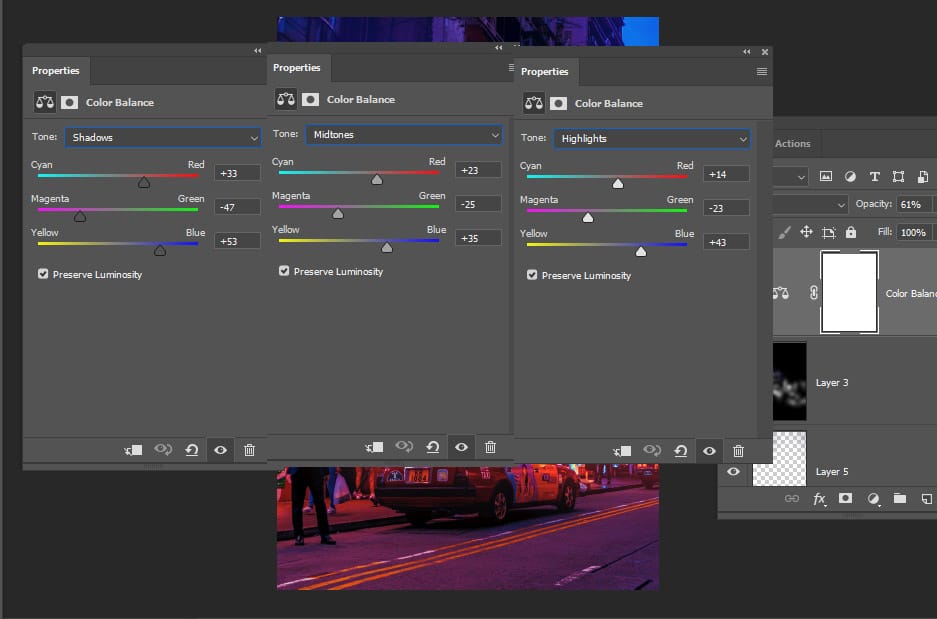
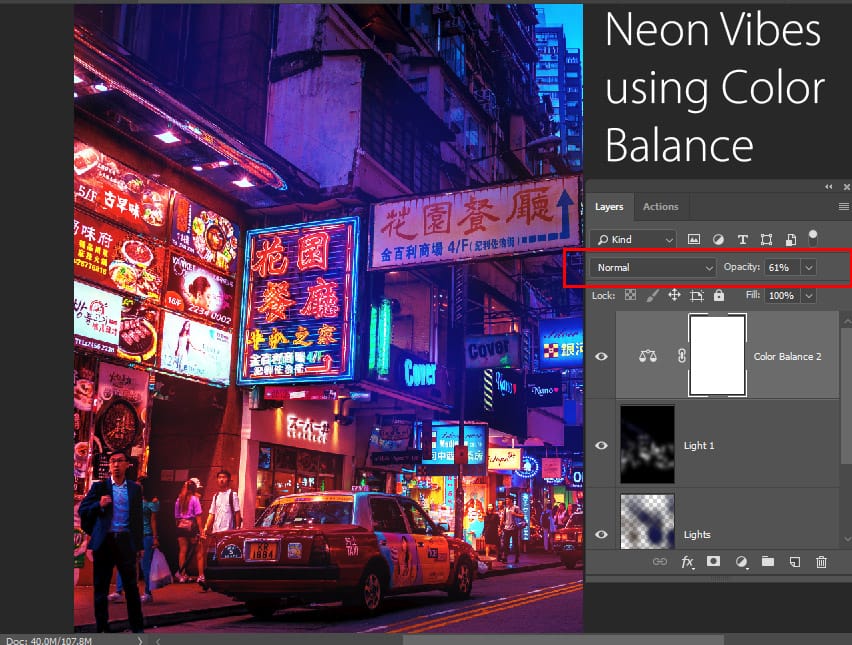
I have reduced the opacity of Color Balance to 61%. As you can see it has added cyberpunk vibes to the image by adding pinks and blues to the image.
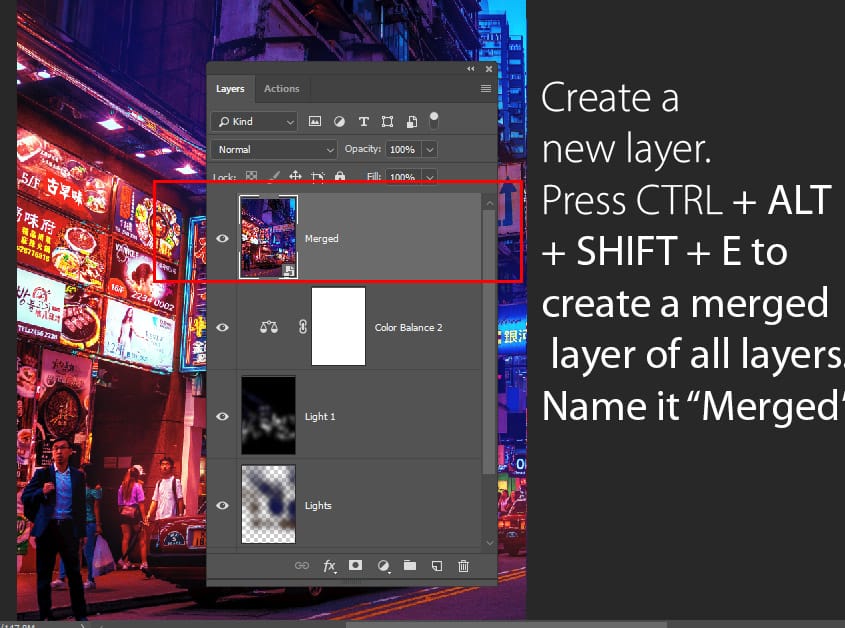
Step 5 – Enhance Coloring
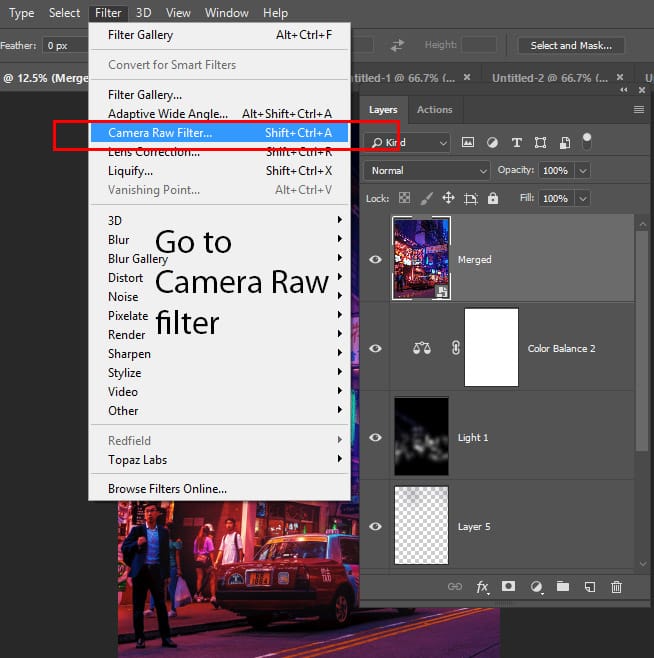
We can do a lot more to further improve & enhance coloring to our image and we’ll use Adobe Camera Raw Filter. Create a merged layer pressing CTRL + ALT + SHIFT + E and name it “Merged”.
Go to Filter > Camera Raw:
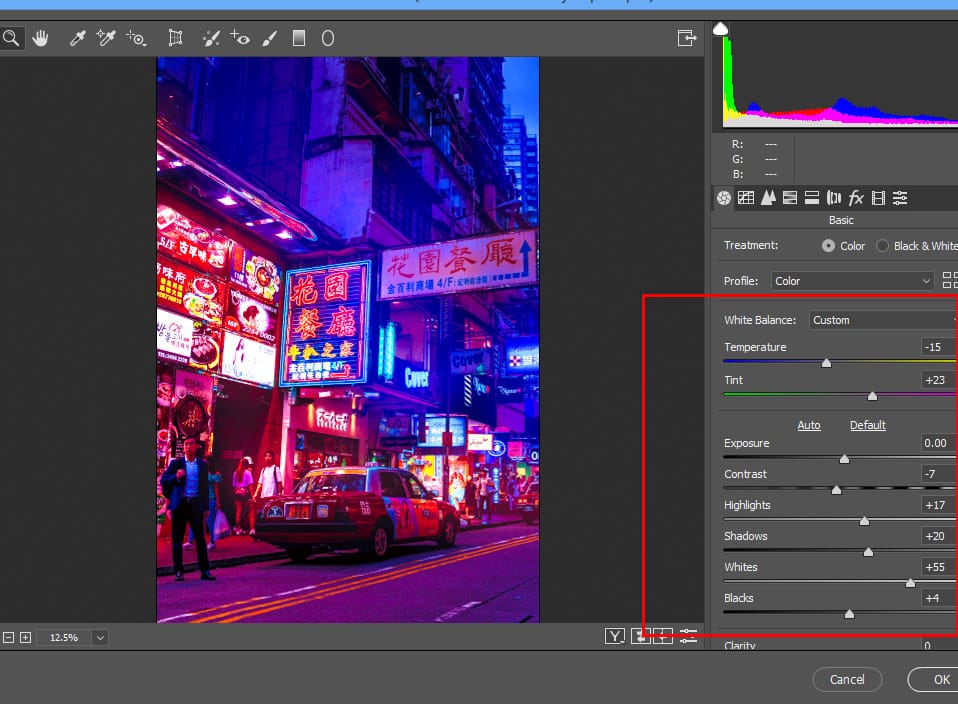
In the Camera Raw filter, decrease the temperature (= adding blues) & increase tint (= adding pinks) and increase the highlights, shadows, blacks, and whites to give a boost of light to the entire image.
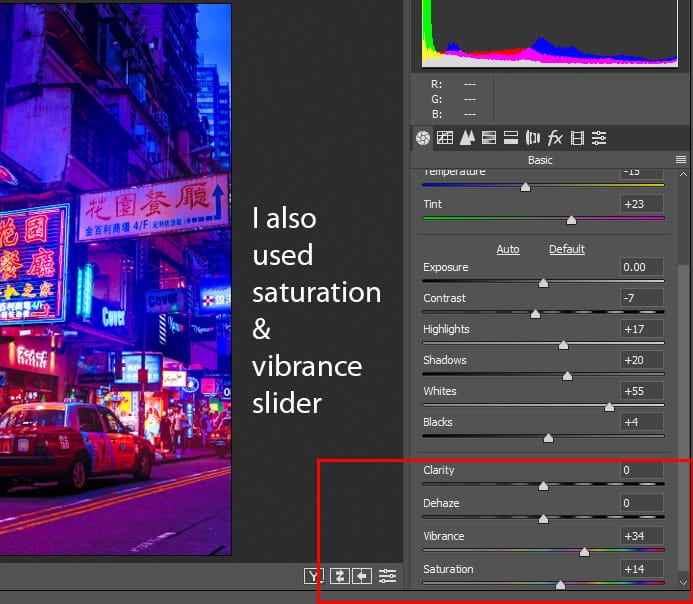
I have also increased Vibrance & Saturation using the settings below:
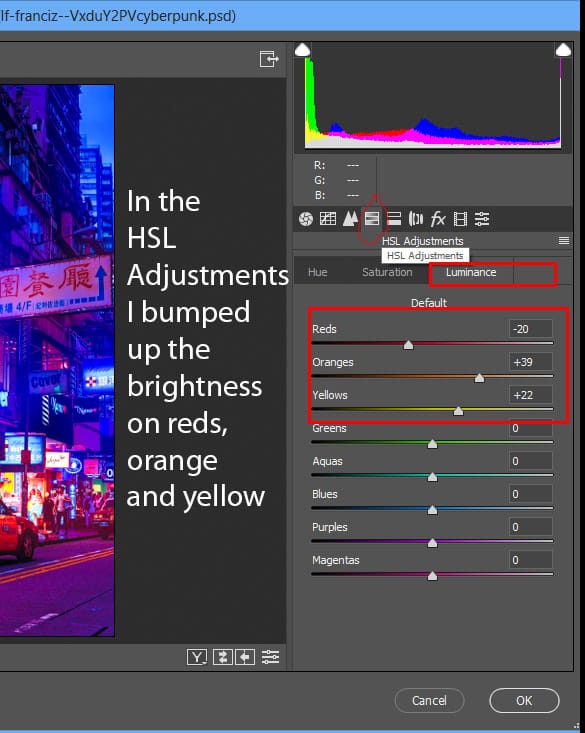
Click on the HSL Adjustments, in the Luminance Tab I increased the lightness on Yellow & Orange, and decreased on Reds.
Luminance slider will increase & decrease the brightness on these tones. You can target color individually here and you can even go for Saturation and Hue by clicking on the Hue & Saturation tab.
You can see the results here:
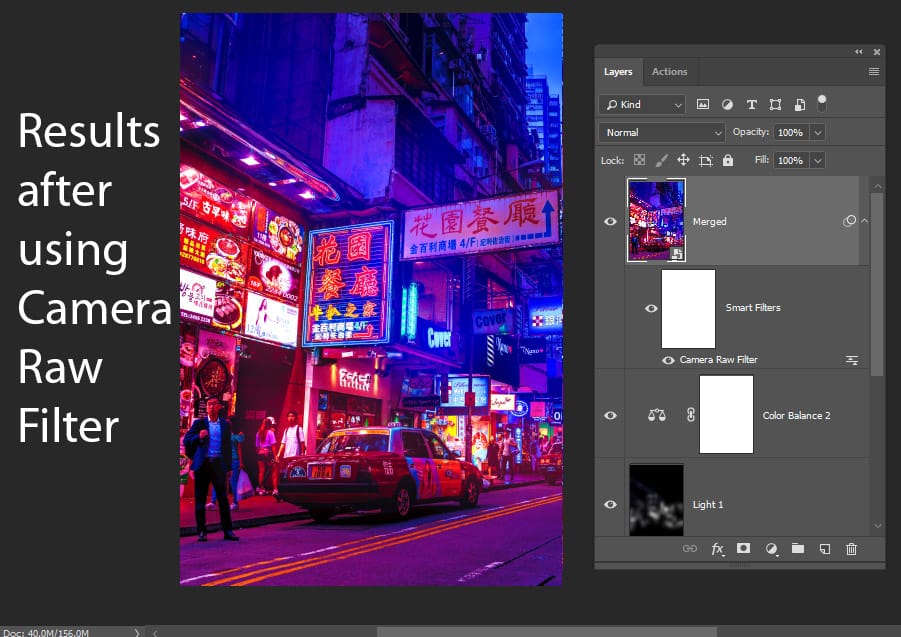
See the results here in the full image:
Step 6 – Add Glowing Edges Filter
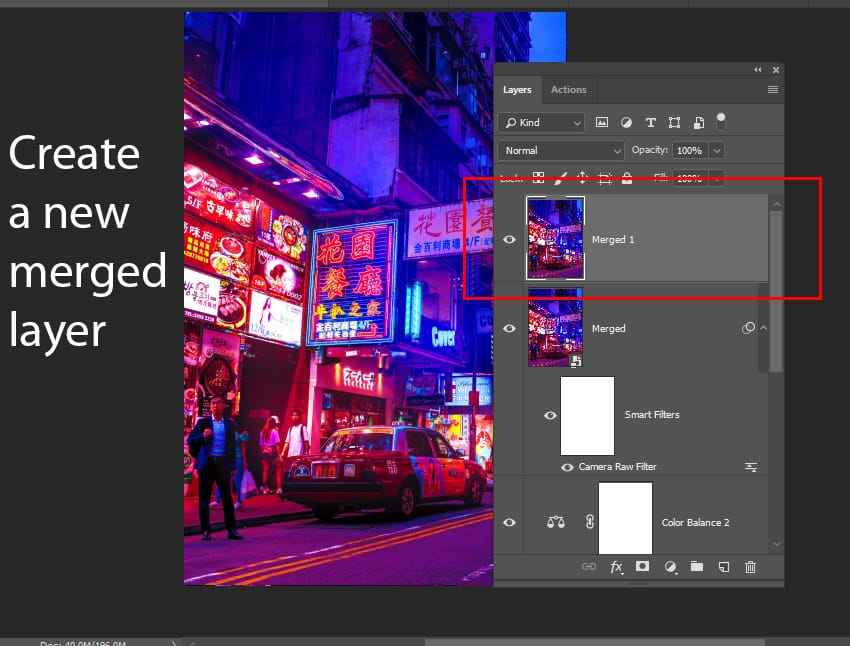
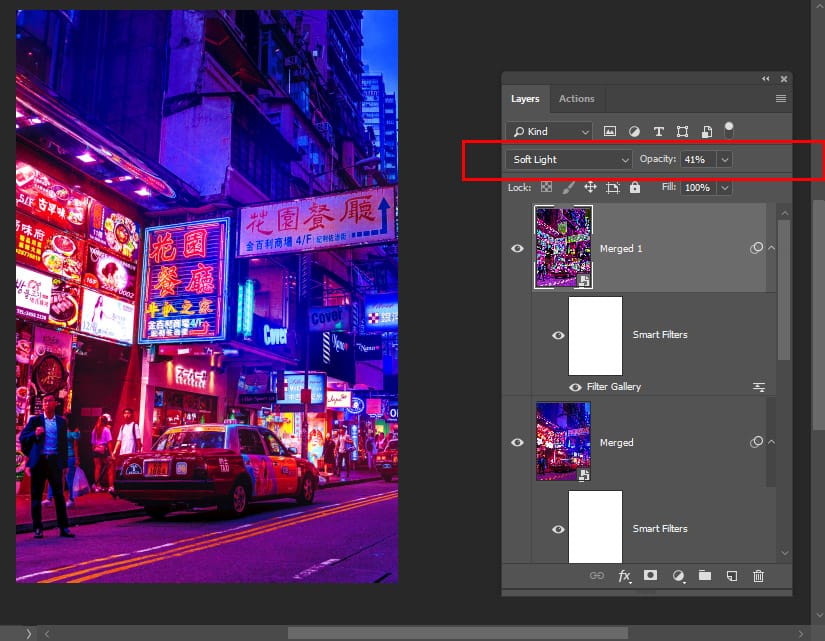
In this step, we’ll glow the edges of the images using Glowing Edges Filter and create a new merged layer by pressing CTRL + ALT + SHIFT + E and name it “Merged 1”.
Go to Filter > Filter Gallery > Glowing Edges and enter the following settings:
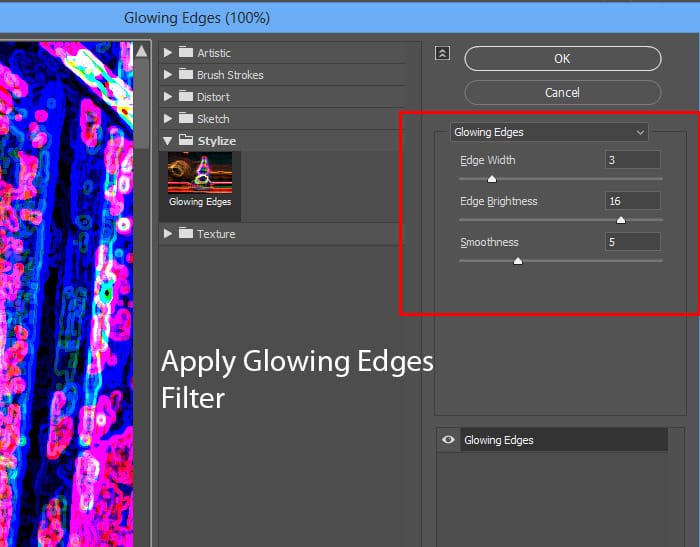
Once you applied the filter, changed the blending mode of the layer to Soft Light and reduce the opacity to 41%. This will filter will add more brightness and colorful glowing edges to the image.
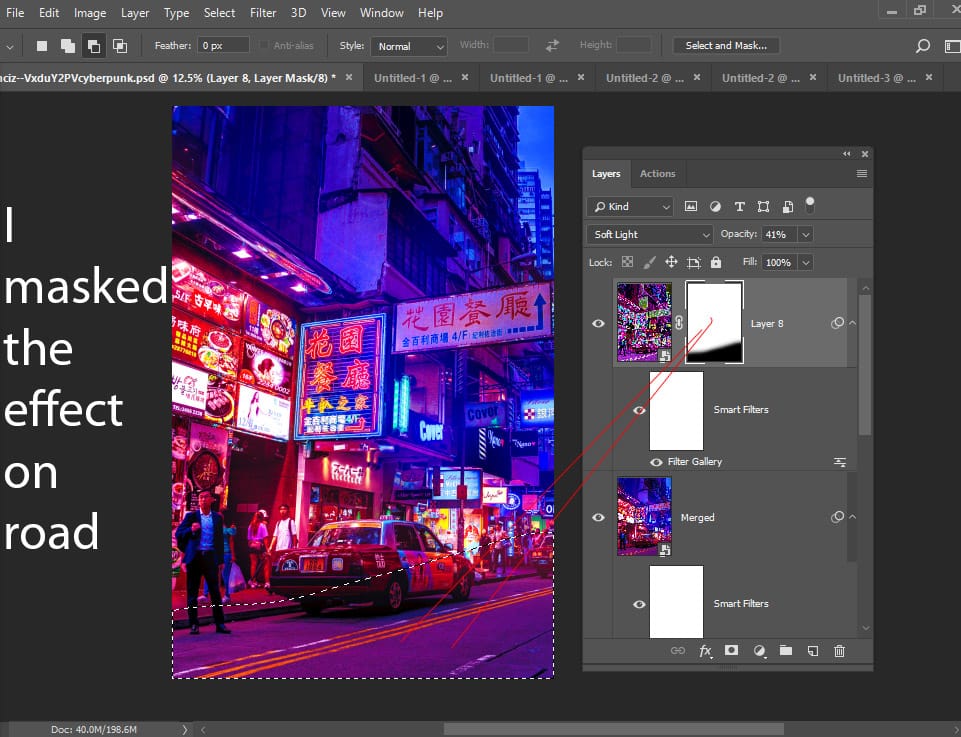
Also, you can add a layer mask to the image by going to Layer > Add Layer Mask > Reveal All & using a soft round black paint on those areas where you don’t want this effect to be visible such as I did on the road.
Step 7 – Slight Punch of Brightness
Finally, I used a Levels Adjustment Layer to give a slight punch of brightness to overall images.
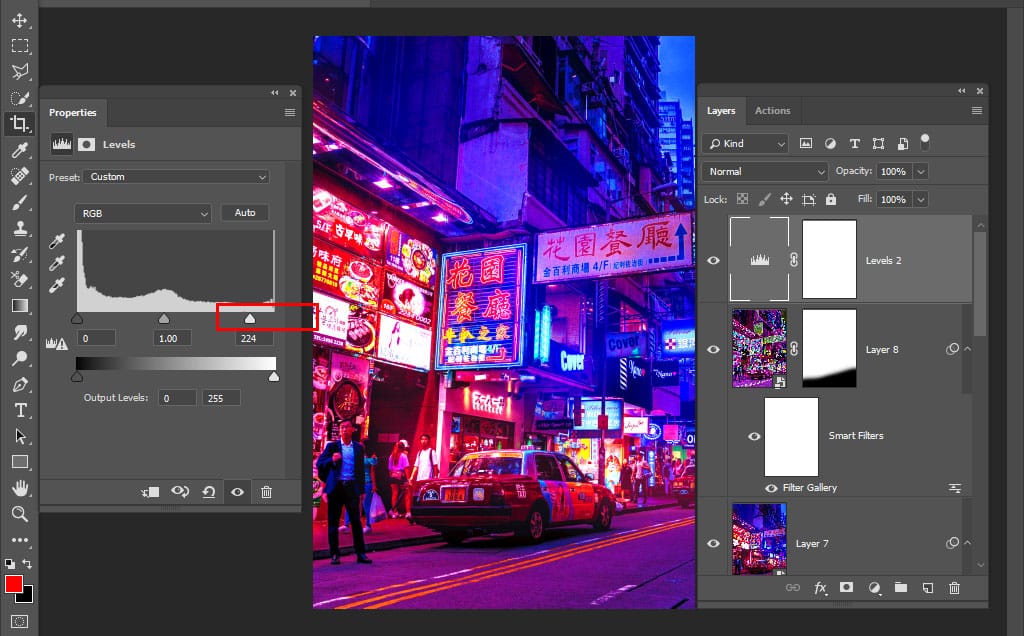
Final Results: