ADVERTISING
Drag and Drop Image Assets in iClone.
We continuing saving all the original elements of our Photoshop project by turning them into individual PNG files for further editing in iClone.

Now we will open iClone since it is here where we will align all our images in real 3D Space. iClone is an easy-to-use 3D animation tool that allows us to quickly drag images, and props, with fast drag & drop mechanics.
To start, we first drag all our Photoshopped images (PNG files) into iClone with the right mouse button. Inside you will then be prompted with a menu, asking what kind of object you want the asset to be converted to.
Select the ‘Plane’ option.

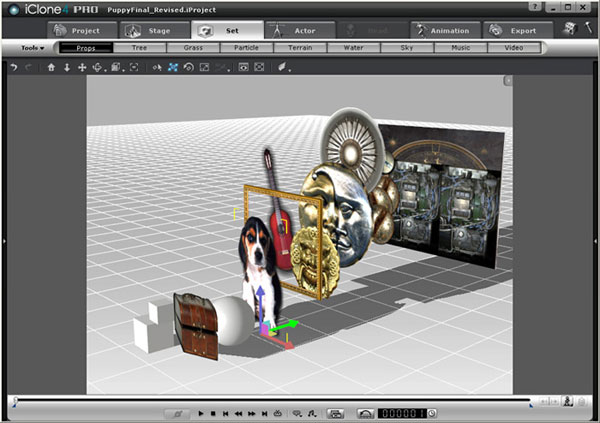
The files will then turn into image planes inside the iClone working area. The alpha channel of each PNG image file will automatically mask the outline of the image.

Repeat the above step until all your items are loaded into iClone’s 3D environment.

Inside iClone you may easily use, and animate ready-made 3D objects (props) and characters (avatars) instead of going through several complicated steps in Photoshop. Remember, that our goal here is to create high-quality 3D images in half the time. We may either drag images from any previous Photoshop projects or use any of the free props inside the iClone content library.

Map each Layer into its own Z-depth.
Once all our assets (image planes and props) are loaded into iClone, then we proceed to adjust the position of each. For this, you may use the move tool to correctly relocate each object into the layer position you have in mind.
Select the ‘Move’ tool. (Press ‘W’ Key)

Move the image planes and the 3D props around, and order them into the layers you need. If you do this inside Photoshop the distance between each layer is actually 0 (zero), but inside iClone you actually have a Z-depth allocated to each object. This provides the great benefit of increasing and directly controlling the 3D sensation inside a 3D Stereo scene.

Rotate the camera view with the Pan Tool (Press ‘X’ Key) in order to check the Z-depth of all the objects in the scene. This method will allow you to have full control over all positioning and depth.

Now you need to turn on the Movement Gizmo in order to bring up the X, Y and Z axis controls for the selected item. To activate the movement gizmo, just press CTRL + Q. (Make sure you first select the item and also have the Pan tool activated) Then drag the green arrow (Z-Axis) of the gizmo to change the Z-depth of each selected item. (Note: Red arrow is X-axis and Blue arrow is Y-axis)