This tutorial will show you how to create a beautiful and simple fractal image based on a flower. This is actually impossible with Photoshop’s standard plugins, so we are going to use the stunning Fractal Explorer free filter that is run using the Pixel Bender plugin.
Pixel bender is a free plugin released by Adobe that lets you run filters created using the Pixel Bender programming language. To follow this tutorial you will have to download and install both Pixel Bender and Fractal Explorer. Pixel Bender can only be installed on Photoshop CS4 and CS5. If you have older Photoshop versions, then you won’t be able to install Pixel Bender.
Download CS4 or CS5 versions of Pixel Bender Plugin (Scroll down to Archived Downloads to get the Photoshop CS4 version of this plugin). There is no need to download the toolkit for this tutorial, just the Photoshop Plugin. You will have to download the Fractal Explorer Pixel Bender filter too.
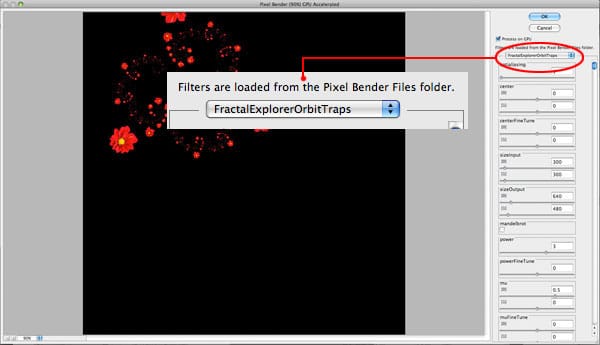
To install both Fractal Explorer and Fractal Explorer Orbit Trap filters, you will have to install Pixel Bender plugin first, and then copy both Fractal Explorer files to the Pixel Bender Files directory located inside the Adobe Photoshop directory. That’s for MacOsx. It should be the same for Windows, just check Pixel Bender docs to be sure.
This tutorial is dead easy. The most difficult task will be to remove the background of an image. After that, it will be only a matter of setting values in the Fractal Explorer Plugin. And regarding those values, there will be no fractal math involved, everything will be done in a visual way.
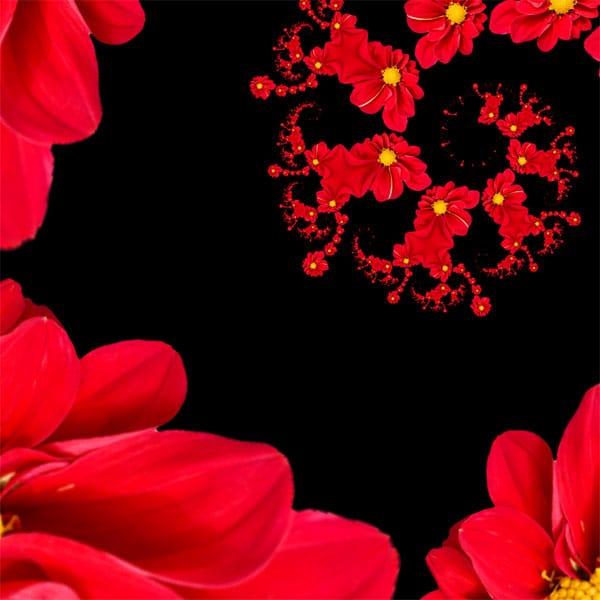
Beautiful Flower Decorated Fractal Illustration
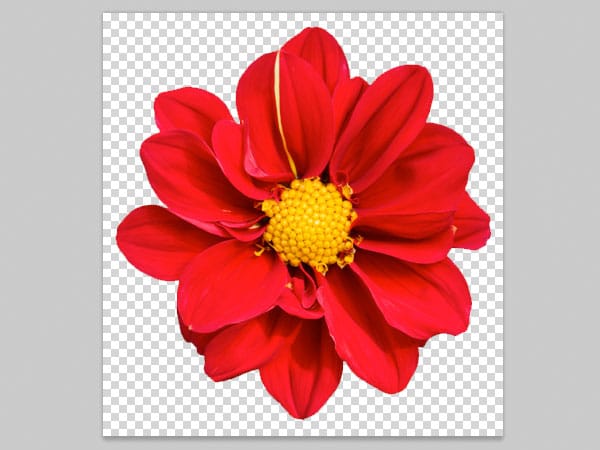
For this tutorial we will be using a flower, but absolutely any object or geometric figure (even a white square!) will be fine. It is just a matter of trying what looks better. Open your image and remove the background so you end up with an object with a transparent background.
You can download this flower from iStockPhoto here.
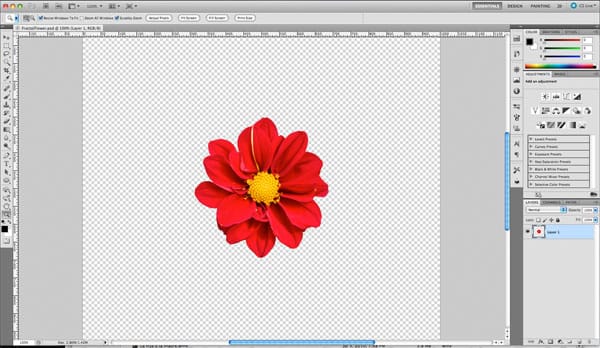
Next, increase the canvas size to 1000×1000 pixels. It doesn’t matter how many layers you have as long as you are working in a transparent layer with the image in the center. The filter will work on that layer only, leaving the rest untouched.
Before going on, I would like to keep things very clear. The settings we are going to use in this tutorial are strictly related with the size of the flower image I’m using as an example. Any slight change in the settings will result in a different image. It is very likely that no matter how much you try, you won’t be able to come up with the same result as mine.
But that’s not a big problem because that is exactly what you have to do: play with the settings. I simply will be just showing which settings to use, the rest is up to your creativity and the image you selected to work with this plugin.
1) Select your working layer, the one with the flower or whatever object you decided to use.
2) Go to the menu FILTERS > PIXEL BENDER > PIXEL BENDER GALLERY…
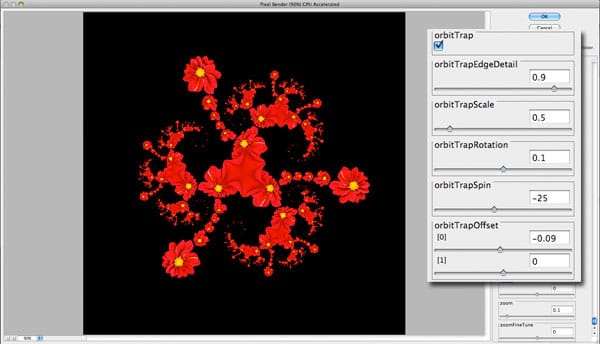
3) Select Fractal Explorer Orbit Trap from the filters pull down menu. With this filter’s default settings, you will see something like the image below.
Let’s start with the basics. Before starting to work on the fractals, lets set the object size and the canvas size. In this case, the flower dimensions are 385×400 pixels. You can set up whatever size you want. I decided to set the exact size of the flower, but you can set up any size you want. It is all about experimenting with different sizes.
Next, set up the size of the output image. In this case is 1000×1000 pixels which is exactly the size of our canvas. You can use different sizes, but there is no much to experiment there.

Now it’s time to do some magic. Let’s get into the Orbit Trap settings. These are the settings that will define the overall look of your image. Concentrate on this part and try different values. In the image below you will see the values I used for this image. Enter those values, but don’t press OK yet. You don’t have to press OK until we are done, at the end of the tutorial.
In the previous step you came up with a nice fractal design, now let’s fine tune up the image.
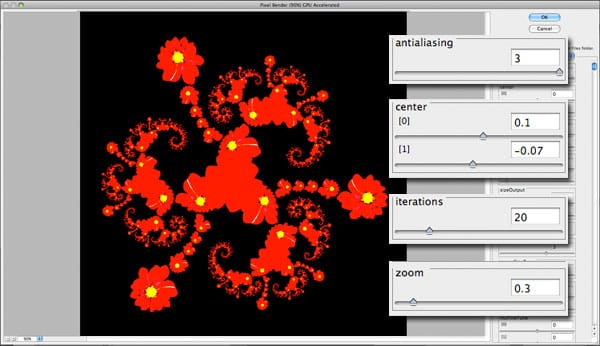
1) Antialiasing: This is the absolute last setting you have to work with before pressing OK. That is because when you set it higher than one, it will make everything very slow. This setting will remove all pixelated edges resulting in a smoother image. A value of 3 will return a very smooth image. Maybe you can try with values 1 and 2 to see how some tiny highlights will show up in the smaller shapes.
2) Center: These two values will center the image. Use them along with the Zoom setting to navigate through the fractal. No manual panning and zooming, sorry.
3) Iterations: The real star of this fine tuning stage. Although it is quite difficult to explain what it is, you can say that this setting gives more flair and depth to the fractal.
4) Zoom: Use this setting to zoom into the fractal.
In this case we are going to set 20 iterations to make the fractal more complex and beautiful at the same time. Then, we are going to zoom the fractal a little bit, center it inside the canvas and finally add an antialiasing value of 3.
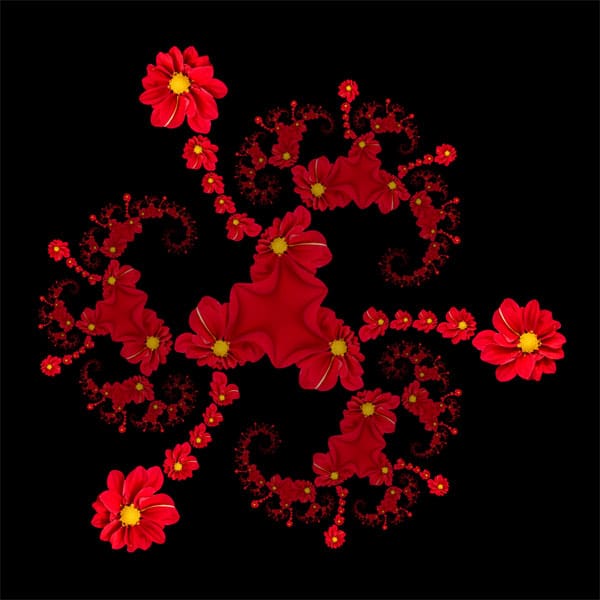
Now click OK and the filter will render the image very fast (at least in my iMac).
Click on the image to see it in full size

Two Variations of the final image
Fractal Explorer offers a lot of tweaking possibilities. So many of them that you can spend a lot of time coming up with different variations of the fractal. Anyway, there are a couple I would like to highlight.
In the following image, I simply set the Iteration Color Blend to 1. This will blend the fractal to the background color according to the iteration step. The first iteration (the bigger flowers) are not blending with the background. The following iterations start to blend gradually until the last iteration which becomes 100% transparent. This gives some kind of 3D illusion of depth. As if the fractal is sinking in some kind of abyss.
Another interesting tweak is to dive into the fractal using the Zoom and Center options. This is a bit cumbersome because there is no manual zoom and panning, but with a little effort you can come up with different close ups of the same fractal. There is no problem with the resolution of the tiniest parts. As you are zooming through the image, the fractal is recalculated.
On the other side, there IS an issue with the bigger parts. The closest you are to the base object (the flower in this case) the jaggier the edges look. You can correct this in two steps. First, set the Orbit Trap Edge Detail close to zero. For this image I set it up to 0.2 which is the minimum you can set. This will ease the edges a little bit. After that, the second step would be retouching the image in Photoshop. That’s something I didn’t do with the image below, just for the sake of showing the exact output of the filter.