Bokeh transforms ordinary portraits into dreamy, professional-looking images with beautiful out-of-focus light bubbles. While traditionally created using fast lenses like a 50mm f/1.4, you can achieve the same stunning effect by layering bokeh images in Photoshop using the Screen blend mode.
This technique works by making the dark backgrounds invisible while preserving the bright light circles, allowing you to position multiple bokeh layers and customize their colors to match your creative vision.
Watch the Video
Practical Tips
Master the bokeh effect technique with these essential workflow steps:
- Set bokeh layers to Screen blend mode to eliminate dark backgrounds and show only the light circles
- Use layer masks with hard-edge brushes to cleanly remove unwanted bokeh areas without creating transparency
- Convert layers to Smart Objects before applying Hue/Saturation adjustments to enable non-destructive color changes
- Apply gradient maps with Soft Light blend mode to add complementary color grading that ties the effect together
- Duplicate bokeh layers at different sizes to create depth and match existing light sources in your image
Related Articles and Tutorials
Explore more creative lighting and visual effects techniques to enhance your photo editing skills.
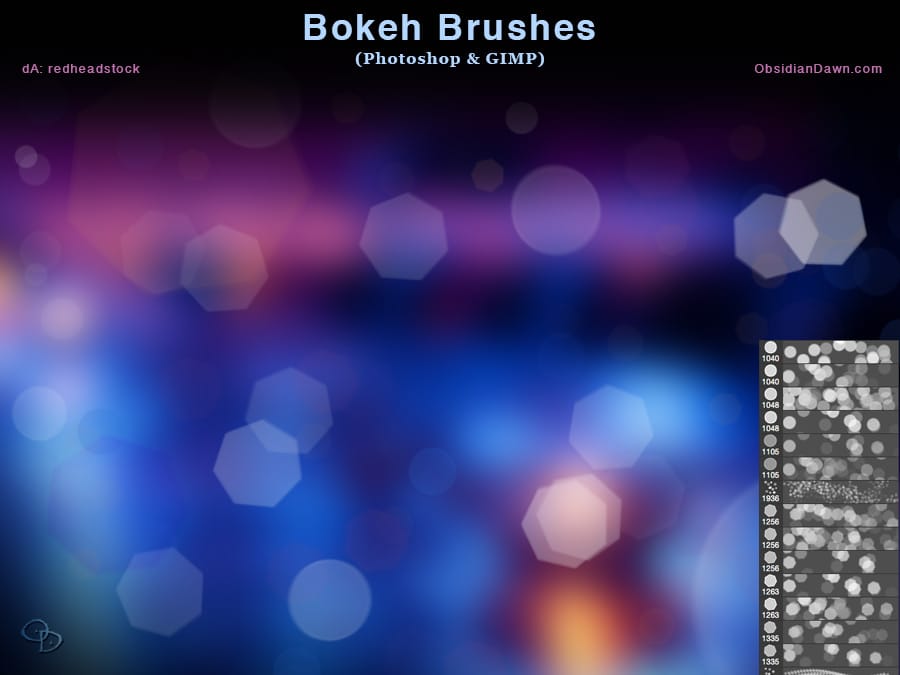
Bokeh Photoshop Brushes
The author has provided a set of Photoshop Brushes that capture the essence of bokeh, a photographic effect where out-of-focus light sources create a glittering, ethereal look. These brushes allow users to recreate this effect and draw attention to the main subject of their photographs.
The collection includes a variety of brushes, from individual shapes like circles and polygons to pre-arranged patterns of scattered bokeh. Some of the shapes are blurred, while others maintain a sharper focus,
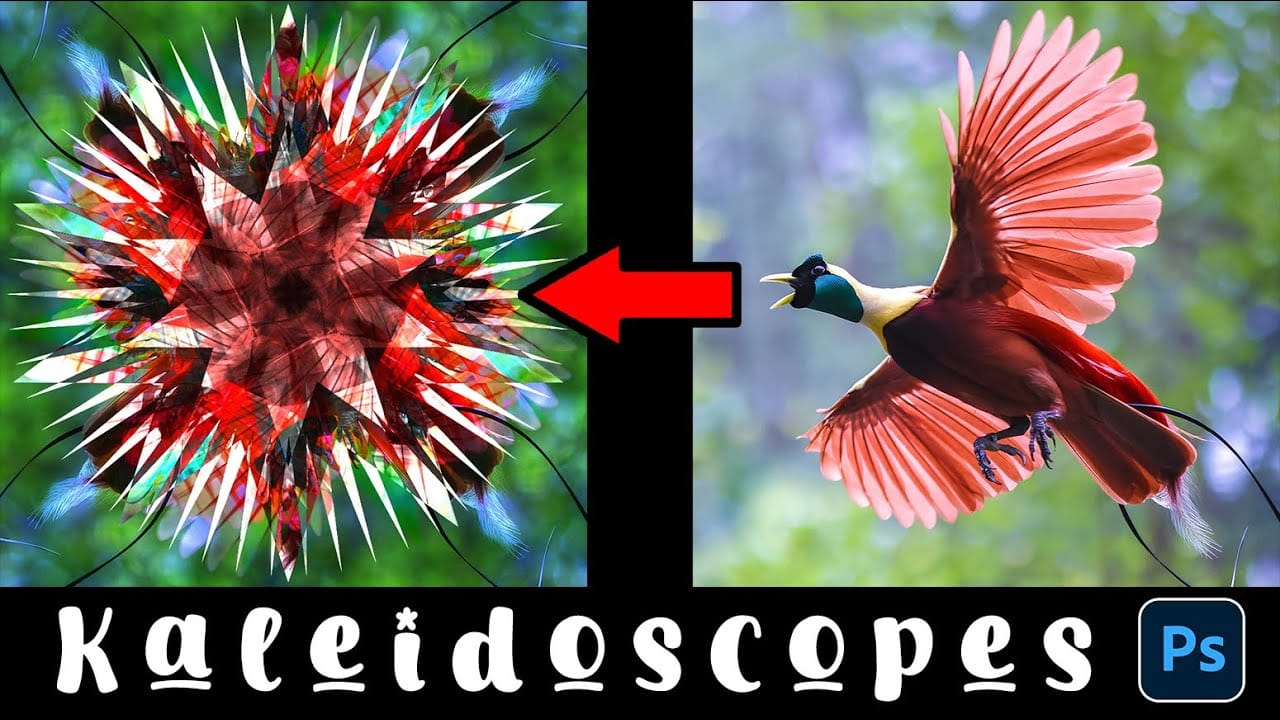
How to Create a Kaleidoscope Effect from Photos in Photoshop
The kaleidoscope effect transforms ordinary photographs into mesmerizing, symmetrical patterns reminiscent of the classic toy. This technique uses smart objects, multiple rotated layers, and custom shapes to create stunning geometric designs that maintain the original photo's essence while adding artistic flair.
By combining layer masks with various blend modes, you can produce unique visual effects that work beautifully for backgrounds, artistic prints, or creative compositions.
Watch the Vi
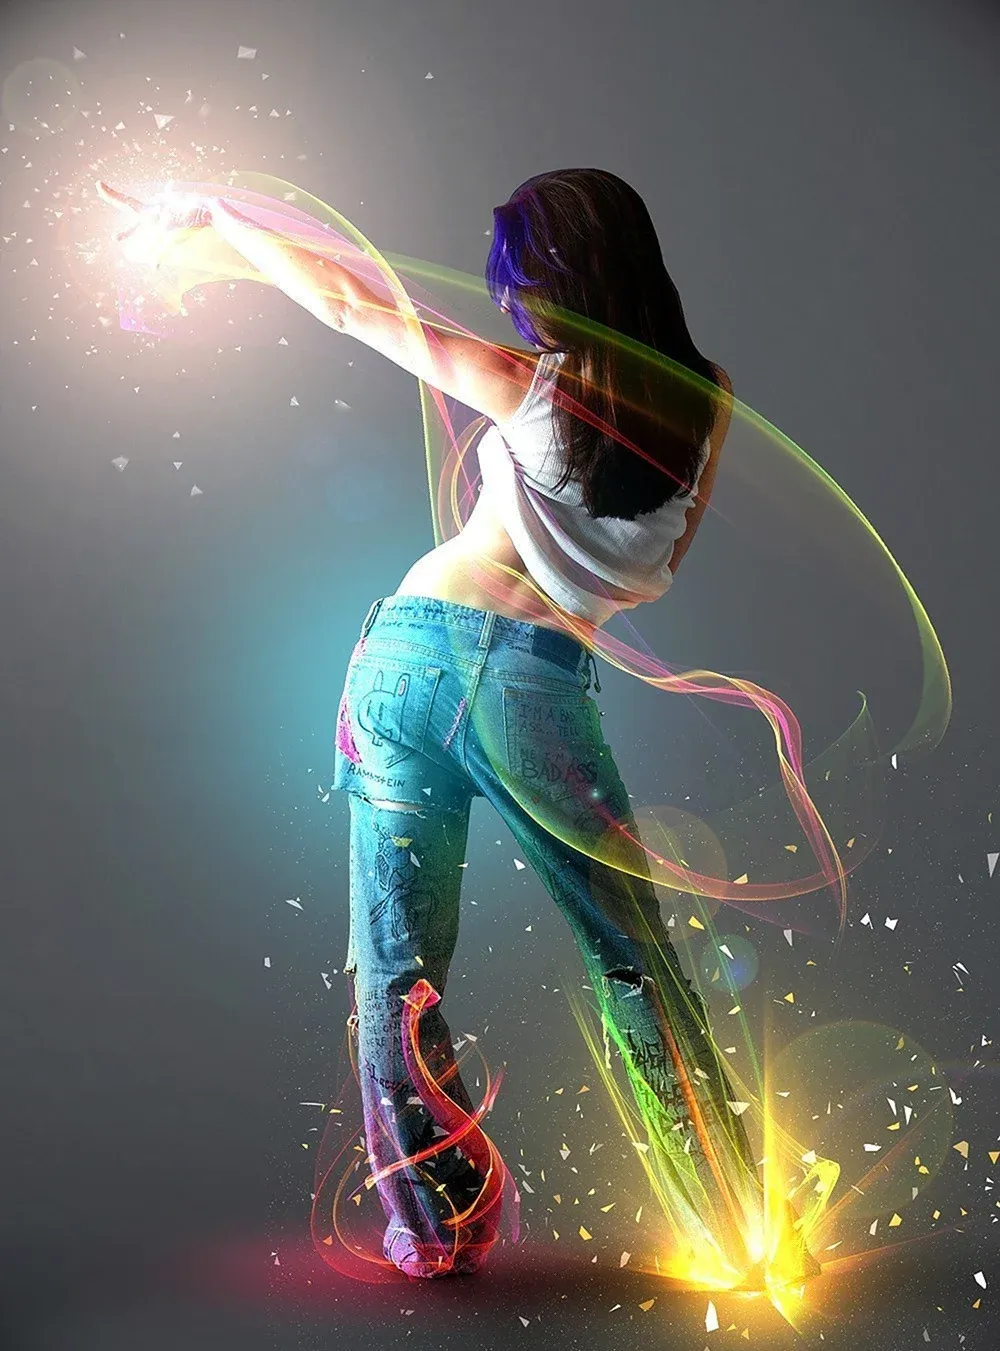
Add Striking Light Effects to Your Photos in Photoshop
In this Photoshop tutorial from PSD Box, using the "Colors in Motion" textures pack and a model image from deviantArt or ISO Stock, you'll create a vibrant digital artwork.
Start by meticulously removing the background with the Pen Tool and placing the model on a new canvas with a gradient backdrop. Enhance the image with non-destructive adjustments for color and contrast, adding realistic shadows for depth. Integrate various light effects from the packs, adjusting blending modes and using tool
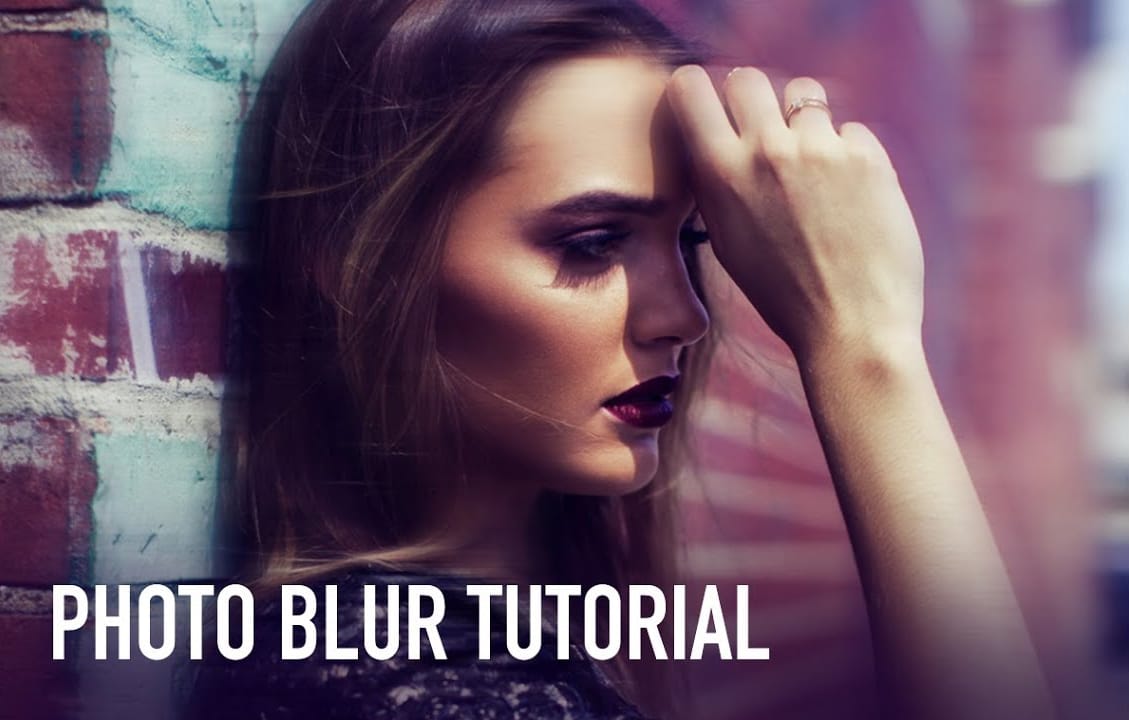
Beautiful Photo Blur Effect in Photoshop
Applying a beautiful blur effect to your photos in Photoshop has never been easier. Jessica Kobeissi's tutorial guides you through the process, showing you how to achieve a stunning, professional-looking result.
With just a few simple steps, you can transform your images and add a touch of elegance. The blur effect creates a soft, dreamy look that draws the viewer's attention to the focal point of your photograph. Whether you're looking to enhance a portrait or add a creative flair to a landsca
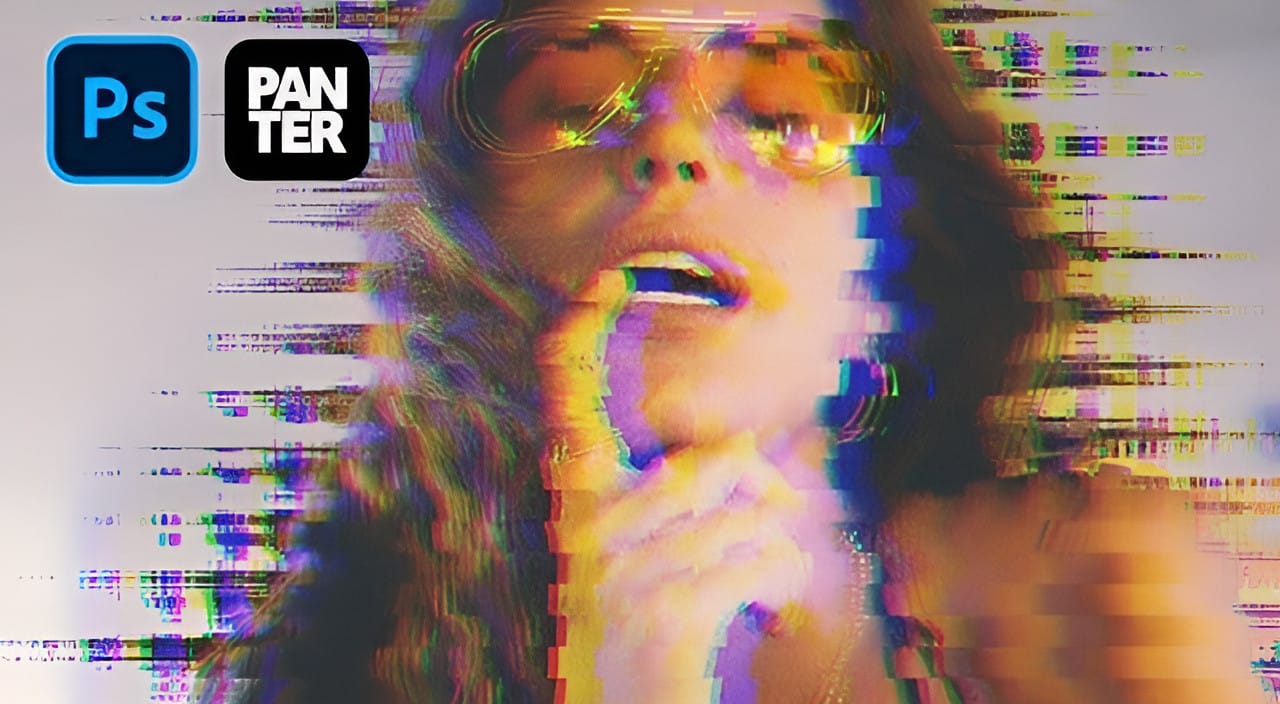
Create a Distorted Wave Glitch Effect in Photoshop
Digital distortion effects transform ordinary portraits into striking visual art by warping reality through deliberate technical manipulation. This technique uses multiple wave filters layered together to create increasingly complex distortions, while selective masking preserves important facial features from becoming completely unrecognizable.
Watch the Video
Practical Tips
Master the wave distortion effect with these essential techniques:
* Convert layers to smart objects before applyin
Create a Knitted Text Effect in Photoshop
This tutorial guides the reader through the process of using Filter Forge to create the knitted argyle effect, which can then be applied to text in Photoshop. This approach allows for a unique and visually appealing result that can be incorporated into various design projects.
This technique can be useful for those looking to enhance their holiday illustrations. Photoshop plugins are powerful tools that can help save time and improve the quality of one's work.
By utilizing the capabilities of

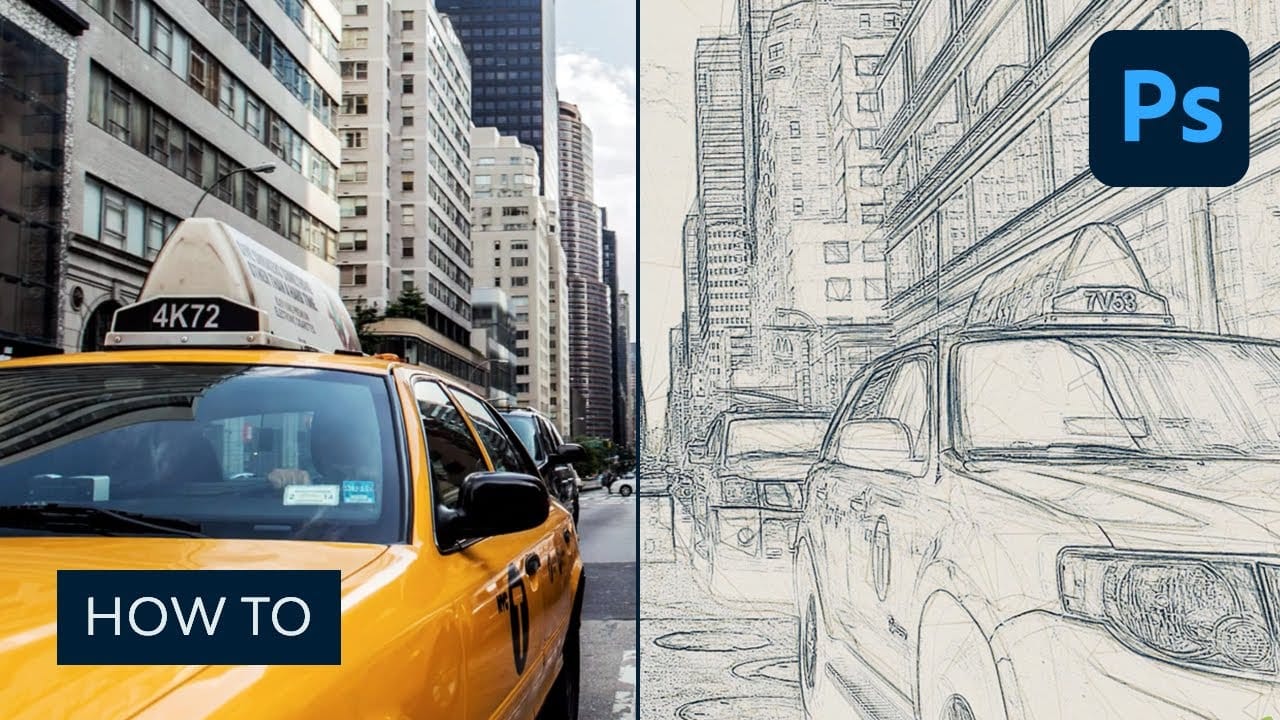
How to Create a Sketch Effect in Adobe Photoshop
Transform any photograph into a professional-looking pencil sketch using layered effects and blending modes. This comprehensive technique combines multiple sketch layers, edge detection, and subtle shading to create realistic hand-drawn artwork from digital photos.
The process builds depth through base sketches at different scales, rough edge effects, and careful opacity adjustments that mimic traditional drawing
Watch tutorial
Create a hole punch effect using knockout in Photoshop
Photoshop offers powerful design techniques that go beyond basic editing. The knockout feature allows designers to create unique visual effects by punching holes through layers without permanently altering your original image.
Watch the Video
Practical Tips for Using Knockout in Photoshop
The knockout feature provides flexible design options for creative layer manipulation.
* Use "shallow" knockout to punch holes through adjacent layers within a group
* Decrease fill opacity to make cont

Download Heart Bokeh Photoshop Brushes
Stephanie Shimerdla, a renowned digital artist, has created a captivating set of Photoshop brushes that capture the essence of heart-shaped bokeh. The collection features an array of brushes designed to produce a random, ethereal bokeh effect. However, Shimerdla has also included a few pre-arranged heart bokeh designs, allowing users to easily incorporate these enchanting elements into their digital artwork.
The brushes are versatile and can be used in a variety of ways, from adding a touch of