Quick and Simple Worn Out Psychedelic Poster in Photoshop

Quick and Simple Worn Out Psychedelic Poster in Photoshop

Adobe Photoshop offers a lot of ways to apply color effects to your images. But maybe the Gradient Map adjustment layer is the most flexible and easy to use of them all. With this tool you can apply one of the many great sample gradients provided by Adobe in the standard Photoshop installation. you can create all kinds of color or artistic effects with just one click. And believe me, many, many of them are really outstanding.

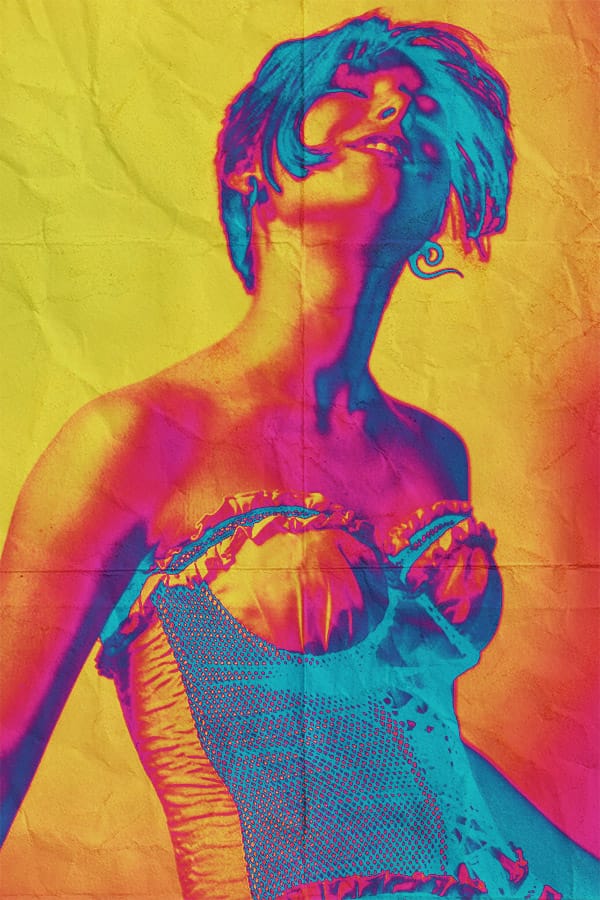
In this tutorial we are going to create a psychedelic poster with just an image, a gradient map and a texture.

👁️
This is an older tutorial, and some external links or data sources mentioned may no longer be accessible. However, the content covers a unique topic and remains valuable despite any broken connections. We’ve kept the post intact for its educational and informative value.

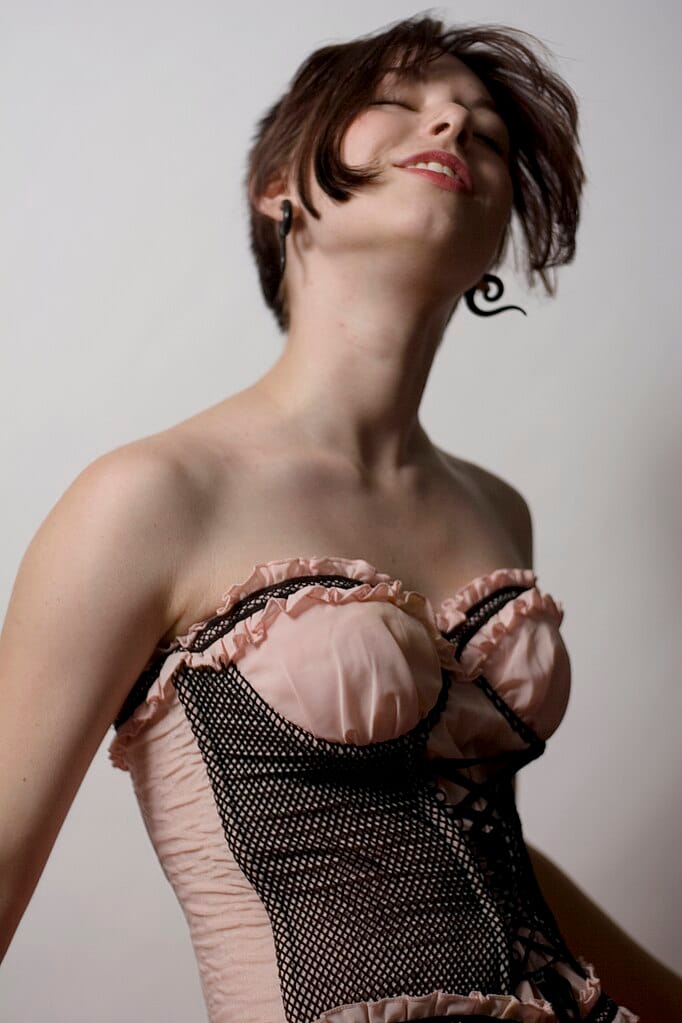
Download the base image. Author: Benjamin Portland. check the usage rights here.
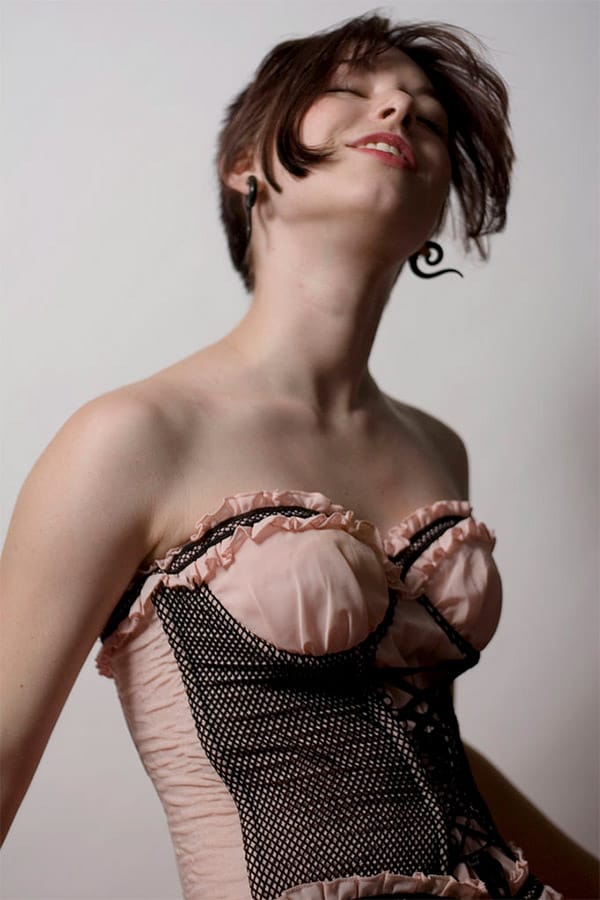
Final Image

Now, go to the layers palette and click on the ADJUSTMENT LAYERS icon. Select GRADIENT MAP from the list.
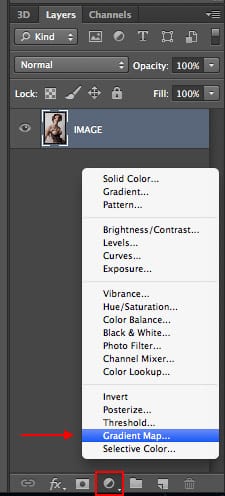
Final Image

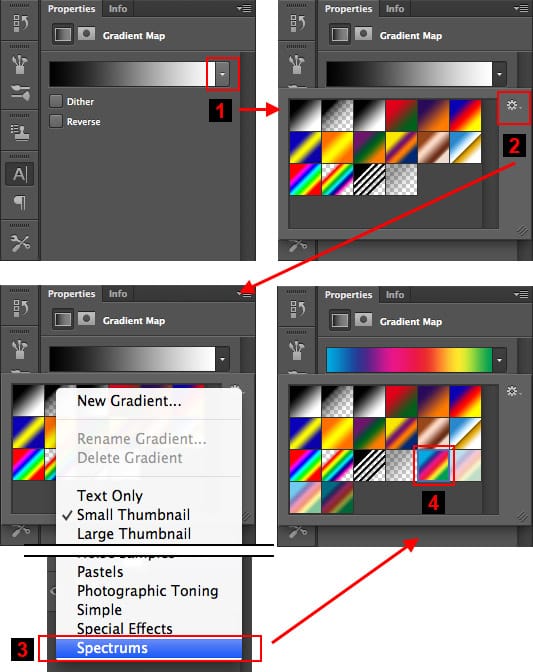
A new adjustment layer will be created using the default gradient map. Now, go to the Adjustment layers palette and 1) Click on the gradients pulldown menu 2) Click on the gradients palette options icon 3) Select Spectrums from the bottom of the pulldown menu. Click on Append when requested. 4) Select the color spectrum gradient marked in the image below.
Final Image

The gradient will be applied to the image giving it a psychedelic style
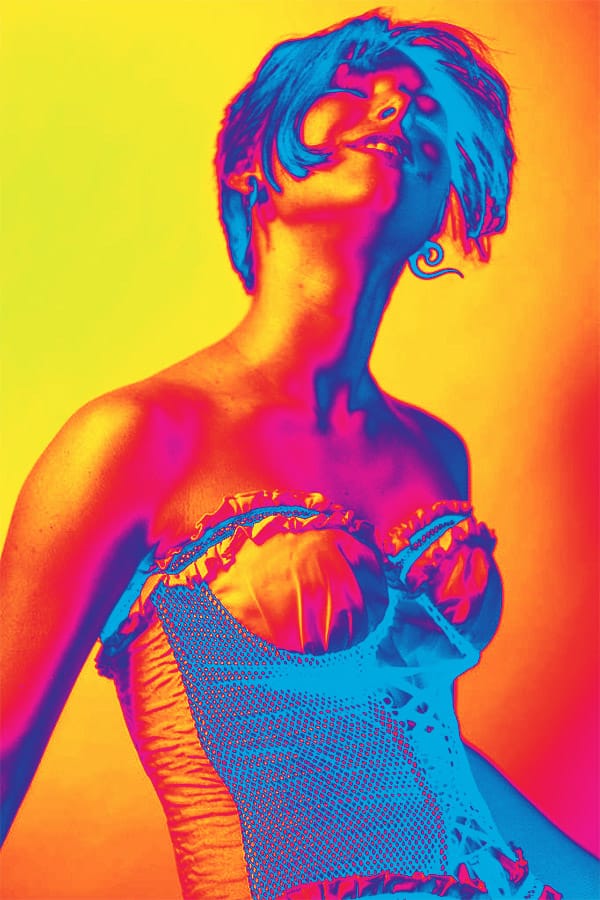
Final Image

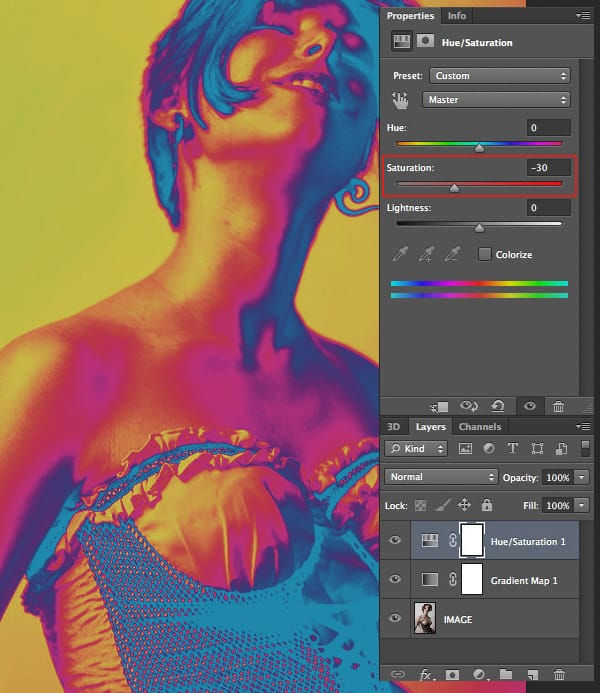
This is all you need to give a psychedelic look to your image. Let’s now wear it out a bit. Go to the Adjustment Layers icon and choose Hue/Saturation adjustment layer. Then, go to the Hue/Saturation palette and move the Saturation control a bit to the left. -30 is fine. Ugly, isn’t it? Don’t worry. Let’s move on.
Final Image

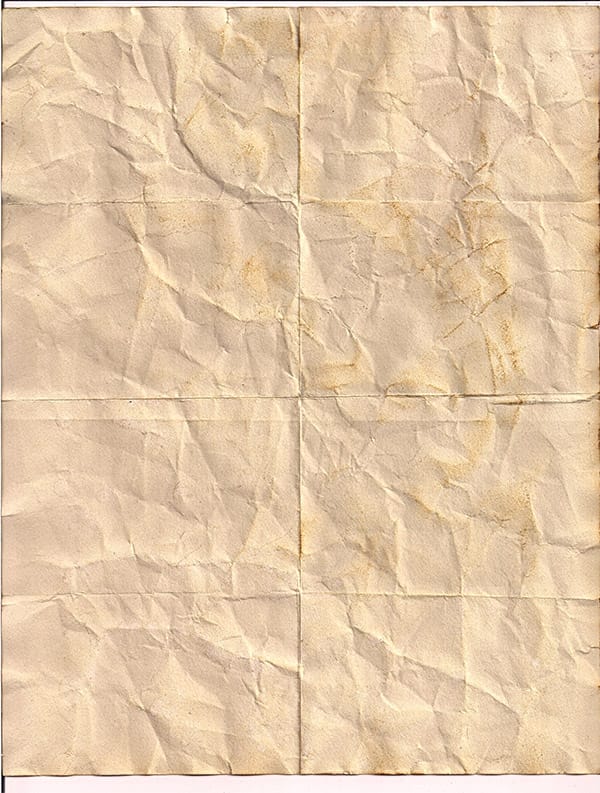
Now let’s add a creased grunge paper texture to the image. Download this paper texture by Spiketheswede from Deviant Art. Read the usage rights before using it in any project.
Final Image

Open the image you just downloaded. Do not paste it into the project file yet. Keep it in a separate file.

You will notice that it is a bit large (1700 x 2246px). So, let’s resize it to 1000 x 1321px using IMAGE > IMAGE SIZE… menu command.

Now that it has been resized, copy the image and paste it into our project. Move the texture until the creases are somewhat symmetrical.

Then set the layer blending mode to Overlay and the opacity to 50%.
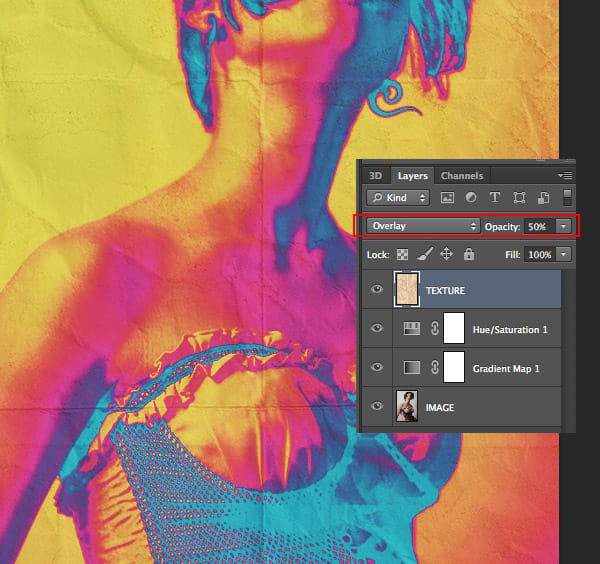
Final Image

Since the texture was a bit light, the colors lost visual impact. Let’s add the final touch creating a new LEVELS adjustment layer right above the texture. Set the black point to something like 25. This will give a better contrast to the image.
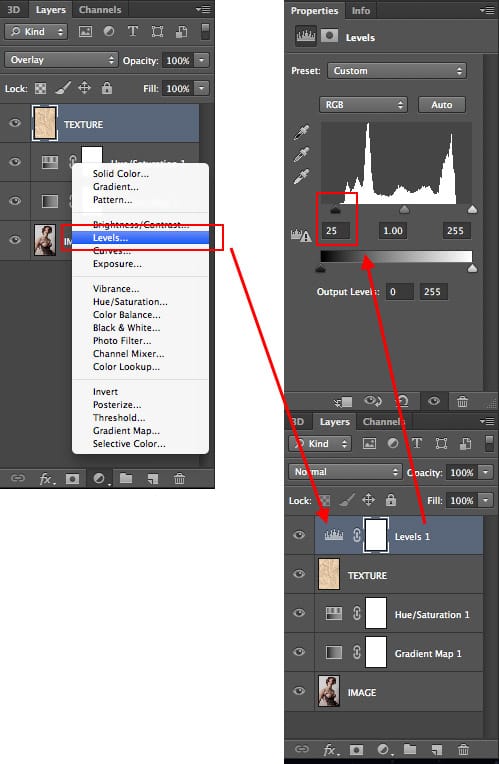
Final Image

This is the final result:

Final Image

The main color effect was based only in the gradient map layer. The rest of the layers were used to fine tune the result. Since we used Adjustment Layers you can keep on tweaking the image to get different effects.

Get tutorials & freebies delivered to you.

Subscribe to the Photoshop Roadmap newsletter, a weekly roundup of new tutorials, insights and quality downloads, trusted by 6500+ readers.

You might also like

9 Photoshop Tools That Still Outperform AI for Precision and Control

AI generates images from descriptions, but it cannot hand you the brush. When a project demands exact colors, editable text, precise retouching, or seamless mockups, Photoshop's native tools remain the more reliable choice — not because AI is weak, but because these workflows require control that generative tools simply...

How to Create a Vintage Film Look in Photoshop Using Adjustment Layers

Aging a photo convincingly takes more than a preset — it requires control over highlights, color channels, and grain working together. This walkthrough covers a fully manual, non-destructive workflow for building a vintage film effect in Photoshop, using Color Range selections, Smart Filters, a Grain adjustment layer, and per-channel...

How to Use the Object Selection Tool in Photoshop for Faster Edits

The Object Selection tool lets you isolate parts of an image with a simple drag, and it becomes even more useful when paired with adjustment layers and layer masks. These techniques are practical for targeted color edits, texture work, and building selections that cover multiple elements like a flower, stem,...

How to Set Up Bleed and Crop Marks for Print in Photoshop

Sending a print file without proper bleed is one of the most common mistakes in print production. A bleed — typically 1/8 inch of extra canvas on all sides — prevents white slivers from appearing when a printer trims the finished piece. Photoshop's Canvas Size tool and AI-powered...

How to Use Camera Raw's Feathered Sky Mask to Create a Natural Glow Effect

Camera Raw now lets you feather and expand AI-generated masks directly in the masking panel — a feature that makes it possible to create a convincing light bloom effect without any manual brush work. This tutorial covers the full editing process for a dark, underexposed landscape shot, with the feathered...

How to Build a Photo Manipulation in Photoshop: A 4-Step Compositing Workflow

Building a convincing photo manipulation from scratch requires more than creativity — it demands a repeatable process. This breakdown covers the four core steps used to composite multiple images into a single cohesive scene, from rough layout through exposure matching, color balancing, and shadow painting. Watch the Video Practical Tips These...

You’ve successfully subscribed to Photoshop Roadmap
Welcome back! You’ve successfully signed in.
Great! You’ve successfully signed up.
Success! Your email is updated.
Your link has expired
Success! Check your email for magic link to sign-in.