The see-through frame effect creates the illusion that you can look right through a picture frame to the scene behind it. This clever photography trick requires just two photos taken from the same position and some basic Photoshop layer masking.
The technique works by combining one photo of you holding the frame with another shot of the empty background, creating a magical window effect.
Watch the Tutorial
Essential Tips for the See-Through Frame Effect
These key techniques will help you capture the perfect shots and blend them seamlessly in Photoshop.
- Use a tripod and lock your camera position to ensure both photos align perfectly when combined
- Switch to manual focus after setting focus to prevent the camera from refocusing between shots
- Set your camera to manual mode to maintain consistent exposure between the two photographs
- Select a frame with thin borders to make the selection process easier and more precise
- Use the polygonal lasso tool to trace inside the frame edges, clicking slightly inward for clean results
Related Tutorials About Transparency Effects
Explore more techniques for creating transparent and ghostly effects in your photos.
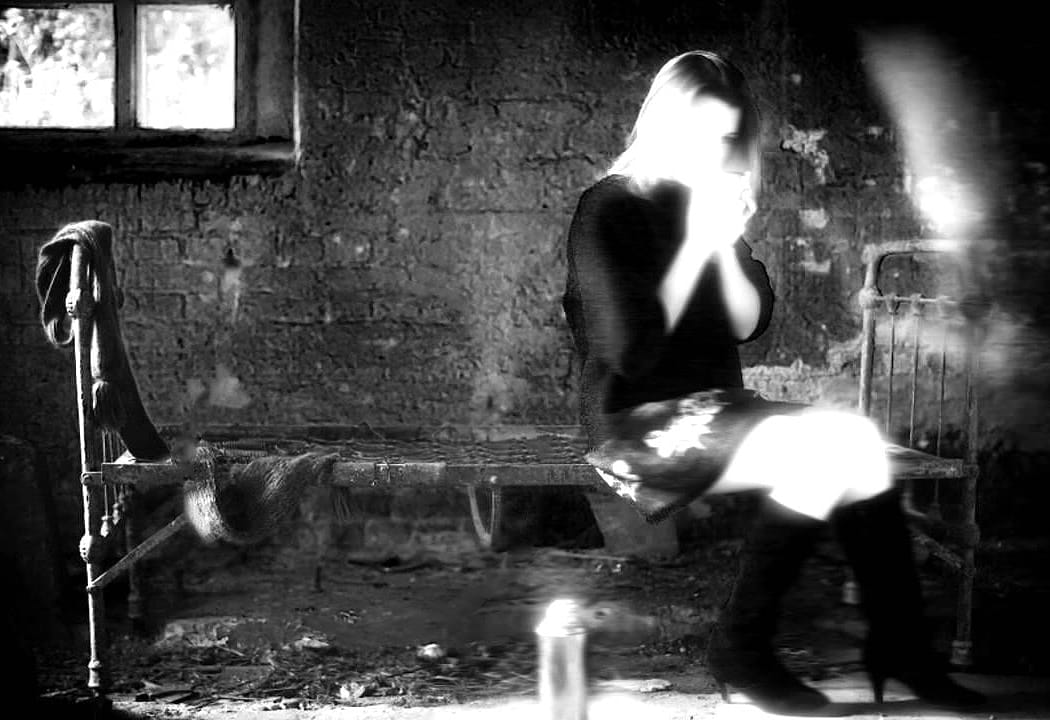
Create a Ghostly Image Effect in Photoshop
In this engaging Photoshop tutorial, you will discover how to create a ghostly effect that transforms a person into a transparent figure, resembling a ghost. This technique is perfect for adding an eerie vibe to your images.
You'll begin by selecting the person in your photo and adjusting the layers to achieve the desired transparency. The step-by-step instructions will guide you through the process of refining the edges and enhancing the overall look to ensure a realistic ghost appearance.
By
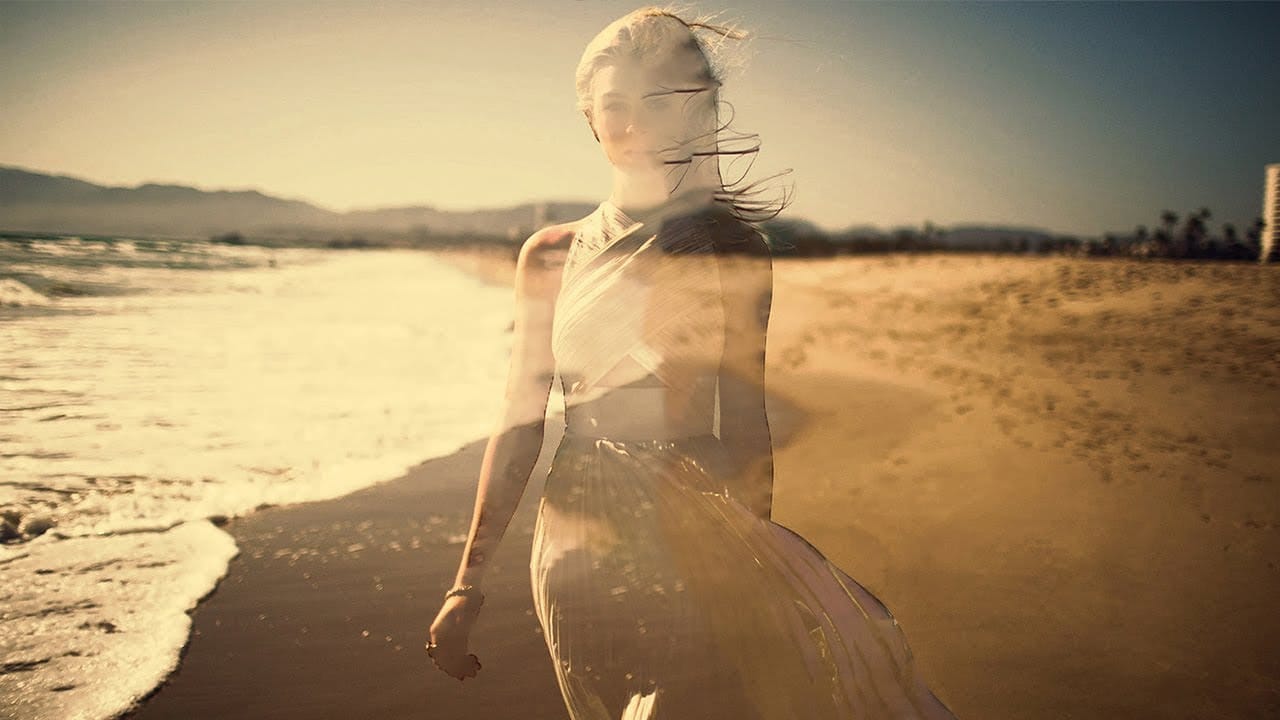
Create See-Through Ghost Photos in Photoshop
This tutorial offers a straightforward guide to creating an eerie see-through ghost photo using just one image. Perfect for beginners, it simplifies the process while ensuring you can achieve impressive results.
You will learn essential techniques that allow you to manipulate your image effectively. The tutorial walks you through each step, ensuring that even those new to Photoshop can follow along with ease.
By the end, you'll be able to transform an ordinary photo into something hauntingly b
Cut Out Glass in Photoshop with Blending Modes
Achieving a realistic cut-out of transparent objects, like glass bottles, can be a significant challenge in Photoshop. Traditional masking often struggles to maintain the natural light, shadow, and reflective qualities inherent in such items, leading to flat or artificial results.
This video tutorial offers an advanced technique to meticulously mask transparent objects into new backgrounds. It leverages the power of blending modes and strategic layer organization to perfectly integrate the obje

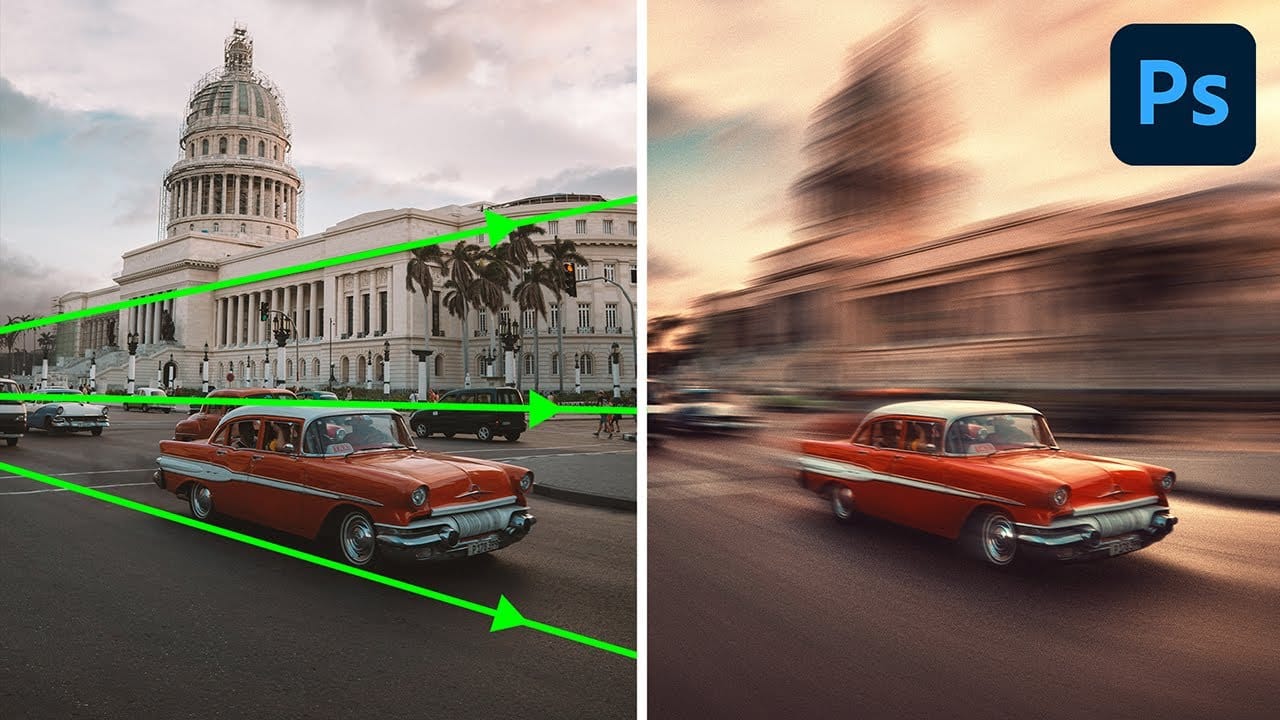
Generate a Perspective Motion effect with Photoshop
In this detailed tutorial, PiXimperfect demonstrates how to create a dynamic perspective motion effect in Photoshop. The lesson focuses on adding motion blur that aligns with the perspective of an object, making it appear as if it's moving rapidly through space. Using multiple paths to capture the perspective, you'll learn how to apply blur effects along these lines to simulate realistic motion.
The tutorial covers advanced techniques with Path Blur to not only create motion but also enhance th