Digital charcoal and pastel effects bring authentic artistic texture to your photos with just a few clicks. Topaz Impression offers preset categories dedicated to these classic drawing techniques, from rough hand-drawn charcoal to soft, smudged pastels.
This tutorial demonstrates how to achieve professional results using one-click presets and simple adjustments.
Watch the Tutorial
Essential Tips for Charcoal and Pastel Effects
These techniques help you create more realistic artistic effects and customize presets for different image types.
- Start with the dedicated Charcoal and Pastel preset category for the most realistic base effects
- Use the first three presets in each category for rough, hand-drawn looks with visible stroke marks
- Choose smudged presets for blended effects that mimic finger or paper towel blending techniques
- Adjust the Coverage setting to full right position to eliminate unwanted background texture at image edges
- Increase the Spill slider for softer, more expressive edges that look less perfect and more natural
Related Articles and Tutorials about Digital Art Effects
Explore more creative techniques for adding artistic elements to your photos.
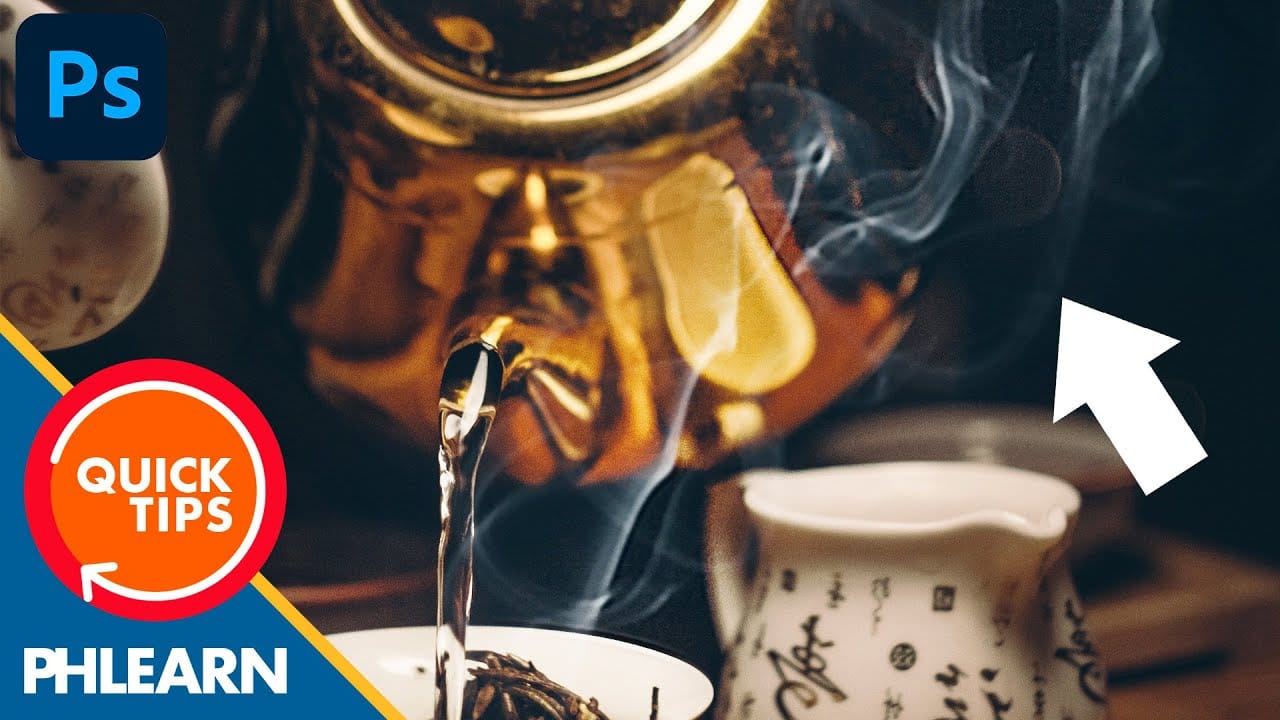
How to Add Steam or Smoke in Photoshop
In this engaging tutorial by Aaron Nace from Phlearn, you'll discover how to introduce realistic steam or smoke effects into your images. This technique is perfect for adding atmospheric elements that can enhance the mood and mystery of any scene. Nace walks you through the process in a few simple steps, ensuring that even beginners can follow along and achieve professional results.
The tutorial covers essential methods for creating and blending steam or smoke effects seamlessly into your photo
Easy Smoke Dispersion Effect in Photoshop
This Photoshop tutorial from Visual-Pixels will show you how to create the dispersion effect in just five minutes. Begin by isolating the model from the background in your image. Duplicate the model onto a new layer and apply the Liquify filter to distort its shape. Conceal this layer and add a black mask to the top layer. Utilize white smoke brushes to paint over the mask, generating the dispersing smoke effect.
Lastly, employ white brushes on the black layer to unveil the dispersion effect in

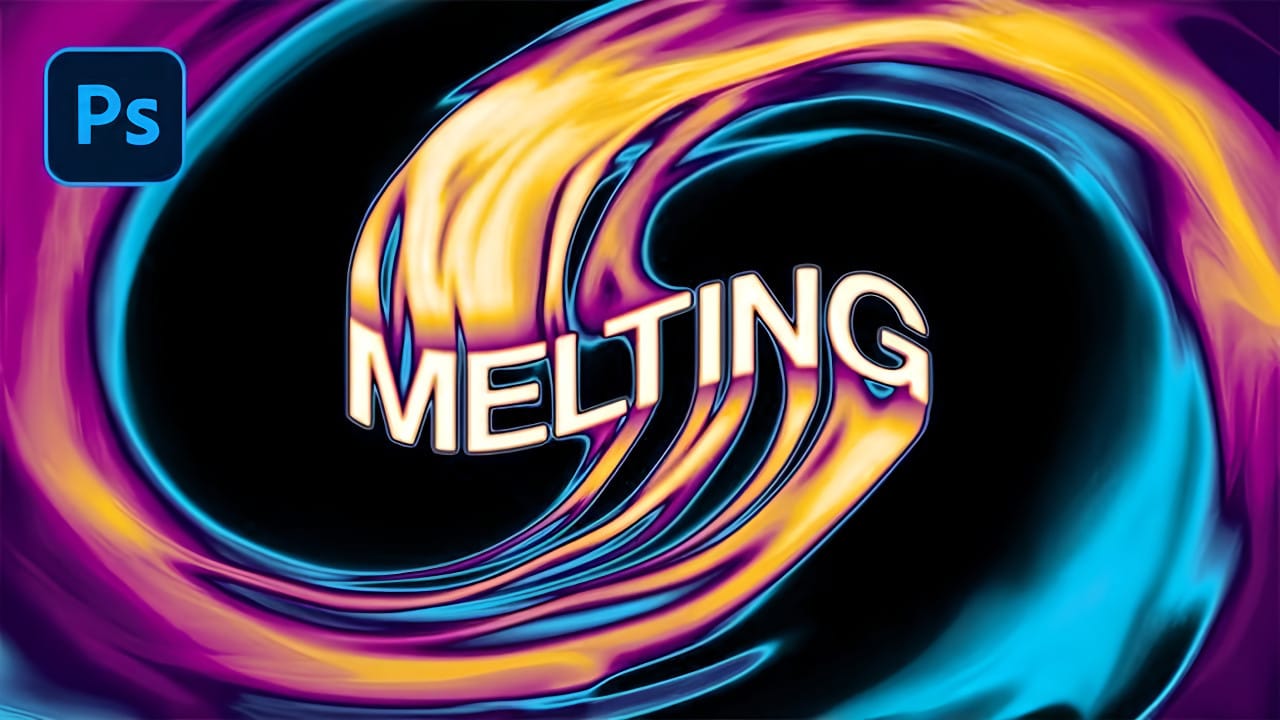
Create a Spinning Melting Fire Text Effect in Photoshop
Fire effects transform ordinary text into dynamic visual statements that command attention. The melting, flowing appearance mimics liquid fire or molten metal, creating depth and movement that static text simply cannot achieve.
This technique combines warping, gradient mapping, and strategic blurring to build layers of flowing color. The smudge tool becomes your primary instrument for sculpting those signature dripping effects that make text appear to melt before your eyes.
Watch the Tutorial
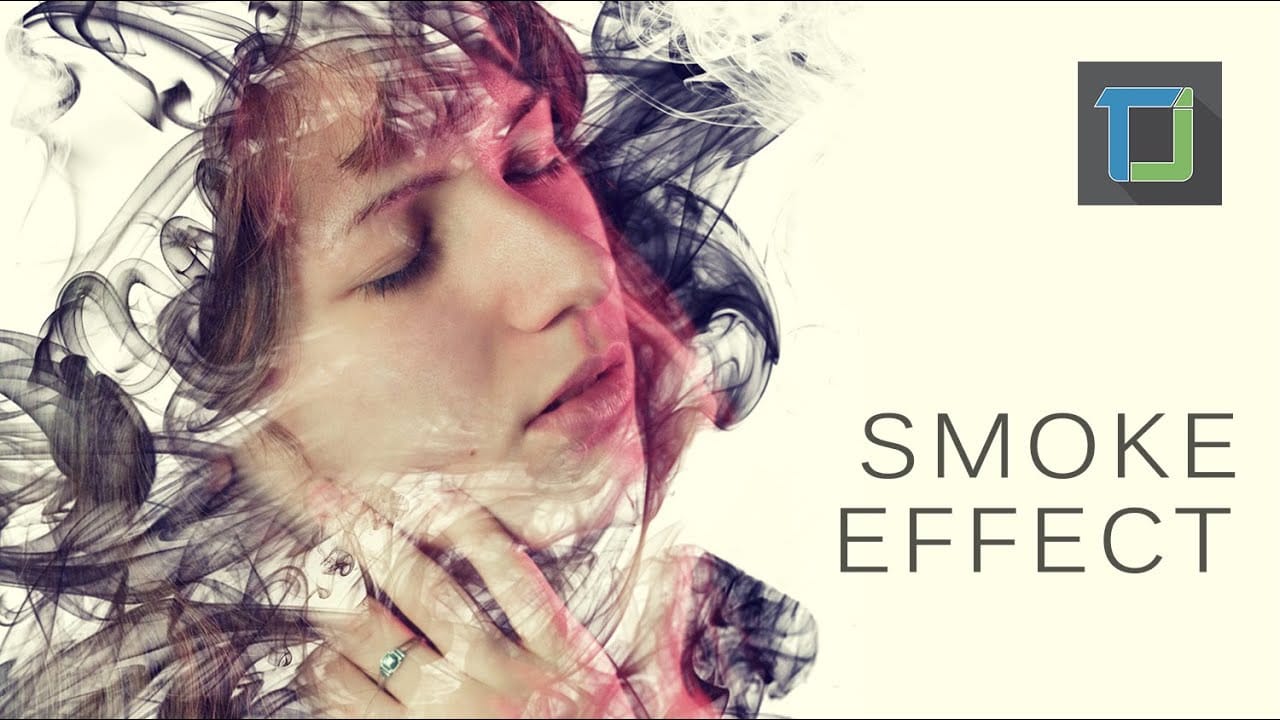
Making a smoke dispersion effect in photoshop
The author provides a straightforward tutorial on creating a smoke dispersion effect in Photoshop. The user is guided through the process of generating a face that appears to be made from smoke and enhancing it with vibrant colors to achieve a more professional-looking result. This tutorial is suitable for beginners, making it accessible to a wide range of Photoshop users.
The author suggests that the tutorial is quite basic, indicating that even novice users will find it helpful. By following