Advanced Color Grading with Apply Image Layer Masks in Photoshop

Advanced Color Grading with Apply Image Layer Masks in Photoshop

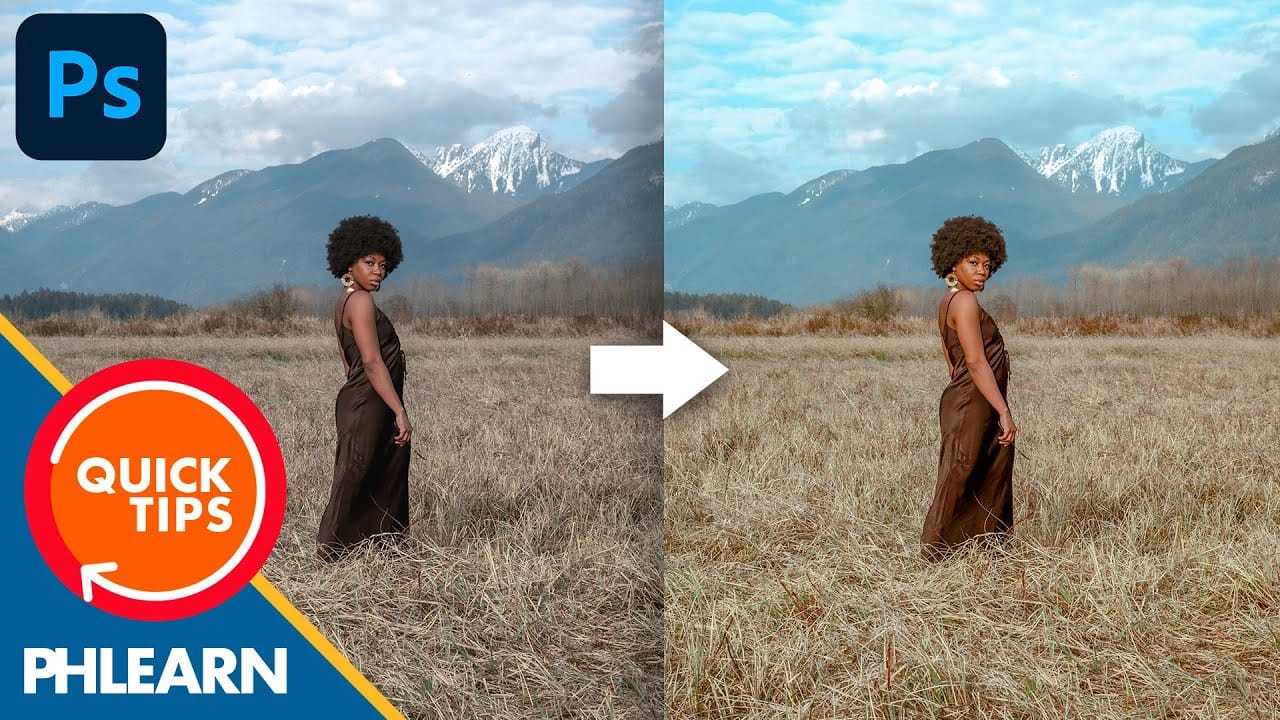
Professional color grading can transform ordinary photos into cinematic masterpieces, but heavy adjustments often create that obvious "filtered" look that screams amateur editing. The difference between natural-looking color enhancement and overdone processing lies in how the adjustments interact with your image's existing tonal structure.

This advanced technique uses layer masks combined with selective color adjustments to create rich, believable color grades that enhance rather than overpower your original image.

Watch the Tutorial

Video by Brendan Williams. Any links or downloads mentioned by the creator are available only on YouTube

Understanding Apply Image for Color Grading Control

The Apply Image function in Photoshop serves as a powerful masking tool that maps your photo's contrast information directly onto adjustment layer masks. This creates a sophisticated system where color adjustments respond differently to shadows, midtones, and highlights throughout your image. Rather than applying uniform color changes across the entire photo, this method respects the existing tonal structure.

Traditional color grading applies adjustments evenly, which often creates unnatural results when pushed to stylized extremes. When you use Apply Image to create contrast-based masks, darker areas of your photo become less affected by the adjustment, while lighter areas receive more intense color treatment. This mimics how light and color naturally interact in photography.

The technique becomes particularly powerful when stacking multiple adjustment layers, each with its own Apply Image mask. This layered approach allows for complex color relationships that maintain believability even with dramatic stylization. The key advantage lies in the ability to push colors much further without crossing into obvious filter territory.

Practical Tips for Apply Image Color Grading

  • Create the mask first: Always apply the Apply Image mask before making color adjustments, as this establishes the tonal foundation for your grading.
  • Duplicate masks efficiently: Hold Alt/Option and drag existing Apply Image masks to new adjustment layers rather than recreating them each time.
  • Stack multiple adjustments: Layer Selective Color and Color Balance adjustments with duplicated masks to build complex color relationships gradually.
  • Balance with contrast adjustments: Follow heavy color grading with curves adjustments to restore natural contrast and prevent flat-looking results.
  • Use dodge and burn to finish: Create separate curves layers for dodging and burning with inverted masks to selectively enhance the color grading in specific areas.

More Tutorials About Color Grading in Photoshop

Explore these additional color grading techniques and creative approaches.

Create a bright and beautiful color grade in Photoshop
In this tutorial, Aaron Nace from Phlearn demonstrates how to enhance your photos with a bright and vibrant color grade using the Camera RAW filter in Photoshop. This technique is particularly effective for model photography and landscape shots, offering a way to elevate the visual appeal of your images with a polished, professional finish. Aaron guides you through the process of applying and adjusting color grades, showing how the Camera RAW filter can be used to fine-tune colors and achieve a
Clever Color transfer trick in Photoshop for astonishing color grade
Add spectacular color to your photographs using an amazing trick discovered by Colin Smith. In this Photoshop 2022 tutorial, Colin reveals a clever hack for color transfer that allows you to achieve professional color grading with ease. This quick tip simplifies the process, making it accessible to every photographer. Whether you're a beginner or an experienced user, you'll love how effortlessly you can enhance your photos with vibrant, stunning colors. Colin demonstrates step-by-step how to us
Black Moody Color Grading in Photoshop
In this comprehensive Photoshop tutorial from WebFlippy, you'll learn how to create a stunning black tone moody color grading effect. This technique is perfect for adding depth and atmosphere to your photos, giving them a dramatic and sophisticated look. The tutorial provides a detailed, step-by-step guide on how to achieve this effect, making it accessible even for those new to Photoshop. You'll also discover how to save your adjustments as a preset, which allows you to quickly apply the same
Create a Professional Color Grade in 90 Seconds in Photoshop
Cinematic color grading transforms ordinary photos into visually compelling narratives, creating mood, directing focus, and enhancing storytelling. This subtle yet powerful technique allows photographers and digital artists to infuse their images with the atmospheric depth and professional finish often seen in film. In this concise tutorial, you'll discover a rapid workflow for achieving a cinematic color grade directly within Photoshop. The method leverages the powerful Camera Raw filter as a

Get tutorials & freebies delivered to you.

Subscribe to the Photoshop Roadmap newsletter, a weekly roundup of new tutorials, insights and quality downloads, trusted by 6500+ readers.

You might also like

How to Use Color Average for Color Toning in Photoshop

Color average creates a unified color tone by analyzing all the colors in your image and calculating their mathematical average. This technique adds depth and cohesion to photos, composites, and AI-generated images by applying a subtle color wash that ties all elements together. The method works particularly well for composites...

How to Remove Complex Background Elements Using AI in Photoshop

Removing complex background elements like fencing or wire mesh has traditionally been one of the most time-consuming tasks in photo editing. New AI-powered tools in Photoshop can now eliminate these distracting elements while preserving fine details in your subject. This tutorial demonstrates two practical workflows: one using the latest Firefly...

How to Use Photoshop's Auto Layer Rename Feature

Messy layer names like "Layer 52 copy 4" and "Untitled 5" clutter your workspace and slow down complex projects. Photoshop's new auto-rename feature uses AI to automatically identify and name layers based on their content, from "Woman in yellow shirt" to "...

New Generative Fill Features in Photoshop Beta: Reference Images and Credit Tracking

Photoshop Beta introduces significant improvements to Generative Fill that address the most requested features from users. The updated interface now displays your generative credit balance and usage, while the new reference image capability lets you add up to eight specific images to guide AI generation with precise visual examples. These...

Essential Photoshop Tools for Beginners: Brush, Crop, and Move Tool Tutorial

Learning Photoshop tools feels overwhelming when you don't know where to start. This tutorial focuses on three essential tools that form the foundation of most Photoshop work: the brush tool for painting and retouching, the crop tool for resizing and straightening images, and the move tool for positioning...

How to Add Custom Textures to Photos in Photoshop

Adding textures to photographs can transform ordinary images into compelling artistic compositions. This technique uses multiple texture layers combined with strategic blending modes and color adjustments to create depth and visual interest. The process involves layering different texture types—color overlays, surface patterns, and lighting effects—then using masking techniques...

You’ve successfully subscribed to Photoshop Roadmap
Welcome back! You’ve successfully signed in.
Great! You’ve successfully signed up.
Success! Your email is updated.
Your link has expired
Success! Check your email for magic link to sign-in.